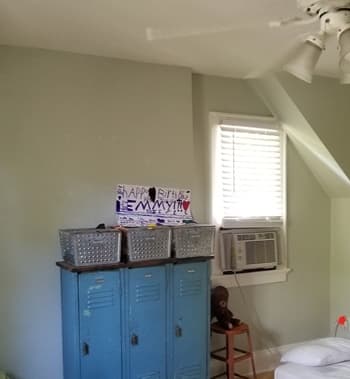
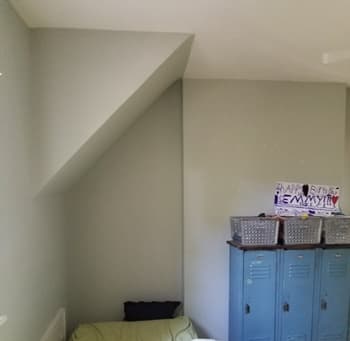
As part of the renovation that we completed on our home we included some mostly comestic updates to my son’s room. This is our version of a “built-in” bunk bedroom. The original plan was to have a custom built in bunk bed placed, but the quote for our design was legitimately the cost of a year’s college tution. Maybe not a year at an Ivy League, but for sure a solid State school with room and board. It was one of those things that was so shocking you have no choice but to find it funny and laugh. I actually prefer it that way instead of it being slightly out of reach, thats when I get frustrated. So it was time to find a plan B. But before we get into that, here are some (embrassing, why didn’t I tidy a little?? then I cropped out the really messy parts(also thank you to Michelle of MKE design and Build for taking the before pictures ;))) before pictures of the room:
Pre-quarantine we were going to have my son and youngest daughter share the room and use the small attached room as playroom for them. Plans changed during construction and my daughter ended taking the playroom as her own, see the post here. With our intial plan needing to get two beds in this space a bunk bed seemed logical. Its a decent size room but with the doors, windows, and the cut outs on the main wall made bed placement tricky. Our contractor drew up a stunning plan for a custom bunk bed that had us very excited, but when the bid came back she immediately came up with the idea of a semi built in bunk bed situation. Even if we had had the money to spend on the custom bunk bed it would not be something that would have increased the value of our house, it would have been purely for enjoyment. I should note that we didn’t shop around, there likely are options of carpenters that will build a bunk bed affordably, but with all the decisions we were making at the time we just didn’t look into other carpenters. This is not something we wanted THAT badly. When I started looking at options of bunk beds to purchase I got very excited about this one from Restoration Hardware, it had the look and the feel of our custom deisgn. It too was an investment, but a tiny one compared to the custom one, and we can bring it with us if we move.
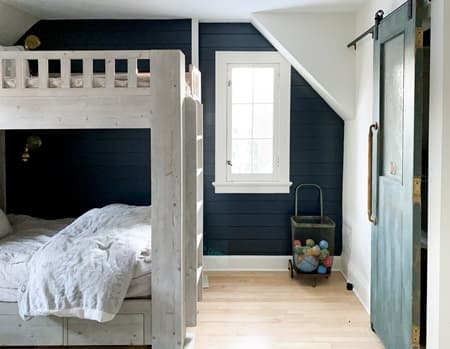
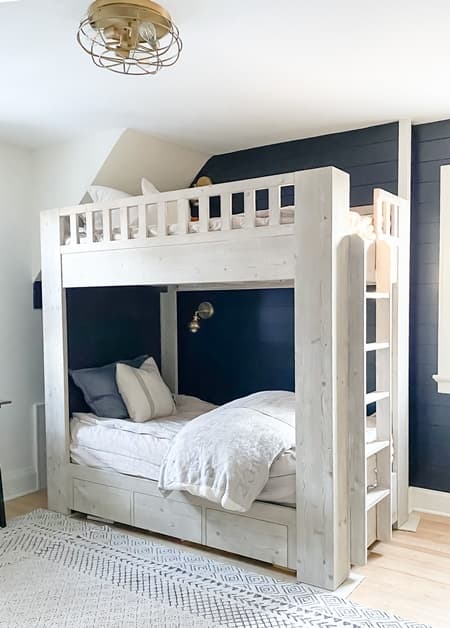
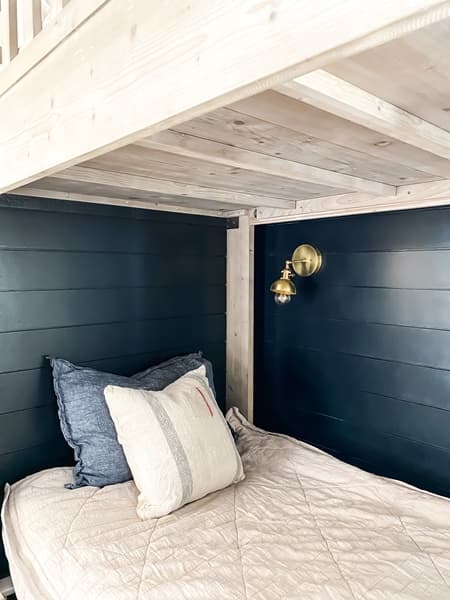
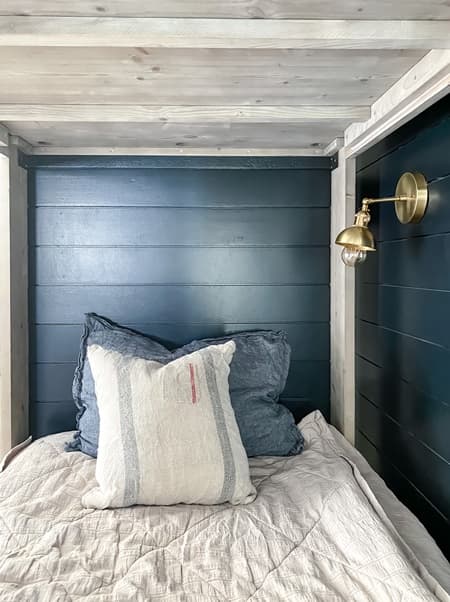
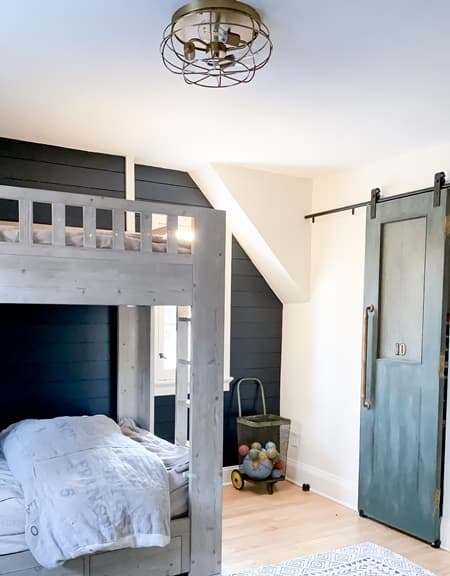
To make the bed feel like it belonged in the space our contractor did some work to the area. They brought part of the back wall out to make it flush, they added the shiplap to the back wall, they lined the head of the bottom bunk with shiplap, and added coat hooks to the nook at the top of the bed. We I chose dark paint to compliment the light wood of the bed. The paint color is Farrow and Ball railings color matched in Sherwin Williams paint. We are happy, and my son is happy. We have 8 foot ceilings, so that top bunk is a snug space, it wouldn’t be my choice to sleep up there, but my son loves it. There is something about that cozy space where basically just he ever goes that makes him feel very safe at night. It has been a great solution for practical and design reasons. Speaking of design the sconces totally do it for me.
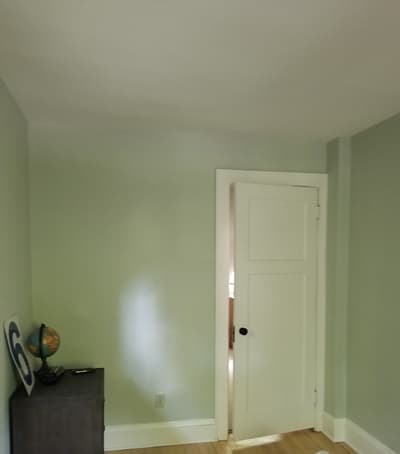
The structural change that we did make in this room was to add a closet, it did not have one before. This should be a good real estate investment because now with a closet it is a legal bedroom, not to mention we NEEDED a closet. This is the before:
After
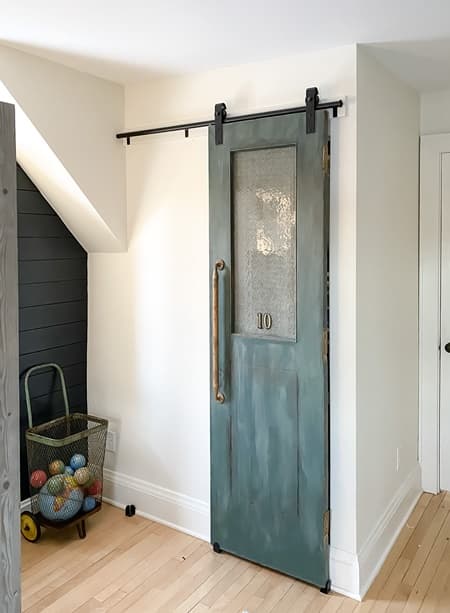
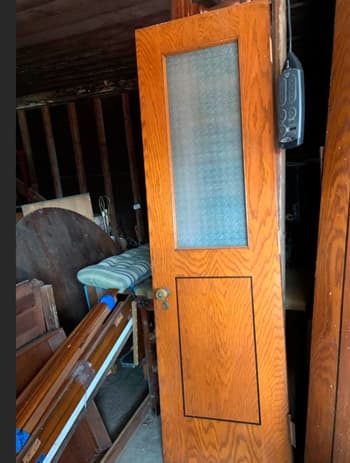
I would most definitely do the barn door set up again. I love how it turned out. I REALLY wanted a vintage door with character and I think I got that. The door was a door I purchased on FB marketplace. It was important that I found one that had very close measurements to what was needed, my contractor warned against having to make too many adjustments to a door. It took months of shopping to find the right size, but totally worth it. Here is what the door looked like before I got it:
I stripped it. I had to remove the cute door knob so it could operate like a barndoor. It was a stubborn door knob, I ended up have to hand saw it off which was unfortunate. I filled in the holes with wood filler. Then I painted it using a mixture of Miss Mustard Seed Milk Paint Artissimo, Boxwood, and Schloss. I couldn’t tell you the exact recipe but I believe it there is more Boxwood than Artissimo then a tiny bit of Schloss. This brand of paint is really easy to mix and create a pretty color, every time I have tried I have had success. I sealed the paint the Tough Coat. The handle and number stickers were finds from an antique shop, good finds if I do say so myself. Our contractor finished off the job by installing the door using simple black barn door hardware.
To finish out the tour of this space, we changed out the ceiling fan because. Lowish ceilings + bunk bed + ceiling fan is not a safe equation. Picking a light fixture was a decision that I was forced into making really quickly, it turned out fine. I like the amazon purchase. Finally to keep you in the know as to the whole space here is the side of the room that was not changed except for a little paint:
To finish out the tour of this space, we changed out the ceiling fan because. Lowish ceilings + bunk bed + ceiling fan is not a safe equation. Picking a light fixture was a decision that I was forced into making really quickly, it turned out fine. I like the amazon purchase. Finally to keep you in the know as to the whole space here is the side of the room that was not changed except for a little paint:
Comments are closed.
Please subscribe to Penny & Ivy's email list to receive updates on future sales and a bonus 10% off welcome coupon code