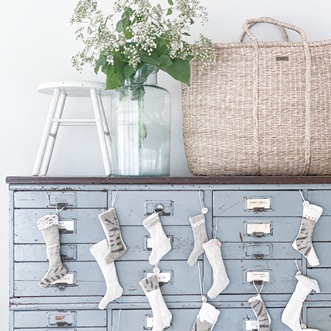
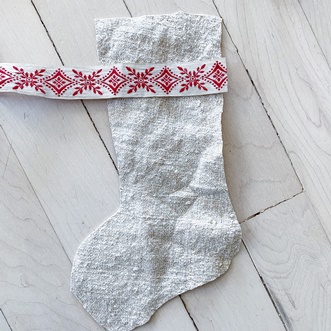
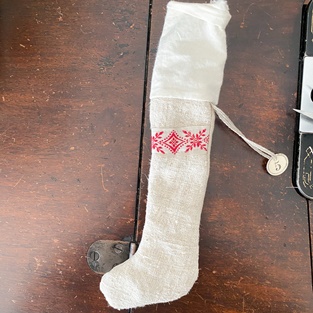
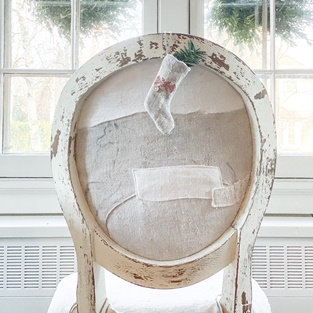
I kind of love these tiny stockings. They have been a bright little spot during this weird time. They are a relatively quick project, which means the mental reward for putting pieces together to create something cute comes faster. That is definitely welcome right now. I have really enjoyed mixing and matching fabrics, sizes, and embellishments to make tiny stocking sets. I am grateful that they have been a very popular item on my website, often selling out. If you prefer to purchase rather than create, please click here to check my shop. If there aren’t any available, contact me for custom set at pennyandivydecor@gmail.com.
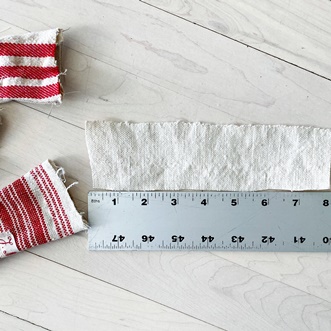
The included pattern is designed to offer 3 options of shapes and sizes of stockings that are approximately 2 ½ inches wide and 5-8 inches long, not including the hanging loop. Click here to download the pattern.
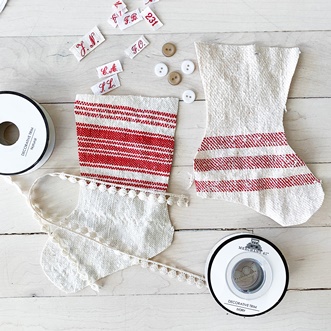
Supply list:
Fabric. Your choice, approximately 10-inch square needed for one tiny stocking. If you are using thick fabric, I recommend just using that for the front and using a thin fabric for the back. It is kind of tricky to turn it right side out if both sides are thick fabric.
A rotary cutter. I think its handy but not essential.
Step by Step
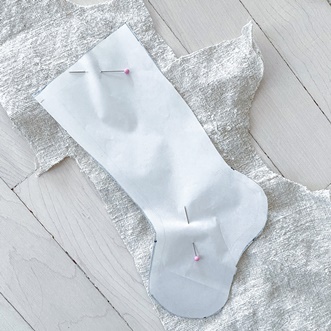
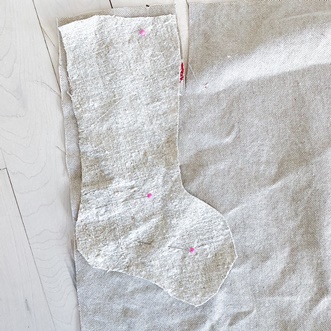
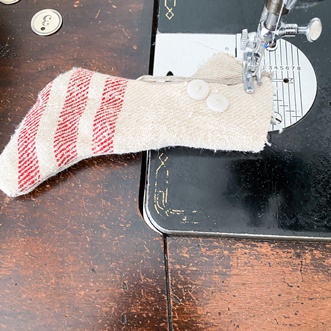
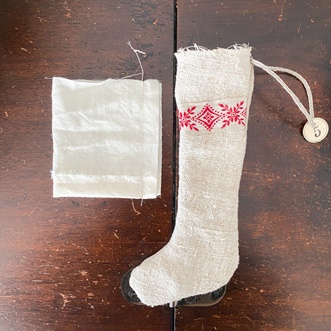
Pick a pattern and cut out two sides. My favorite is always grain sack fabric and this is really thick, so I back it with modern day, thin linen. These are a couple online shops I recommend for grain sack fabric: Linen by Sabine, Textile Trunk, and Grain Sack. As I mentioned above, if you have two sides of thick fabric it is really hard to turn the stocking right side out. It also helps to make my precious vintage grain sack fabric go farther. In addition to the grain sack fabric I also like to add some unique fabrics, I have found some very special ones on Etsy. This post highlights my favorite shops that I purchase these fabric from on Etsy. I also appreciate this project because not much fabrics is needed and its a great opportunity to use unique fabric remnants.
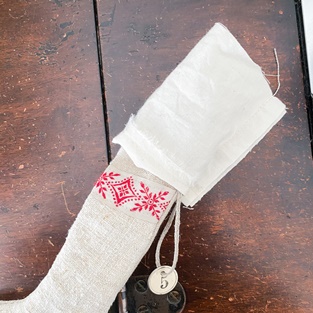
Take the cut-out piece of the front of the stocking and add whatever detail you would like. This is one of the best parts. The possibilities are endless and you don’t need a lot of anything to make an impact on tiny stocking. I love buttons. Any craft store should have a great assortment of trim, I usually pick mine up at Hobby Lobby. This year I discovered this shop on Etsy that sells French laundry tags. They are the sweetest.
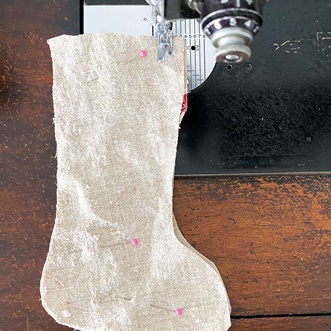
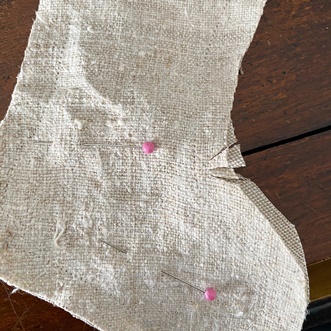
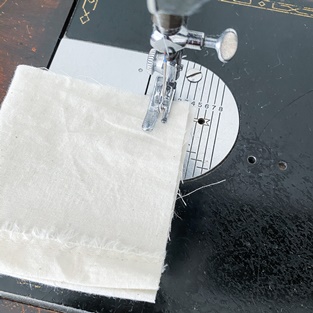
Once your front is decorated to your liking, take it and pin it together with the back piece wrong sides out.
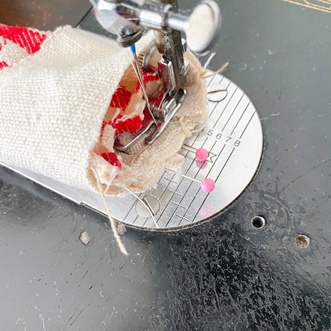
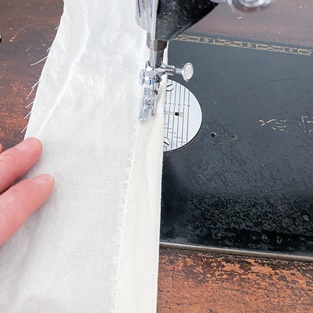
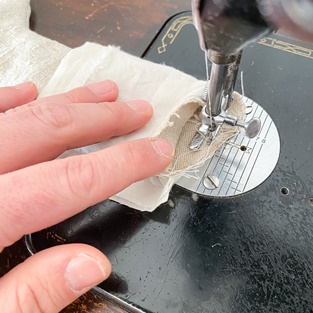
Sew it them together leaving the top open. This pattern was designed for a ½ inch seam allowance. It helps to trim some slits in the spots with curves.
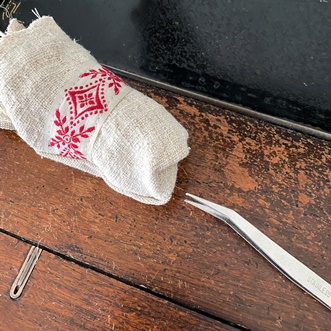
Flip the stocking right side out. Sometimes I need tweezers for the tight spots. Make sure your tweezer’s ends are blunt, so they don’t rip your fabric.
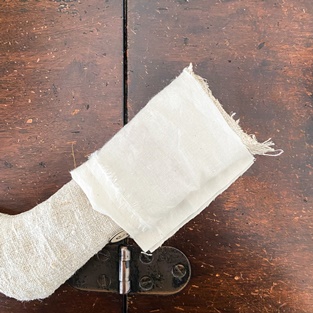
This is an optional step if you want a cuff on your stocking:
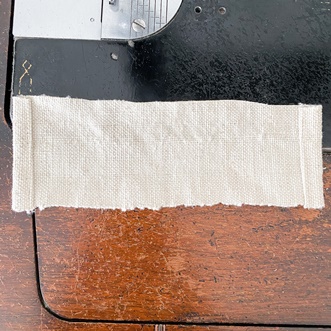
Cut an 8-inch strip of fabric at desired length. I cut mine 2 inches high along the finished edge of fabric so I did not have to hem it. But keep in mind you may need to hem your cuff fabric or not, I like frayed edge too. The design choice is up you.
Hem the ends of the fabric strip, I did mine with a 2/8 seam allowance folded over twice.
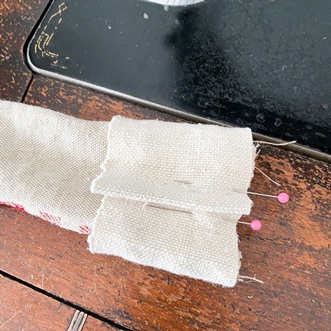
Pin the cuff off the stocking at the top with the end beginning in the back, wrapping around the front, overlapping the other end and ending in the back.
Do a stitch around the top of the stocking to hold the cuff in place.
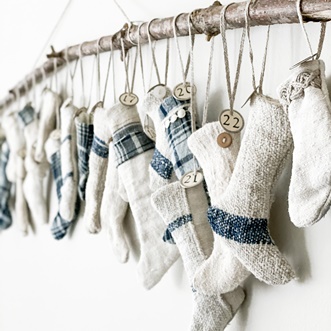
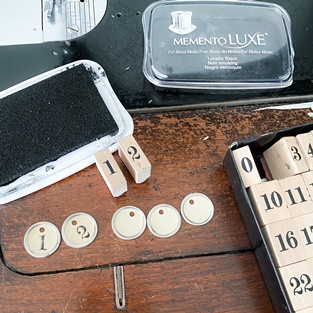
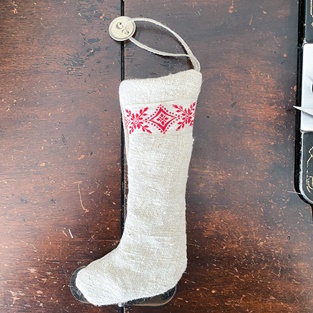
This is another optional step if you want number tags on your stockings. I get them all stamped up and ready now.
I used some vintage tags I purchased off of Etsy, but there are many options to get a similar look. Here are couple:
Let the tags dry while you do the next couple steps.
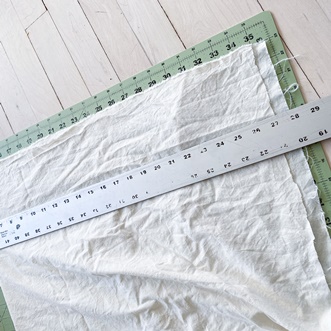
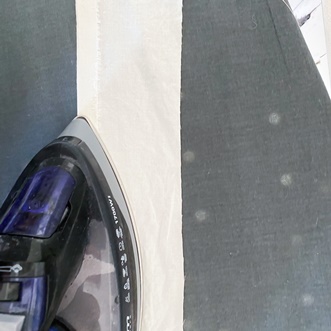
Cut 6 ½ by 4 inch strips of muslin, one for each stocking. Fold about ¾ inches of the fabric down on the 6 ½ side, iron, then sew in place.
Take this muslin strip and fold in half, wrong side out. Sew together the ends leaving the hemmed bottom and unfinished top open. Set this aside for the next couple of steps.
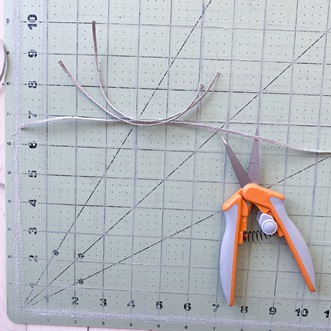
Cut 6-8 inch pieces of ribbon, trim or string for your stocking loops. Add the number tag to the loop now if you want them.
Then, with the loop folded in half, stitch the ends at the top corner of your stocking. The loop should be looping downward, opposite of how it will end up. You can also just pin it in place, but sometimes my pins shift and I have to do it all over. I think it is easier to quickly stitch in place.
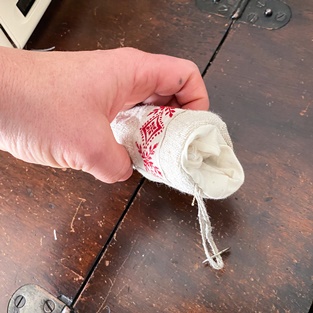
Take your muslin tube (wrong side out, and hemmed side down) and pull it down over the top of your stocking (right side out) until the unfinished tops meet.
Pin in place. Then stitch in place.
Then take the muslin, flip it right side out, tuck it in the stocking.
Voila! You have a tiny stocking!
I’d love to see pictures of your finish products! You can share them with by tagging me in your Instagram stories @pennyandivy.
Please subscribe to Penny & Ivy's email list to receive updates on future sales and a bonus 10% off welcome coupon code