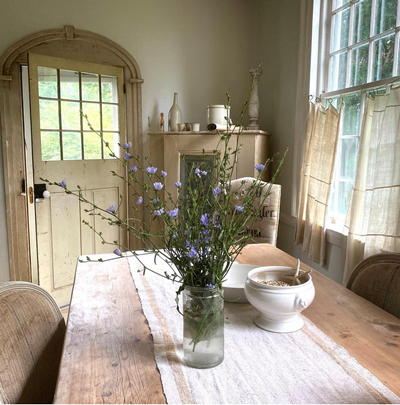
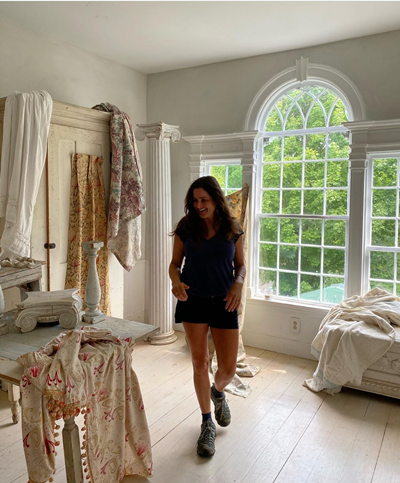
I am back reminiscing about my travels to Provence during a bit of a winter blues funk. My travel partner, Jenn, kept saying during the trip that the memories would help to get us through a long winter, and as always she was right. In my last post on this little and slightly neglected blog (stocking season rolled around and that kept me quite busy) I talked about the two days in Paris that I spent leading up the tour in Provence hosted by French Larkspur. I have never traveled with a tour before and I am not sure that tour would be the right word for this kind of trip, because when I think of tour, I envision a massive tour bus with a guide using a megaphone. This is experience was the opposite of that. Tracey the owner of French Larkspur keeps her trips small, she only accomodates up to 4 travelers per trip. You basically are experiencing the most charming hilltop towns with a small group of friends and you don’t have to plan or worry about a thing except if you are wearing appropriate shoes. I am just like every other parent in the world, where I am rarely in a situation that doesn’t require me to be in charge or leading the way in one way or the other. I completely welcomed the opportunity to travel without even the tiniest bit of responsibility.
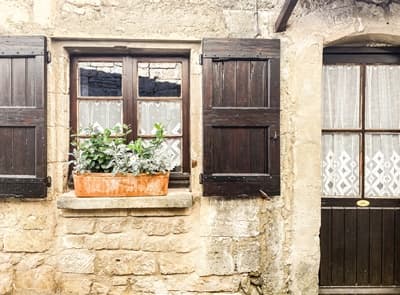
Saignon
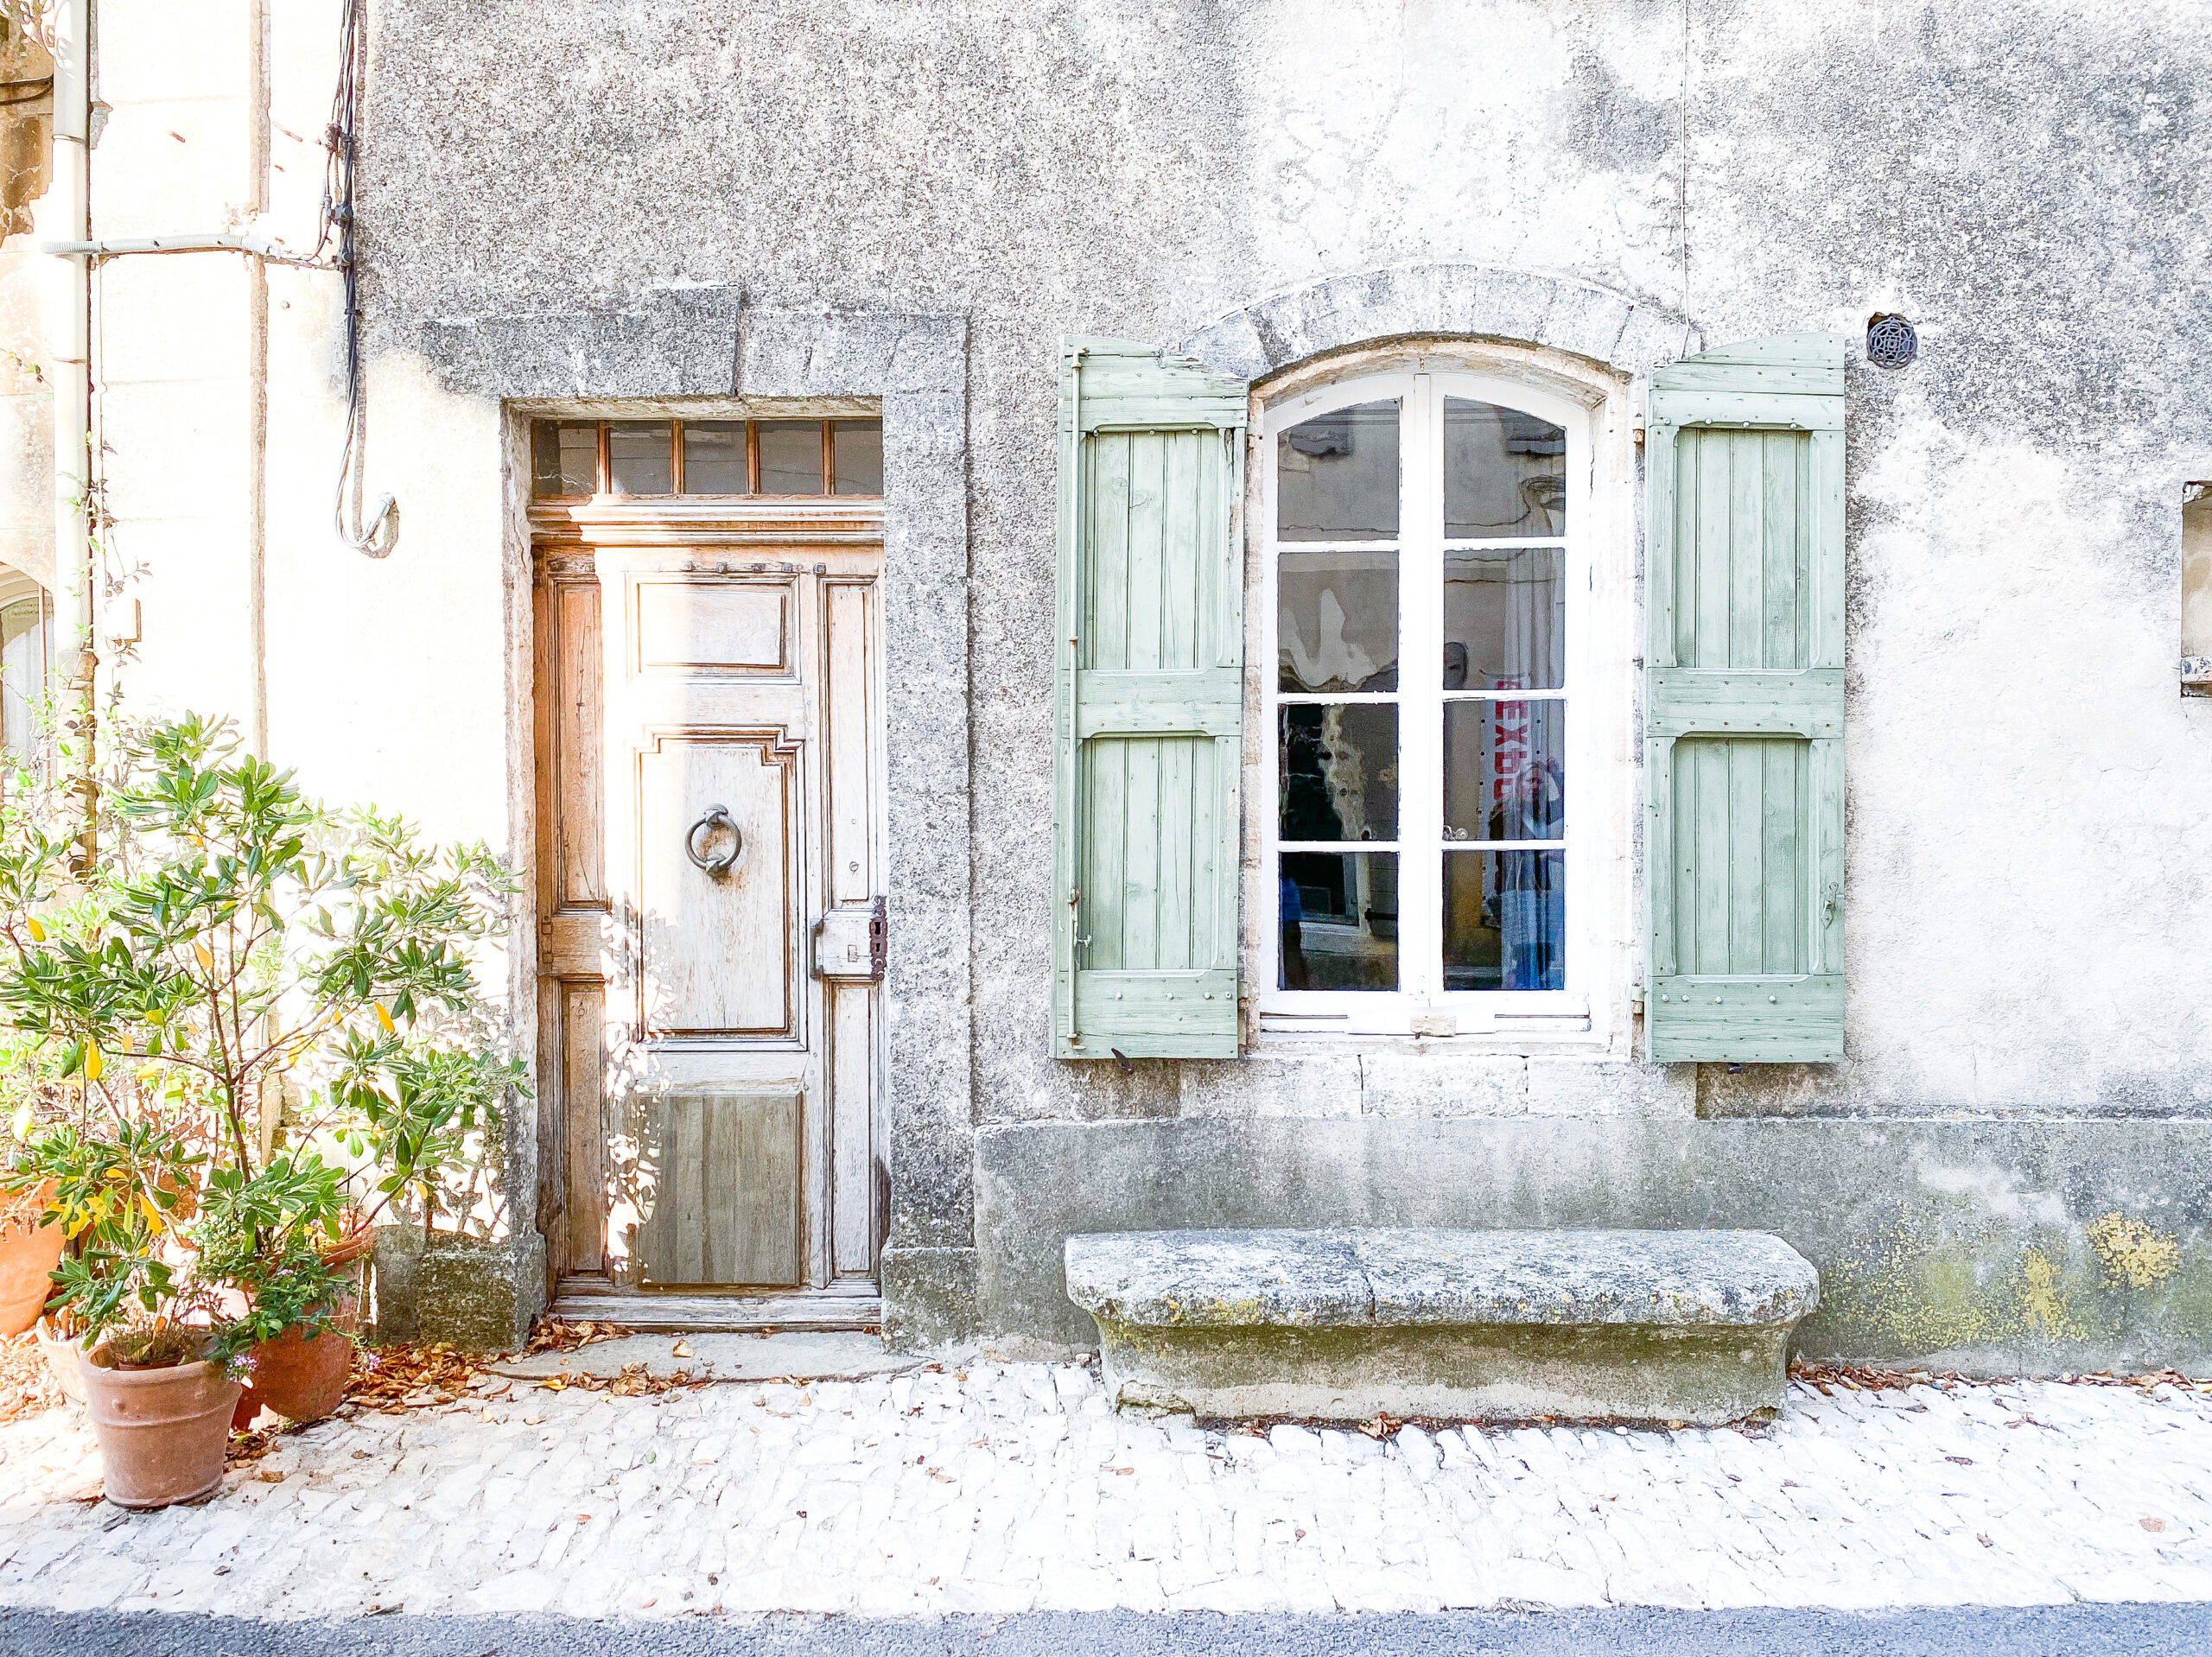
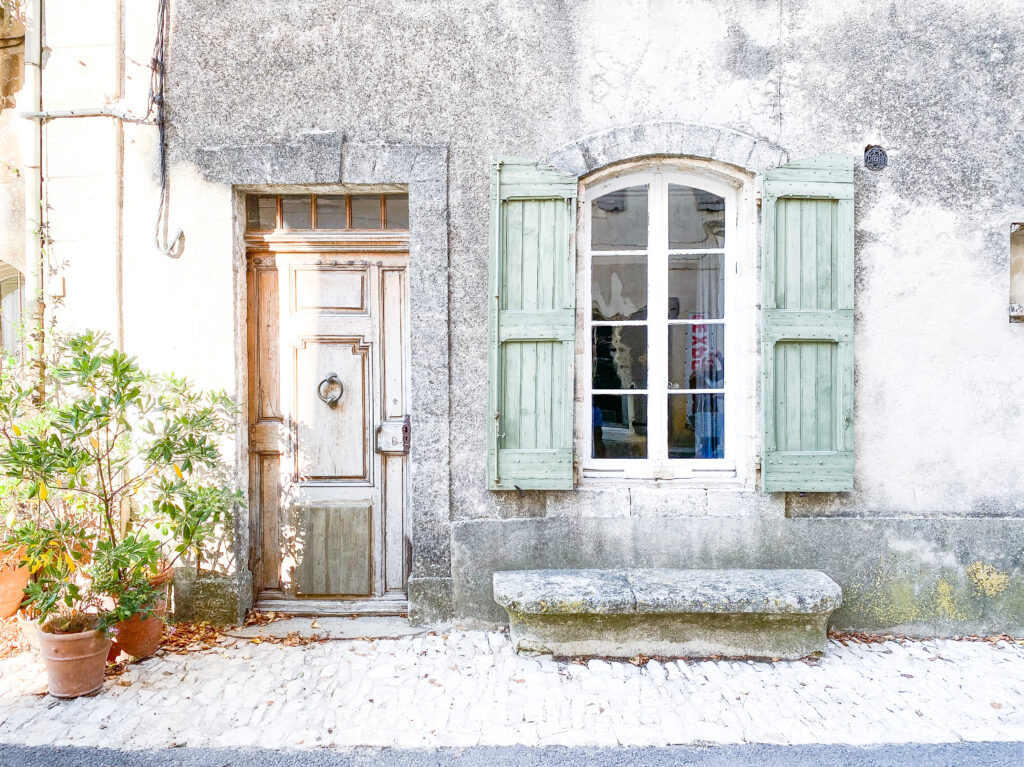
Tracey curated an amazing experinece that began each day with a delivery of fresh croissants to our apartment door so we could nibble on them while getting ready for the day. We had full days soaking up the beauty of this magical part of the world. This wasn’t a trip that was dictated by a list of tourist attractions we had to check off. We wandered cobblestone streets and our eyes feasted on all the treasures along the way, big and small.
True to the French experience we ate leisurely long lunches in some of the most stunning settings, always accompanied with a delicious meal.
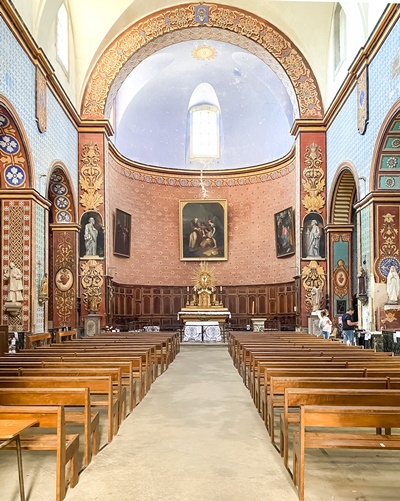
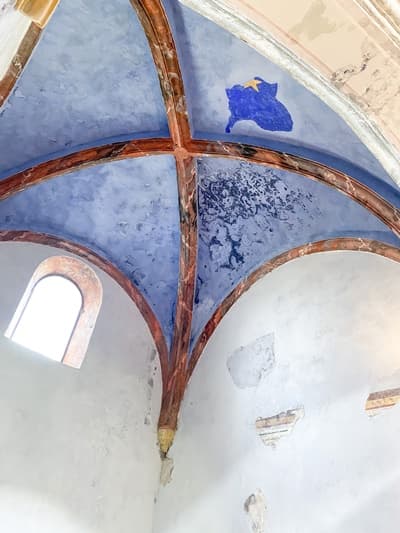
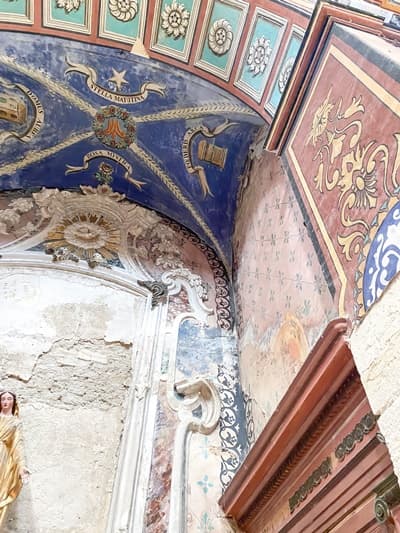
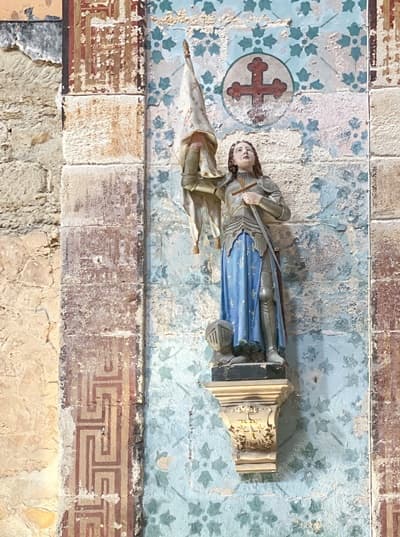
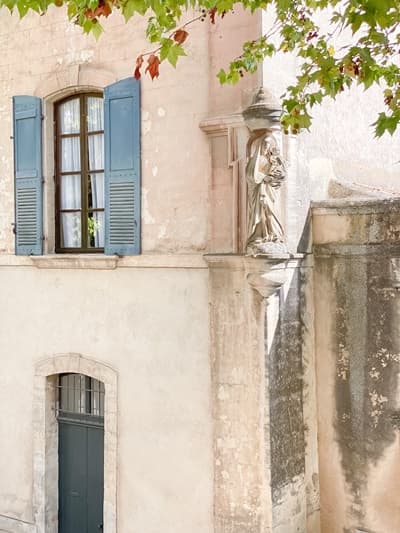
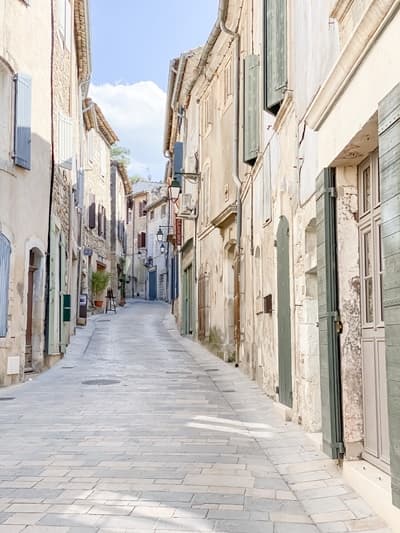
Gordes
The cathedral in Gordes is one of the most beautiful places I have walked into. The combination of colors, whimsical details, architecture, and it all being aged over centuries made for a truly remarkable place.
The Blessed Mother statues have always been a source of peace for Jenn, when we started the trip she would point them out to me. I quickly caught on, there is a lot of love communicated in them, and I always saw them as a good omen.
We would return to our apartment in the early evening and had this time to ourselves. Tracey always made sure that we stopped by a grocery store and bakery to get enough fixings for a dinner in. We could make the couple minute walk into town to eat a restaurant if we preferred. But we ended up really enjoying our dinners in our apartment. These were some of my favorite meals. We ate fresh bread with goat cheese and figs and grapes. And also the very best olive tapenade, which came with a story…Jenn and I stopped by a stall in a street market with a man selling various types of olives and tapenade. The truth of it is that he was very handsome and charming and his tapenade was delicious. He had us trying all the kinds, and we kept adding to our purchase. In the end we spent 20 euros on tapenade. EACH. Okay. We didn’t expect that. I guess I am not complaining because it was very yummy, it did last us nearly 3 dinners, and then there was the whole experience of buying it. C’est la vie. Sweet but not budget friendly.
This down time in the evenings was the perfect way to complete a full day. It gave me chance to look and edit my photos from the day which helped me to soak up the entire experience more. I also read some, and caught up with what was happening at home. A couple evenings I went jogging on a bike trail close to the apartment. I have run all of my adult life and there is something pretty special about jogging in a new area while on vacation that lets me experience it in a slightly different way.
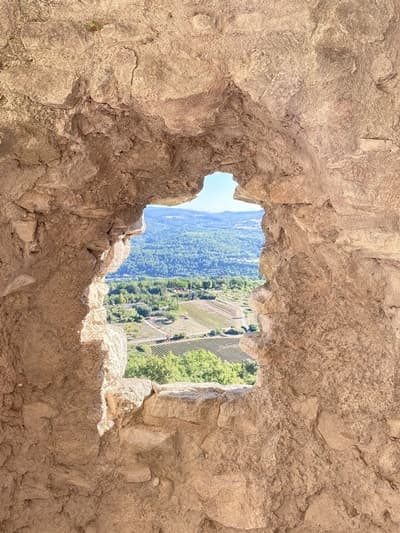
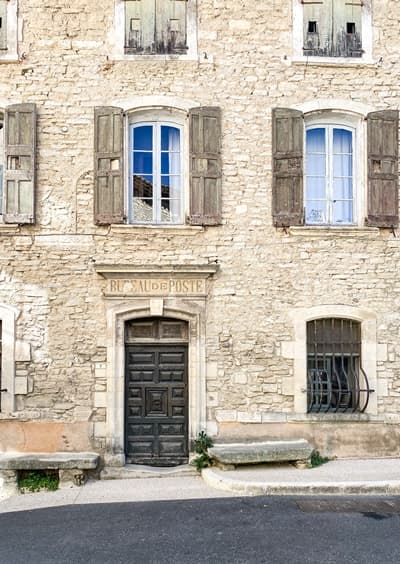
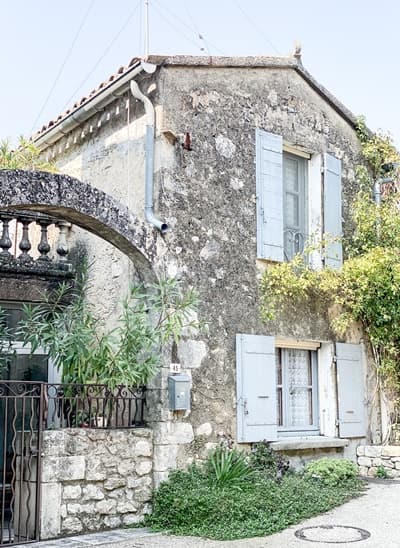
Lacoste
One of the biggest advantages to this trip was that transportation was completely provided and taken care of courtesy of Tracey and her husband Steve. I am not afraid to travel and I can handle figuring my way through public transit in most places. Visiting the towns we did, would require renting a car. It gives me a little anxiety thinking about renting a car in a foreign country, and then to be responsible for navigating the tiny streets and parking. I am not discouraging anyone from trying it, and if I get to travel to all the places I hope to travel to, one day I will be doing this. But holy moly, it was so nice to have a chauffer in Steve that knew what he was doing. I am sure I would have seen less than half the places we saw if I had been in charge of finding our way and finding parking once we arrived. There were times when Steve would drop us off to start exploring while he circled to find parking. This was made it a first class/stress free experience.
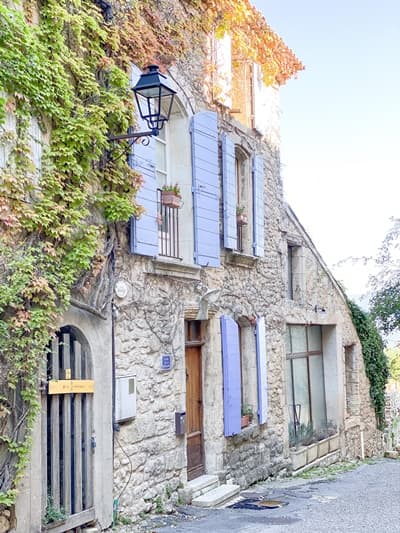
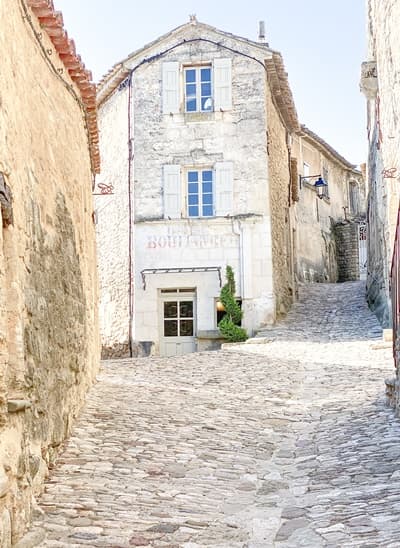
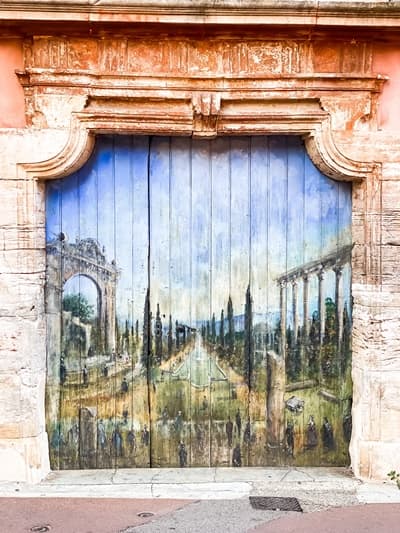
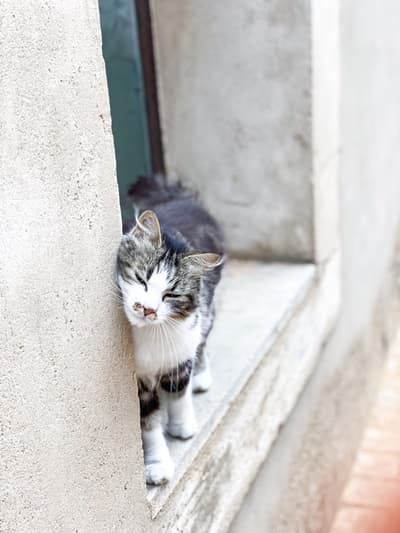
Roussillon
Le Chat
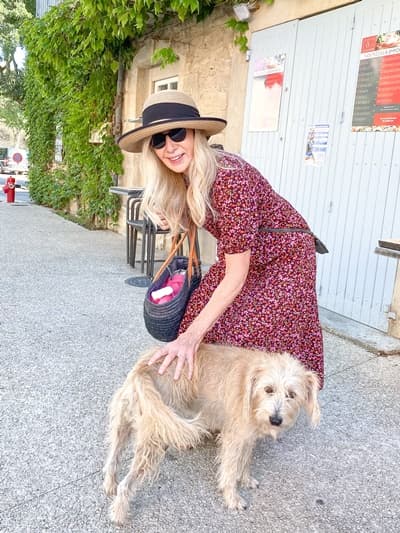
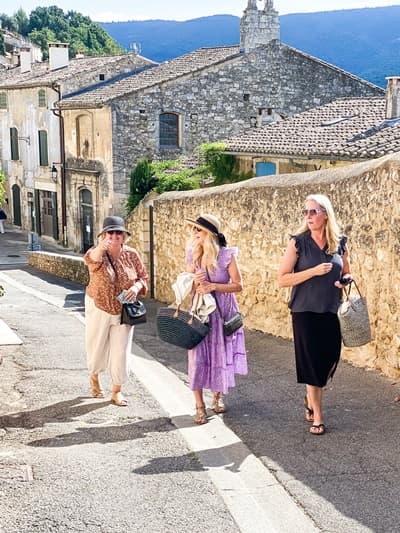
I loved my travelmates on this trip. I suppose its a bit like the Bachelor, where you are doing these amazing things in this incredibly beautiful place of course you are going to start to love the people you are with (and in my case not romantically like the Bachelor, just as friends 🙂 ). Jenn and I planned to go together, so I knew I loved her, even though we had only known each other for a couple months. She is a really easy person to get to know well. The other woman who joined us came on her own from Boston, Jean. Before the trip she was stranger. Jenn and I both felt like we had hit the jackpot with her coming. She is one to love. I hope to travel with her again. I think we would survive real life friendship, not just one viewed in the rose colored glasses of Provence.
mon amie, jean, avec le chien 🙂
Tracey is an excellent guide. She is very much a perfectionist and hard worker. She will do everything in her power to make sure you are shown an amazing time. Also if you peek at her website or IG page you will notice her incredible photography. She has an eye for beauty and the ability to create an environment for you to enjoy it.
Our final visit was the tiny town of Oppede-le-Vieux. It had been a rainy day, our only rainy day, and the sun came out just in time to wander this town. It was a lovely parting gift from the area.
Oppede-le-Vieux
I am glad that I was able to experience each hilltop town that we did. Although they have a lot of similarities, there is something unique about each one. If I try to pick a favorite, I remember something special that stood out to me from each one. I am not sure I can even articulate those special qualities to classify the towns, often times it was just the feeling of the town or a moment when I turned a corner and saw something that was inspiring. It is such a gift that I got to experience this and hope to carry a piece of it with me.
Stay tuned for a post coming soon about the other important aspect of my stay in Provence. SHOPPING.
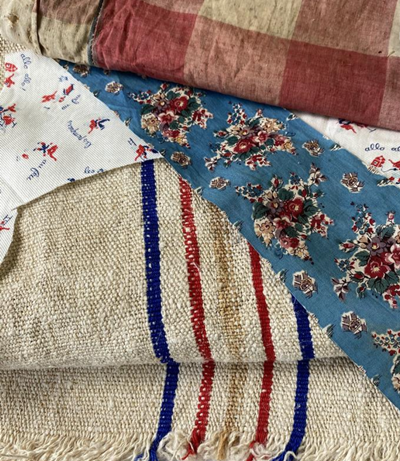
One of my favorite parts to my business is shopping/hunting/scouring the world for antique French linens. Here is a little back story on how it all began…In 2015 I tackled my first upholstery project, it was chair that I purchased off of craiglist for $5. Being inspired by pictures of chairs with grain sack material, this is what I wanted to attempt. And that was the beginning. I had very little kids at the time and did very little shopping, most especially at antique shops. I intially thought that I could just run to my local antique mall and grab some grain sacks. Nope. It is not out of the question that your local antique mall carries a couple, but I quickly found out mine did not, and finding the right vintage fabric was a process. A process I really enjoy, but there is some work involved. I was lucky enough to find a lovely grain sack from a seller on ebay, and the outcome was good. I wanted another project. So next I found a vintage French style sofa on craiglist. It had beautiful lines. I had committed to buying it, when the seller got a higher offer and threw me to curb. I was sad, I had grown attached already. But it finally ended up being mine when the other buyer never showed to pick it up. It had a lot of potential, but needed a complete overhaul. My vision was to upholster it using antique hemp linen sheets. So now I had to get my hands on some…That brought me to here:
P A R I S
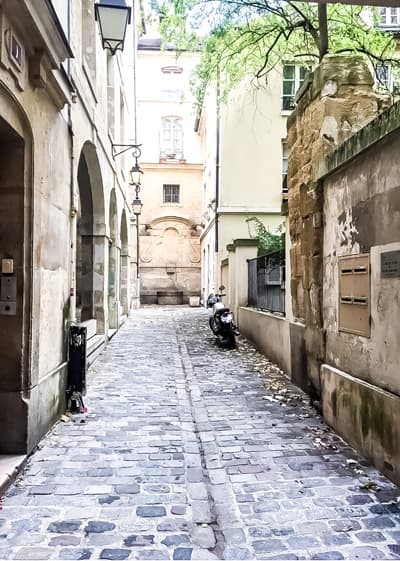
Around this time my husband had a business trip in France, he asked me to meet him in Paris for a weekend. Eveything aligned, that mostly meaning my sister was able to watch my kids, with childcare in place all the other details are easy. It was a pretty special weekend, I think back on it with fondness. We wandered, ate crepes, stayed in a nice hotel, and even the book I read on the plane made me happy. But what was really quite a big deal for me was I needed some antique European hemp sheets for my sofa, and Paris was a promising a place as any to find those. I did as much research as I could online figuring out where precisely I needed to go to shop for the sheets. I flew in one morning and my husband couldn’t meet me until the evening. My research steered me to the Marais area, so I set out on my own in this direction with a mission.
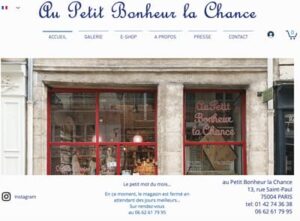
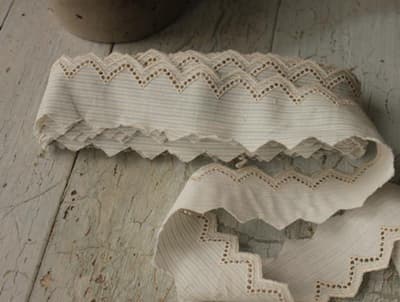
There was a courtyard like area tucked in to a block that had several quaint antique shops, I didn’t find what I was looking for, but I really enjoyed myself. I wish that I had taken more pictures. One of the shops I visited was this one, its a treat to just look at their website and dream about picking through the lovely collection of textiles and ribbons:
I was not disappointed that I didn’t find my linens on the first day, because I was feeling really hopeful and excited about my luck at a Paris flea market. There are several flea markets in Paris, there is Les Puces de Saint-Ouen, which according to the internet is the most famous flea market in the world. But I found information warning me that the prices were very high, and it wouldn’t necessarily be the best for linens. From what I could gather from my research was that Marche aux Puces de la Porte de Vanves was a bit more causual with better prices and plenty of linens. So Saturday morning I set out early on the metro by myself to buy linens. Antique shopping is not my husbands thing, and I really prefer to not have to drag an unentertained person through stall after stall. In addition I kind of like shopping alone, so it worked out. We bonded over French pastries later.
See THAT is an example of an assortment that served us well. Back to shopping, although, a proper shopping trip should always include snacks and nourishment. In my experience sugar is best to keep up the longetivity of a shopping trip, its science :). French pastries do their job well to keep a sucessful shopping trip going.
Okay, now back to shopping, I arrived early due to an internet recommendation. A bit too early in fact. Some stalls weren’t welcoming shoppers yet, and even if they were I am not convinced it was necessary. The atmosphere was not of a hustle to score the best pieces. It was more like a social event. Everyone seemed to be leisurely enjoying themselves. It was lovely.
I speak very limited French. I took French in high school, which equals me being able to introduce myself and order a crepe. But I did read up on how to ask for a price so I was prepared. My pronunciation was often not understandable and it was one of those experiences out of my comfort zone, but I tried. I always had warm feedback because I made an attempt. The vendors would either start speaking English to me or if they didn’t speak English they would write down the price for me. Even though I could sort of ask what the price was, it didn’t mean I could always (almost never) understand the response. But it worked out. The mutual goal of a sale and the fact that I tried to speak French in France we worked through any communication barriers.
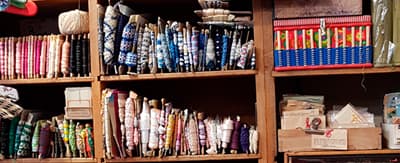
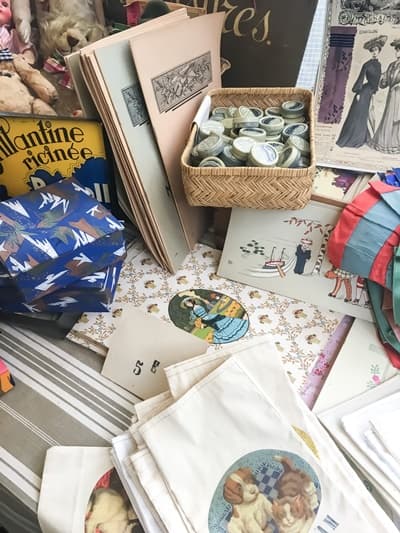
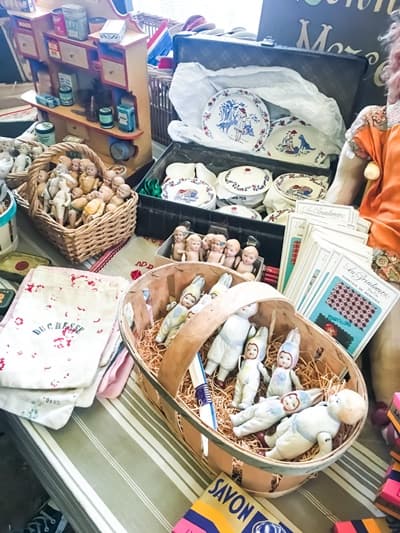
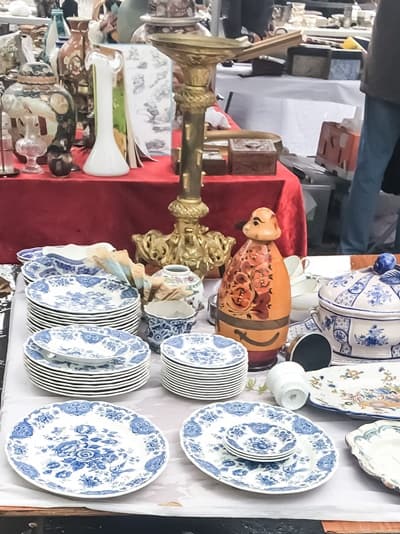
I loved the flea market. There were some curated stalls, like this whismical one filled with ribbons, textiles, and sweet vintage childrens toys. Looking at these pictures makes me wish I had bought so much more.
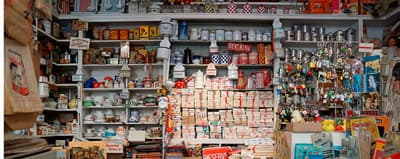
There were also tables set up that were disorganized and random. But there were always good stuff to be found. The dishes!!! There were so many pretty ones!! And the prices were very good in my opinion. But there was only so much room in my suitcase.
It took the morning but I eventually found enough linen for my sofa. I was thrilled. It was a lot of linen, it didn’t make the metro ride back to the hotel easy, but I was beaming inside holding on tightly to my treasure. Even the plane ride home I was very careful not to check my pile of linen, I carried it on and made sure it was never too far away.
The quality of the linen made it possible to recover my sofa successfully. I remember one moment working on an arm, and the fabric stapled beautifully in place without very much effort, it felt wild because I was fairly inexperienced with upholstery and most DIY projects I had done before did not cooperate so easily. Between the magic of a special weekend in a foreign land with my husband and learning that I had a developed a new skill and love and a true love for it, makes this a time that I hold close to my heart.
This is the finished product of my vintage linens from Paris and my craigslist sofa in our old house
These days traveling to France is not an option, and it wasn’t very easy pre covid anyway. I have found shopping on Etsy gives me a little taste of the Paris Flea market experience. It has turned into one of my favorite pastimes. The hunt is for the perfect item is really, REALLY fun. Then there is nothing like receiving a package from France to make your day. Sometimes I am just buying a fabric remnant, or some ribbon so shipping remains reasonable. The items that arrive always make my project very special. Here are some of the Etsy shops that I have had the most success with:
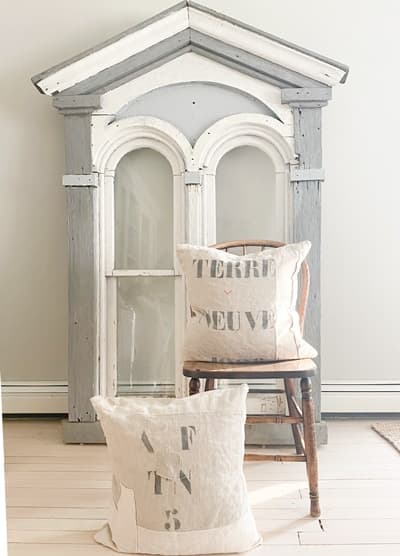
-First off is my friend, Cybele’s shop Au Pres de Mont Toi. I purchased many French Postal Bags from her initially, but since I have bought some other beautiful treasures from her shop. A bonus is that I have gotten to know her through communicating over the internet through google translate. She is sweet, funny, and a mother like me. Last year I received a thoughtful note from her wondering how we were doing with the pandemic in my part of the world. I hope that to meet her one day in person. From her shop I purchased the postal bags that made these projects possible.
Newfoundland Postal Bag Pillows
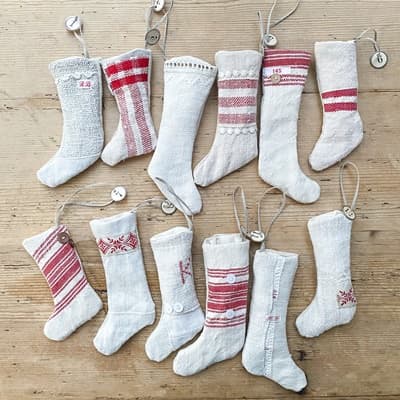
Another shop that I love is Sissidavril, this little shop has beautiful fabrics, ribbons, and French laundry tags. Using the tiny French laundry tags that I bought from this shop added a lot of charm to my little stockings I made at Christmas time.
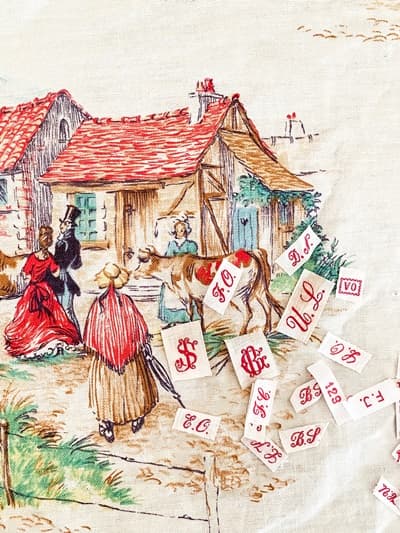
Sissidavril also offered this extra special fabric remnant. I love all the characters in it. I was able to make a couple of pillows and some Valentine’s decor with it. It was a treat to work with it.
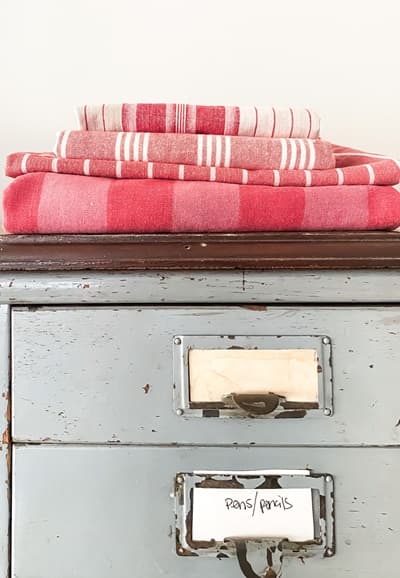
I just discovered MarieDecor1888, when I was searching for vintage ticking stripe fabric. Browsing the shop is really fun, and I reached out to the owner in hopes that she possibly had some fabric similar to what she had listed. She was very easy to work with and had just what I was looking to buy. I hope to use these pretty pieces to make some stockings when the holidays roll around.
I have a package making its way over the Atlantic from FrenchVintageRetro right now. I have yet to actually receive a package directly from them, but a friend who bought the fabric from this shop had me sew a pillow for her. She actually ended up with some extra French linen and I gladly took it off her hands. This particular fabric is pristine vintage French linen, it is c’est magnifique!! Also a virtual wander through this store is highly recommended, their treasures are not isolated to pretty linen, and their photography and presentation is beautiful.
Happy shopping or browsing or sewing or just dreaming about travel. If you would like to see if I have any completed projects for sale using my French finds check my shop. Also if you are looking for a project idea check out my stocking tutorial or bed upholstery tutorial.
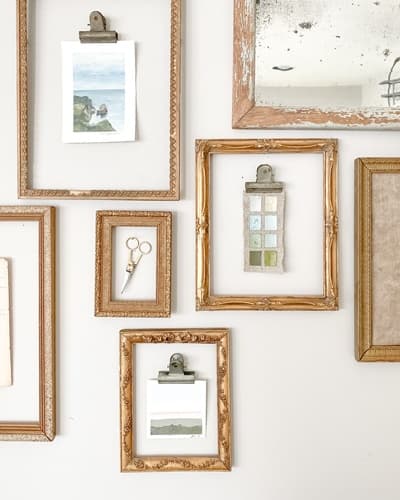
A couple of weeks ago I was tidying my house because I had a couple of close friends coming to lunch. In the off chance that they wanted a complete house tour, my goal was to get every room presentable. My house has really missed having company and getting a good full, top to bottom clean. But inevitably my expectations for a magazine appearing house outweigh my ability and there is total panic in the last minutes leading up to their arrival. Anyway…this is how my gallery wall came to be. Not in the last moments of panic but during the clean up process.
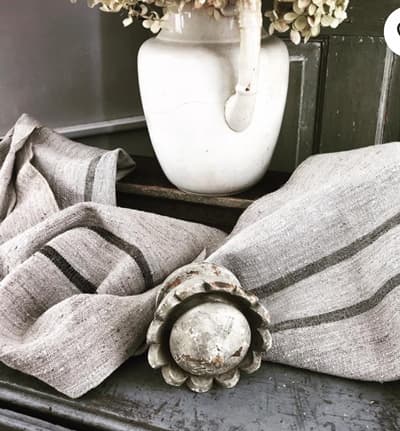
In a corner of what we call our sunroom is my sewing/studio space. This sunroom was an addition to our 1920s bungalow probably in the 1980s. It is very large room and there is enough space for a family room and studio space. It has a wall of windows, so its our sunroom. ANYWAY…above my sewing machine I had just hung a mirror and tacked up a grain sack to experiment. It was not looking good. I loved both pieces but not displayed like that. Surely I wanted it cuter for company. I started to wonder about adding more frames, some art that I loved, and framing the grain sack. Good vintage gold frames are an item when I am out thrifting that is hard for me to pass up. I love them. And this proves its true you never know when you might use them. I was able to pick out enough frames from my stash to start a gallery wall. If you don’t have much luck at your local thrift store, Etsy has a selection. Here are a couple examples of a to some nice vintage frames: link, link, and linkity link. If those have sold or don’t work, my search for vintage gold frames produced a good selection on the site.
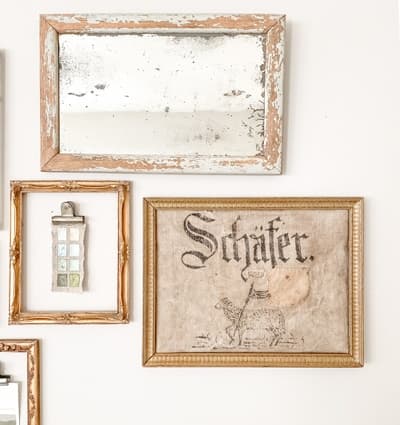
This special grain sack was purchased from the Etsy shop, Objekts1. The owner, Atta offers the most unique grain sacks. This one was very special to me because my maiden name is Schaefer, meaning shepard in German. I love the hand drawn sheep and my genelogy represented.
When I had the frames in hand I started to wonder about how I could use them to frame the paintings. Then I remembered the vintage clips that I had bought for something else but didn’t use, I bought these from my friend’s shop, Anthology Home. But again you could buy them…guess where?? ETSY. Here are some links: here and here. I really, really love the look. And I love the practically of the clips. I was thrilled when the clips worked. I could finish the project quickly and I have the potential to change the art out any time that I would like.
I find that I often don’t complete many DIY projects that include stopping and starting. Framing falls into that catergory. Finding the right size frame, plus the right size matting often ends up being a lot of steps, totally reasonably doable, but for my brain I find if I can just complete something in one feld swoop it happens. When several steps are involved sometimes frames just sit waiting empty next to the wall they are intended to hang on.
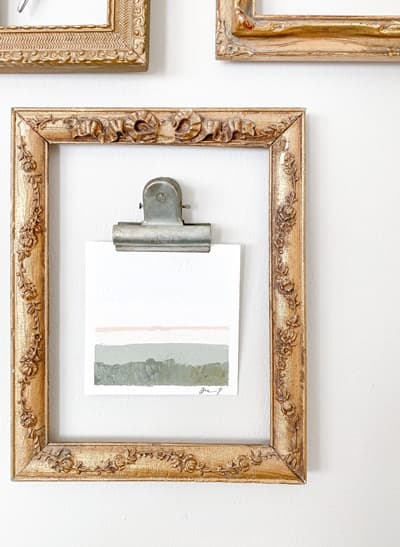
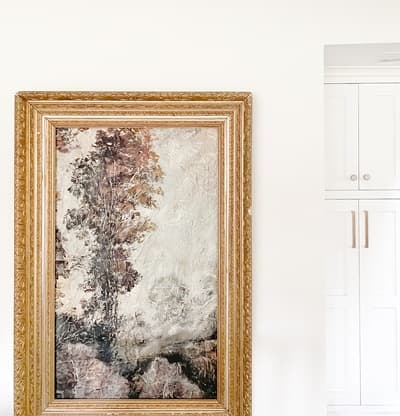
This sweet painting was done by the ultra talented Shaunna Parker. Even though it is very simple with the use of colors, the way she used texture in this landscape adds such an artisitic element that it fosters imagination.
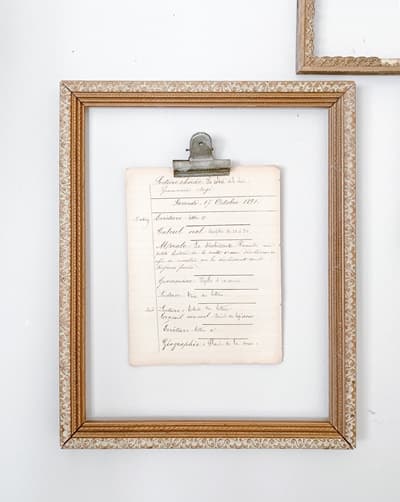
I was happy to find a display for this handwritten antique French list. I am not sure where in my shopping travels I got this, but I found this shop had many similar items.
I 100% support planning out a gallery wall carefully with cut outs of wrapping paper in the shape of frames taped to the wall as a guide. This sets it up for success. But I didn’t do that. I winged it. I will likely have to fill some nail holes, and I am okay with that. Also for the exception of the mirror, because I removed the glass the frames were very light, it just took a nail or two to hold them up on the wall. The clips were also very light just requiring one nail. I didn’t need to find any special hanging equipment.
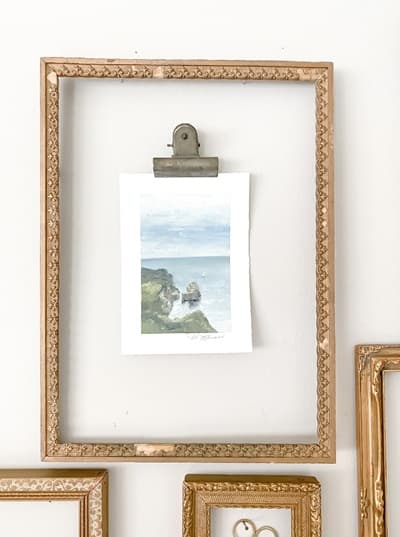
To have a couple pieces of original paintings done by Marian Parson of Miss Mustard Seed is very special to me. She has long been a source of inspiration to me through her projects, design, and business.
I am so pleased with the end result. I really love my sewing corner, there is something about it that makes me feel good, and fosters creativity. I am very much a visual person, so it means a lot to me to have a visually appealing wall that makes this space even better to create in.
In addition to this gallery wall success with thrifted frames, I have had results that I have been happy with in using them to have pieces professionally framed in them. I know I am contradicting my above statement on avoiding multiple steps in decorating, in the case of the gallery wall I needed something quick. I have purchased large prints that I thought the best option was to have them professionally framed. It is an investment, but worth it in this scenario. I provided an vintage frame in both cases, and that saved a bundle. The local compant that I used said that if they had created a frame similiar to these vintage ones it would have cost nearly $1000, I could be over quoting that, but it was shockingly A LOT. I was very much patting myself on my back for spending $30 to purchase these frames at the thrift. I believe the first one was a mirror and the second an empty frame.
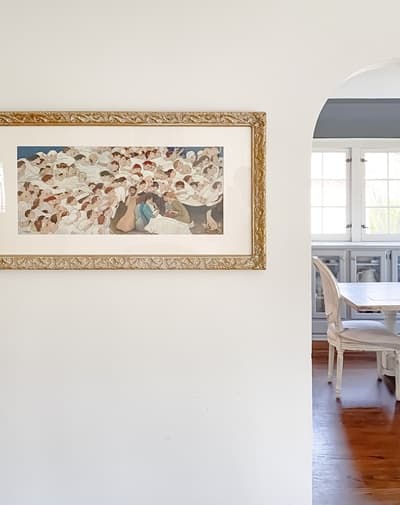
This is a giclee print of the artisit Brian Kershisnik‘s Nativity. I really appreciate the way he depicted the feelings, rejoicing, and love that happened on that monumental night. I am pleased to have it displayed in my home.
This is another print done by Brian Kershisnik. I was drawn to it because one of my most vivid memories as a kid was star gazing with my dad. Also visually it is stunning.
Finally there is this frame. I love it very much. It purchased it an antique store for around $60. It has had many uses. I have used it as display in my booths when I did decor shows, and also I used it to frame a gallery wall in my old house. My favorite use for it now is having this backdrop pinned in place and hanging in our house.
This backdrop is a reproduction that I purchased from the artist Jennifer Lanne. She offers a variety of these and it is an affordable option to a sizeable piece of art. And they can be hung without a frame and are just as beautiful.
Never understimate the value of a good frame or not. There are lots of ways to hang art. I support the idea of no rules when decorating. Don’t be afraid to experiment!
*Disclosure: This post contains affiliate links at no additional cost to you.*
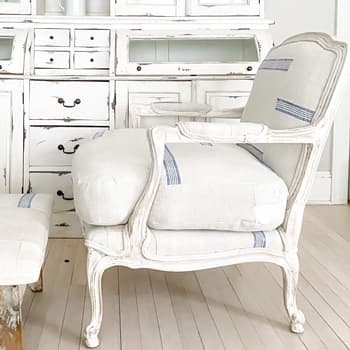
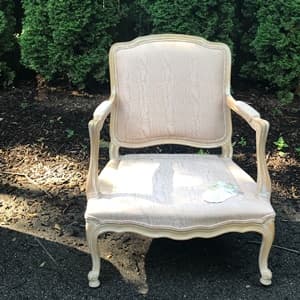
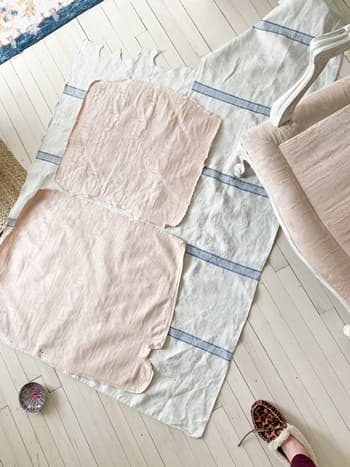
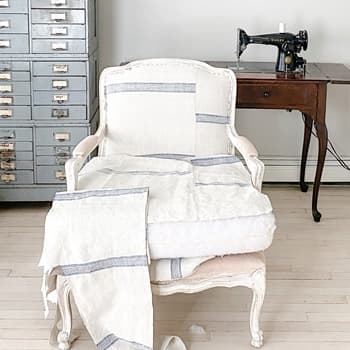
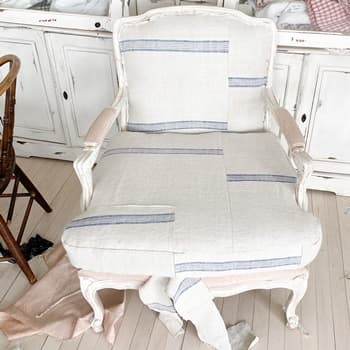
I thought I would offer a bit of a behind the scenes look at reupholstering this thrift store chair. I had not done a big project like this in some time, it reminded me that I really enjoy reupholstering pieces and that it takes quite a bit of time.
Here is a picture of how I found the chair although it did come with a seat cushion. I am not entirely sure why I didn’t include it in the photograph, I took it several months ago and that is too long ago for my memory to recall such details :). Although I do remember shopping at the thrift store when this was brought out onto the floor by one of the workers and staking my claim on it as quick as possible. There is nothing like thrift shopping to bring out my most assertive self. I was drawn to its shape and upon inspection I found it to be very sturdy. I am often tempted in second hand projects that aren’t particularly sturdy, but they can be more trouble than they are worth. There are lots and lots of potential projects out there, you can find a sturdy one, it will be worth the wait.
This chair sat in my basement for a while, like nearly 2 years. So in my head it went through a variety of plans. I actually sanded down the finish a couple months ago and sealed with wax. It was a nice finish, but when I finally decided upon using this vintage hemp mattress cover that I purchased from the shop, Parna, I thought it needed to be painted white. I painted the wood two coats of Miss Mustard Seed Milk Paint Linen after a light sanding, I sealed it with a layer of tough coat.
To avoid reinventing the DIY wheel I am going to direct you to Miss Mustard Seed’s blog that inspired and taught me how to reupholster a French Style chair, . She offers a great detailed tutorial if this is a project you would like to tackle. AND YOU CAN TACKLE IT!!!
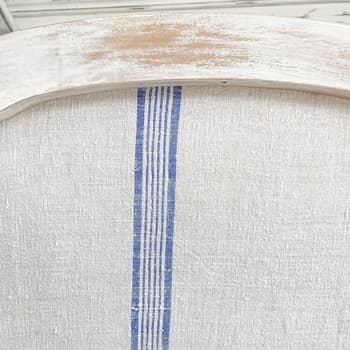
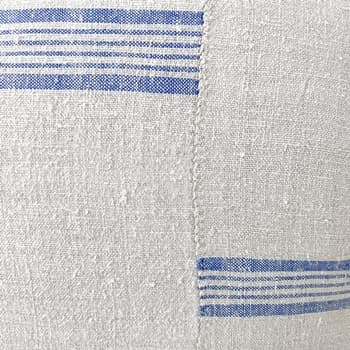
For this project I was so glad that the fabric that I stripped from the chair remained intact so I could use it as a pattern. It is generally good practice to always do this, but in this case it especillay helped me line up the stripes and stitching just so. On a side note something very special about this kind of vintage fabric is the hand stitching. In my work I like to celebrate time and person who carefully did these quality stitches that have lasted decades. It adds so much meaning to these beautiful textiles, I often wonder who this seamstress they might be? And in what setting did work? I wanted these stitches found running down the front of the chair and lining it up worked out great with a pattern.
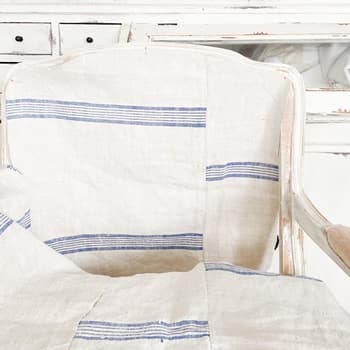
Next I like to tack up my pieces of fabric to get a visual on placement before I reach the staple gun level of commitment.
Here I am happily working on the back of the chair:
*note all the visitors I have wondering about dinner. I had hoped they might forget, but they never do.*
After the back of the chair was done I took on the cushion cover. Cushion covers have given me the most headaches in reupholstery. It has taken me a lot of practice to get somewhat efficient and confident in sewing them. I have even hired a sewing instructor TWICE to work along side me to give me pointers. However I totally think I beginner can sew one. Absolutely. There just could possibly be a bit more moments of frustration, at least that was my experience. But if you are mentally prepared for frustration, hiccups often don’t turn into frustration. So by all means beginners go for it! My first cushions turned out fine in the end, but it took A LOT of patience. I am not trying to be a downer or discourage anyone, quite the opposite. I just don’t want to romanticize the process so that if someone tries this out and it doesn’t turn out the first time they know they are not alone. This is a really good tutorial done by Peg Baker and she is very precise, maybe I would have had more luck when starting out if I had followed a her tutorial. In her tutorial she uses piping, for the deisgn of this cushion I liked it without piping. Also she teaches how to put a zipper closure, I like buttons and use those instead. The buttons take a bit more time, and more fabric is needed for the overlap but it is worth it for me. Also I have found an important step in making a cushion with this hemp linen is adding a bit of padding. I really like a full looking cushion and the woven fabric has a lot of stretch to it, I always end up adding a layer or two of dacron. This cushion was already very full, but it needed a little more padding. I cut a piece that was just about half the size of the top of the cushion and then I cut a piece to the exact size of the entire top of the cushion. I put both pieces in place on top of the cushion with the smallest one under the larger one. I like the bit of cozy fullness it added to the seat.
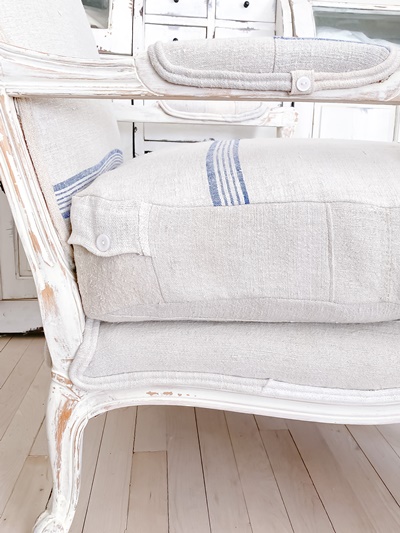
When I put the cushion back on is when I had my ahhhhhh moment, the chair was starting to come together. It takes a while to get to this point with upholstery, but it is so sweet and worth the wait to feel like your vision is coming to life. Also you may notice on the bottom left there is a stripe that I patched in. I felt like it needed one more stripe and that is the beauty of this pieced togther look of the fabric is that it gives freedom to add patches.
Next up was the bottom of the seat. I used modern canvas for the part of the seat that would be covered by the cushion, this is fairly typical, but also I needed to because I was running out of the vintage hemp fabric. To be honest here, this part took me the better part of a day. It is tricky because you have to make cuts to fit around the legs and arms of the chair so that the fabric is smoothed down in place, but you can’t cut too much then you are left with too little fabric. In someplaces the trim can help cover some small spaces in the fabric, eventhough it is just a half an inch it can make all the difference. I am glad that I took my time with this seat, in the end it turned out well.
The last parts to the chair left were the fabric for the arms and the trim. Picking the right trim can stress me out. It can a make or break part of the entire piece. I feel like sometimes its hard to find a trim that looks like it belongs with the fabric and doesn’t overpower or detract from it. For this chair I wanted it to blend, and in order to get the color just right I need to make my own with the same fabric. I made my own double welting. And here is yet another tutorial that I did not write, thank you Miss Mustard Seed. Then I secured the trim with a glue gun. I used a small piece of fabric to glue into place where the ends met, I tried to place these parts in inconspicious areas. On the arms where it was visiable I added a button, because why not?
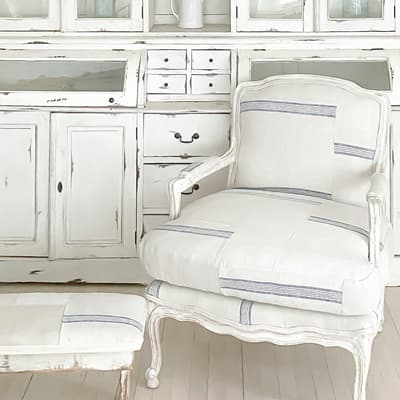
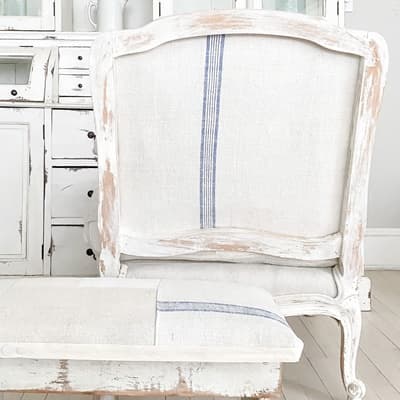
And she DONE and avaliable for purchase with local Milwaukee pick up. All the details are on the shop page.
For quick reference here is a list of the tools I use:
T50 Staples I like to have a couple different sizes handy, I often start with the smaller ones so I can remove them if needed and adjust things. Then when I am ready to commit, I bring out the larger ones. Be sure you get the right kind of staple for your staple gun.
I often get asked where I find the grain sacks and fabrics that I use for my products. But in thinking about that, I started to wonder where the shop owners that I buy fabric from get their fabric?? Not that I want to take over their business, but they are one step closer to that farm family that once used the sacks to haul their grain around or hand wove the hemp sheets to use on their beds. Any antique lover understands there is something magical in finding out more about the original owner of a piece or at least getting a little closer to solving the mystery. In finding an answer to this question, I reached out to Wendy, the owner The Textile Trunk, which is in fact a shop that I frequently purchase from. I have been a loyal follower this business. Her linens are STUNNING, she has the most vast selection of special vintage European pieces, and she displays and photographs them in her New England farmhouse to create a bit of an experience when browsing her online shop.
I asked Wendy about how she purchases her linens and she explained that she has a massive collection (over 4000 listings on her Etsy shop right now) that involves a lot of different processes to purchase each unique piece. She has developed relationships with people all over Europe that help her search out the “most wonderful textiles around” (this statement is accurate, they are wonderful). Many of these pieces come from private collections that have been in storage for many years. She also has traveled a great deal to France following a schedule of hunting for fabrics and eating (my favorite things, what does one need to do to tag along for that??). She went on to tell me that she couldn’t tell me anymore because that would expose her “secret sauce.” I more than respect her holding this information close to her vest. I believe the job that she has is a combination of being an artist and a hard manual labor job. It is a talent to pick out fabrics that are worthy of resell, especially when the investment is great. Then the behind the scenes of cleaning, organizing, photographing, and packaging linen is A LOT of hard work. She deserves all the right to reserve her secrets, she has worked hard to develop them. Although without more information, it leads me to relying on my imagination for the origin of my textiles, but that is okay. I can imagine Wendy traveling the French countryside, making connections, and searching through estates finding special pieces. I am grateful to be the receipant of this hard and magical work.
Photo by The Textile Trunk
I wanted to know more about her business so I asked her about how it started. She refrenced a write up that the author, Nora Murphy did for her book, “Nora Murphy’s Country House Style” about her business. The story goes that she once lived in London, where she would often visit France. She had always had a passion for history, art, and design, so when she came across a piece of fabric from the 1700s on a trip to France “the heavens opened.” There was no turning back at that point, she began her collection, she found in order to continue to purchasing for her collection, she would have to sell some of her fabric. So the business The Textile Trunk was born. She took advantage of her time in Europe visiting textile museums to increase her knowledge of antique fabrics. This knowledge is apparent in her collection.
Photo by The Textile Trunk
I asked Wendy what a typical day looks like for her and her business. She explained that every day is different, this is part of what she loves about her job. And she really does love her job, she said she generally works 7 days a week, but it doesn’t feel like work because she enjoys it so much. Even though the days vary somewhat she said if usually begins with lots of coffee, then she ships orders she has received, and responds to customers. She enjoys this part as a connection to her clients, some of which have been purchasing from her for two decades. Then she told me she usually moves onto photographing a group of fabric. This is the part where she lit up in her email to me. Her passion for this niche that she has created was so evident in her description. I will let her words do the talking: “Each textile has it’s very own story, and there is so much that can be gleaned about these pieces just from looking closely at the details. Whether it’s the printing techniques, dyes, ground cloth, fading pattern, condition etc, everything comes together to speak for these textiles and tell me a bit about their history. I do all my own photographing, which is important to me as it’s a bit like photographing my children! I want each textile’s character and personality to shine through, so I focus on making them alive again and telling their story!!!”
Photo by The Textile Trunk
Wendy goes on to explain that her house is her work place. It is typical to have antique linen draped in every possible place. Her kids have gotten used to moving pieces like an 18th Century curtain out of the way to walk up the stairs.
Photo by The Textile Trunk
In browsing the 4000 listings that The Textile Trunk has on Etsy, I found some favorites. Granted each one is special, but if I had to pick a couple here you go:
I actually purchased some of this while I was doing my thorough research on her shop 🙂 . I have more of my Textile Trunk favorites linked here on my favorites’ Etsy page.
I met Wendy in person at Brimfield Antique Show in Massacusetts. Her booth was piled high with heavenly textiles. She was warm and welcoming and I was happy that I introduced myself. I walked away having purchased a couple of grey striped French grain sacks with some sweet patches. Its rare to come across grey stripes on grain sack fabric and I am very glad I got to work with them. I made several pillows and reupholstered a chair using them.
I recently purchased a hemp table cloth from Wendy that I was able to use to make pillows. I love the tone of the wheaty color of the fabric accented with stripes. This is a bit coarser of material, but I appreciate the way the coarse texture accentuates the fibers that were used to weave the fabric. But its not too coarse for a throw pillow, they will be listed this weekend for sale on the Penny and Ivy online shop.
I am grateful that Wendy does what she does. Her influence has improved my business by supplying quality fabrics and providing loads of inspirtaion through her photography and love for textiles. And she is a pleasure to interact with. Let me leave you with one of my favorite pictures done by Wendy.
Photo by The Textile Trunk
***This post contains affiliate links with no additional cost to you***
I am not the most organized person, I am not the least organized person either. But if I classify myself I would land closer to the least organized person group. Almost everyday I wish that being organized came a bit more naturally to me. Just like everyone else there is a lot that I need/want to accomplish in a day. Included in that need is a bit of rest, otherwise I become worthless. Please know that if you are reading this, and are one of my customers, providing timely, organized, and a pleasant shopping experience is one of my greatest priorities. That will always, always be at the forefront of my mind 🙂
I don’t know what organizational classification that you fall under, but know all should be celebrated, there are strengths in everyone’s approach to their day. Anyway, I have discovered a couple things that have made my life a bit easier in helping me accoplish my to do list that I thought I would share.
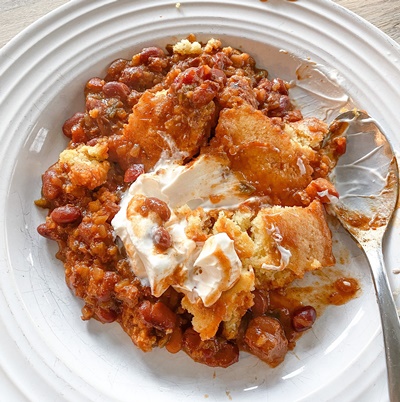
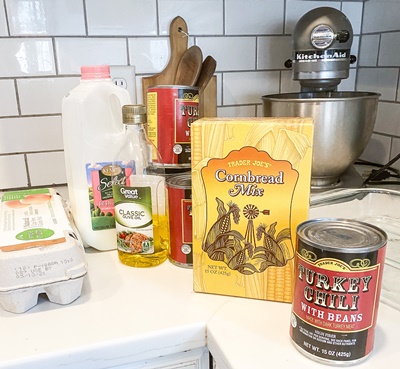
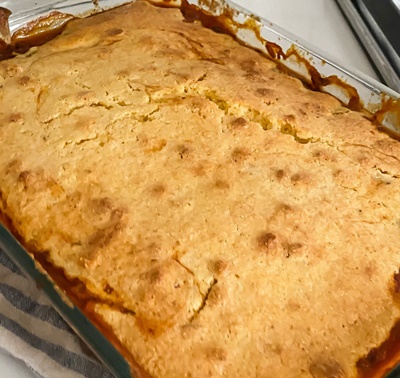
First off is an incredibly easy dinner recipe. It is not a summery recipe, but it may come in handy on a rainy day. It is Trader Joe’s Chili with Cornbread baked on the top. Its not 100% homemade, but its very yummy and takes less than 5 minutes of prep work. I learned it years ago from one the Trader Joe’s sample tables. My family loves it. And a funny thing happened with this recipe…so one Easter a couple years ago I threw I big dinner for friends and as I was cleaning up my husband turned to me and said “I have to bring chili tomorrow to work for our chili cookoff”(reflecting on this story makes me think maybe the people I live with affect my organiztion 🙂 ) First of all my husband doesn’t make anything besides pancakes (he has many other talents), second it wouldn’t have been good if he didn’t participate, and third I was tired of cooking and just tired. So I whipped up this recipe. We (Trader Joes included) won second place. Was it my most proud moment? Nope. But it just goes to show what a good recipe it is.
Here are the instructions to make this award winning recipe:
Ingredients:
-4 cans of Trader Joes Turkey or Chicken Chili (I have used both and both are good)
-1 box of Trader Joes Cornbread Mix
-1 egg
-oil
-milk
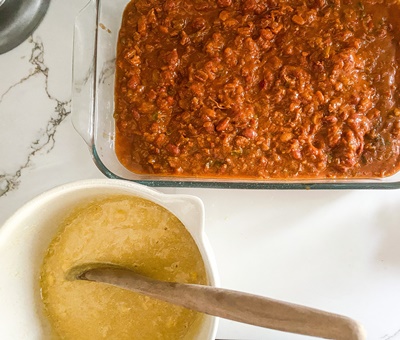
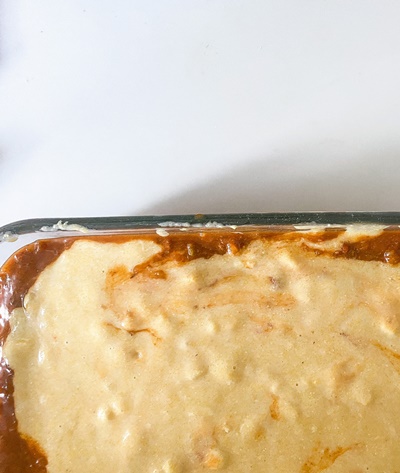
1) Spread chili on an 9 by 11 inch pan
2) Mix cornbread ingredients as instructed on the box
3) Spread cornbread mixture over the chili
4) Bake chili/cornbread pan according to box instructions. I have noticed it takes 5-10 minutes longer than the instructions to bake in my oven likely due to the chili. So keep an eye on it.
5) Let it cool and serve it up with some cheese and sour cream.
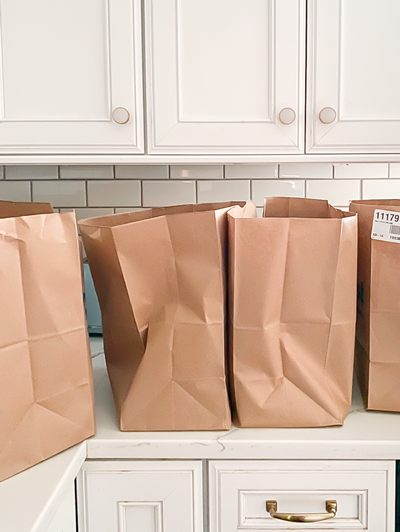
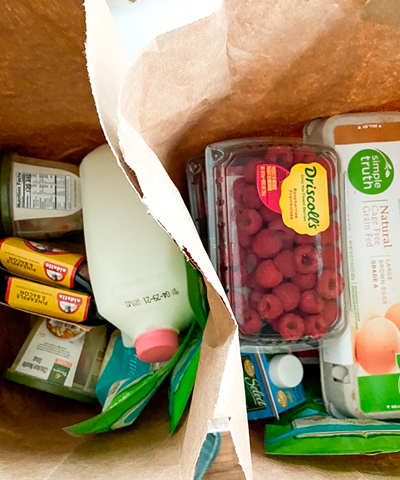
Another thing that has helped me so incredibly much is ordering groceries. Maybe I am the last person in the world to start doing this, so my apologies if this old news. But its amazing. It saves me so much time wandering the aisles trying to find things. It helps avoid me on a bunch of random trips to the store. It keeps me organized in having ingredients for dinner on hand. My routine (and yes it doesn’t happen EVERY week, but when it does I have a smoother week) is to make a dinner menu on Sunday for the week and sit down and take 20 minutes to order my groceries. I am usually able to get the 7 am Monday morning pick up time slot, so I run over to the store first thing in the morning and have fresh food for packed lunches before my kids head out for the day.
One last little thing that I have really enjoyed lately is buying old library books. I believe most libraries have small sections where they sell their used books. At my local library they offer them for $1-5. Thrift stores are a great place to buy used books. I can never remember to return library books. I do think about it. But hardly ever when I am actually heading out the door. See this is a book that waited for days (maybe weeks) in my dining room to be returned, then I moved it to the bench by my door where it waited for days before finally making it to the library.
I feel kind of bad about it. I love the library, and its librarians, I want to respect them with timely returns. Not to mention I have had some NOT pretty fines. But this detail of life is a struggle for me. Buying the used books is a perfect solution for me, and the couple of dollars I spend supports the library. I have enjoyed each read that I have found lately, with zero of return dates. Also I don’t typically need to save every novel I read, but it is nice to have on hand to pass it on to friend.
Also these two books were very good. Both were serious and sad. But they showed the beauty in human resiliency, which for me is such a powerful thing to be exposed to. I always enjoy when I can learn a little bit of history while reading a novel and both provided that.
I hope this not decor related post helps you a bit to make room in your days for things that you really want to do. Please let me know if you have any tips or tricks to stay on top of it all.
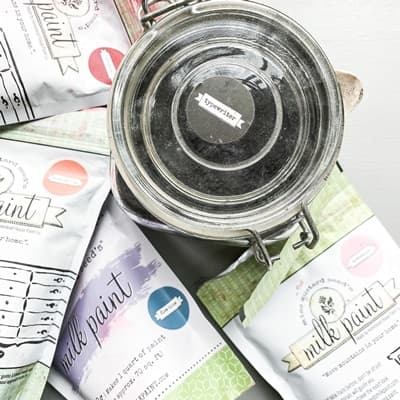
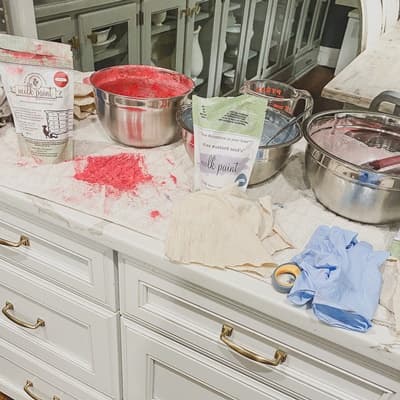
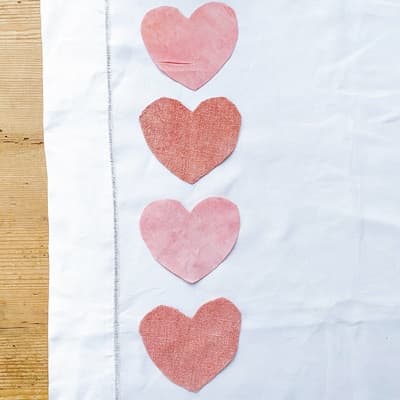
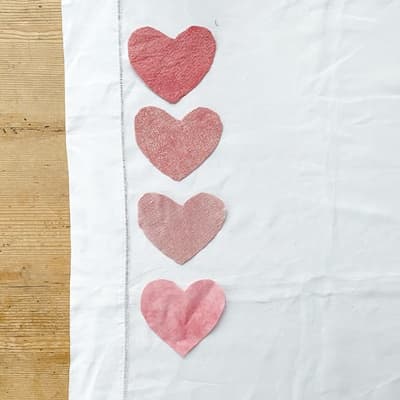
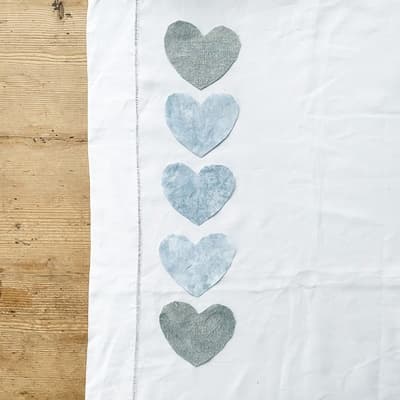
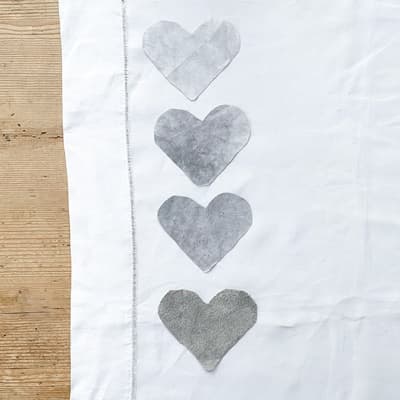
I partnered with Miss Mustard Seed’s Milk Paint to experiment with using their paint to dye fabric. I must say I am quite pleased with the results and learned a lot. MMSMP is the paint I use the most. One of the reasons for this is the colors, they are so pretty. I generally use neutrals for my projects, but this project was colorful, and fun. I used 5 different MMSMP colors: Tricycle, Apron Strings, Typewriter, Flow Blue, and Arabesque. I was surprised which color was my favorite, more on that later.
If this is a project you would like to do here is the process I followed and what I learned:
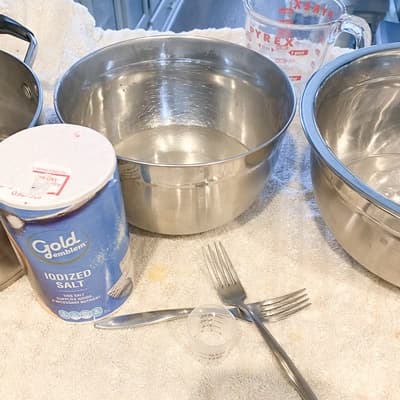
Supplies
-Miss Mustard Seed’s Milk Paint
-Natural fiber (cotton or linen) light colored fabric
-Salt
-Bowl
-Spoons/forks/tongs
-Old towel or drop cloth
-Gloves
-Hot water
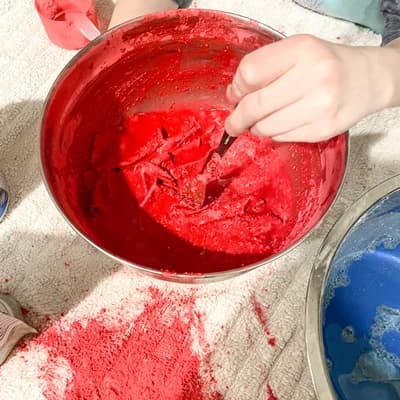
1- First get your set up ready for a mess, with towel or drop cloth in place. Use a bowl that you are okay with getting ruined to place 2 cups of hot water and dissolve 1 tablespoon salt into it. Then add 1/2 cup of MMSMP paint powder to the water/ salt mixture and stir for about two minutes to get it all mixed into liquid form.
2- Make sure your fabric is clean and completely wet. So run your fabric through the washer. DO NOT PUT IN DRYER. Take wet fabric and immerse in paint mixture.
3- Let the fabric sit for at least 10 minutes, stirring occasionally.
4- Remove fabric and rinse with water.
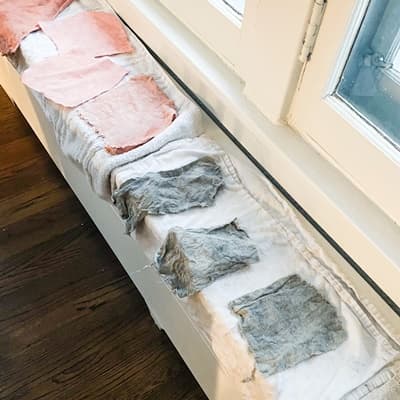
5- Let air dry, then iron fabric to help set the dye. Make sure your iron is clean before ironing something else : ).
6- Lastly use a washer and dryer to wash (using a little bit of detergent) and dry the fabric.
Lessons Learned
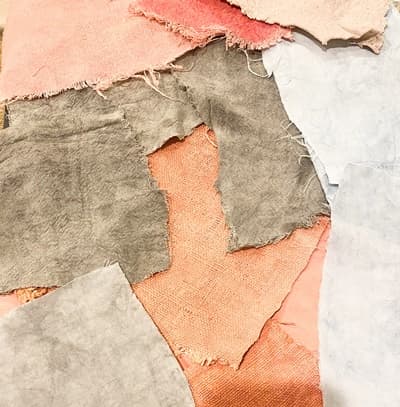
– All the colors I used were successful in dying fabric except Arabesque. The colors were lighter variations of the paint, but they turned out nicely. I believe Arabesque was just too light, it is such a lovely color, but it quickly washed out the fabric using my process.
Apron Strings
Tricycle
Flow Blue
Typewriter
Arabesque
-I used a couple of different kind of natural fabrics and mostly liked the variations on how they absorbed the dye. I used stark white linen, natural color antique hemp linen, and the affordable option of a modern day oatmeal cotton drop cloth. All were a little different, I liked them all.
drop cloth – hemp linen – white linen
-I wanted to get a series of 3-4 pieces of fabric that were different shades of the same fabric, an ombre look. I had some success with two shades, but after that I wasn’t able to acheive a variation in the shade doing what I tried. First I tried four pieces of fabric and put them all in and removed one at a time after 10 minute intervals, so the first piece was in for 10 minutes and the last for 40 minutes. I really didn’t see that much variation in the color after the fabric was washed. Then I tried 3 minute intervals with Typewriter, that was a bit better because the first piece of fabric I removed ended up with just a tint of the dye that it contrasted well with the remaining pieces. However I didn’t see enough of a contrast in the remaining pieces and I even tried adding more paint powder without luck. I am not saying this can’t be done, I am sure that one of you has the answer to achieving this and please let me know when you do.
-I did not see much difference in leaving fabric in the dye for 10 minutes versus 1.5 hours.
-This recipe of 2 cups of water was suitable for about 1-2 feet square piece of fabric.
– I learned I enjoyed this project and will be doing it again! The possiblities on what to use the dyed fabric for is endless.
-Finally I learned I love, love the color Apron Strings. I am generally a blue/green/neutral girl. But the outcome of these pieces of fabric with the salamon color made me so happy, it was my favorite!
Have fun, and let me know if you have success!!
*Disclosure: This post contains affiliate links at no additional cost to you.*
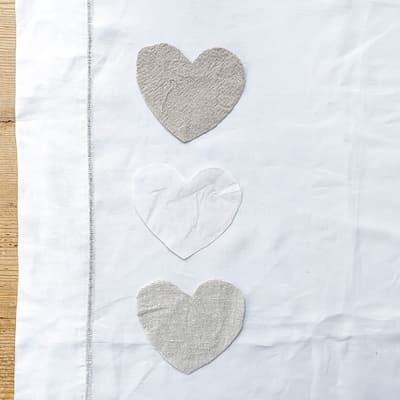
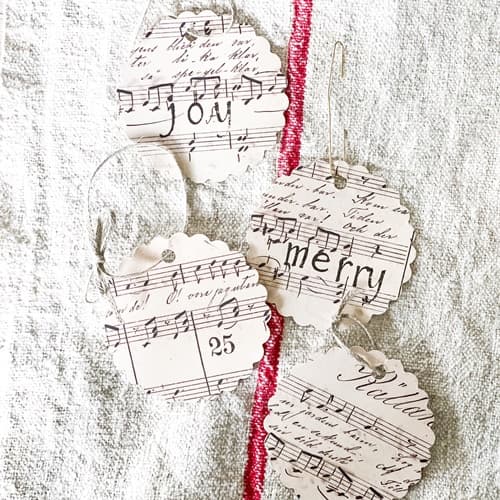
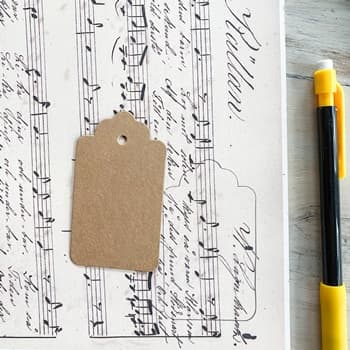
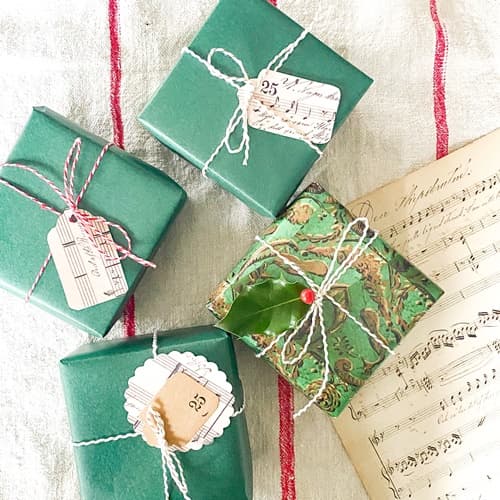
During my history of searching for treasures I have found some pretty special handwritten letters from dating over 200 years ago. I believe the handwritten script is a piece of art. Recently a friend who knew me well discovered these antique handwritten Swedish sheets of music in an antique store in Massachusetts. They are stunning. Lucky for me, she brought me back a pile of them. I am certain the orignal composer never imagined someone using them to make holiday decor. I hope that this is a celebration of their beauty and work that went into the pages. I am really enjoy the charm and history they add to my home. I got several projects out of just four pages of sheet music.
PAPER CHAIN
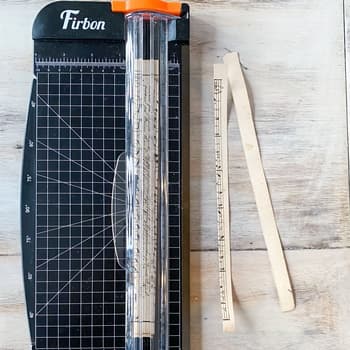
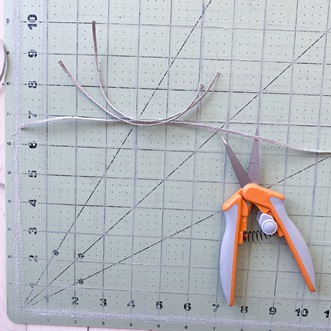
First up is the good old fashioned paper chain. I haven’t made a paper chain since elementary school, but they made an impact that has lasted decades. A paper chain for elementary kids in the 1980s was most definintely THE project. This chain used two 8 1/2 X 11 inch pages and ended up being nearly 10 feet long. I cut approximately 1/3 inch strips along the 8 1/2 inch side. Then cut those strips in half, so the strips ended up being about 1/3 by 4 1/4 inches. Next I weaved the chain together, and I secured the links with a glue gun, but if my memory serves me right a stapler or tape or a glue stick will do the job.
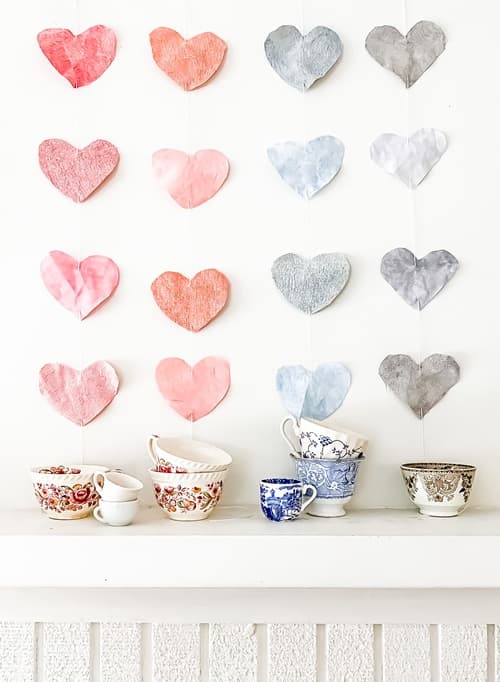
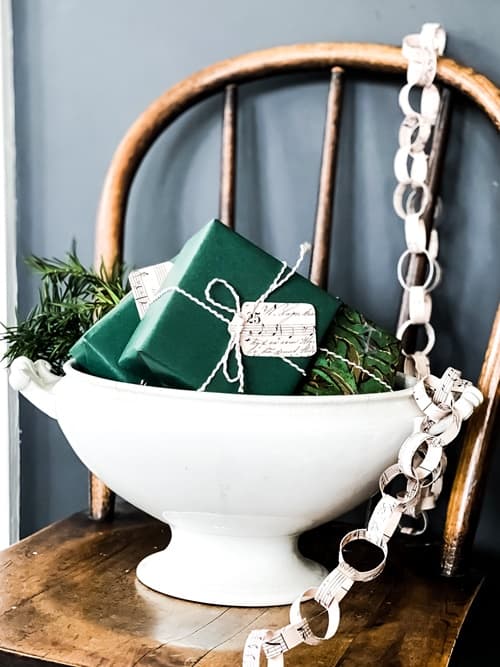
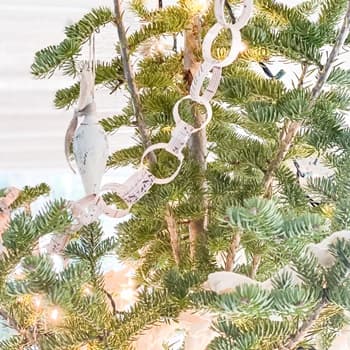
FRAMED ORNAMENTS
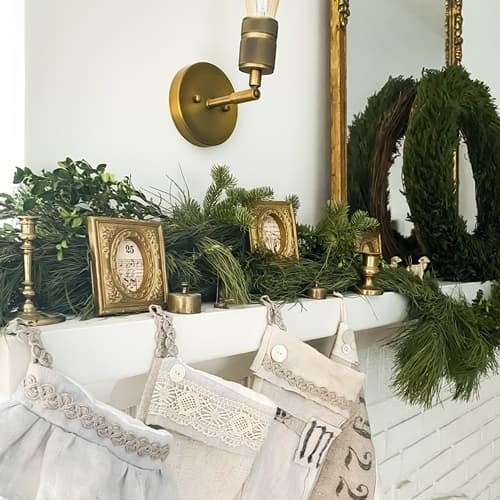
I love framing these antique pages. I have two larger frames with antique French letters displayed. They are some of my favorite things in my home. Having a couple of small frames with these music pages naturally seemed like their destiny when they landed in my house. I had these small frames that I picked up at Goodwill and I am really happy about what they add when tucked into my garland. Another idea is adding ribbon to the back to make an ornament. I did add a little stamping to a couple for a little extra.
ORNAMENTS & GIFT TAGS
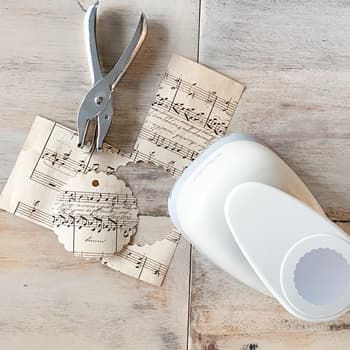
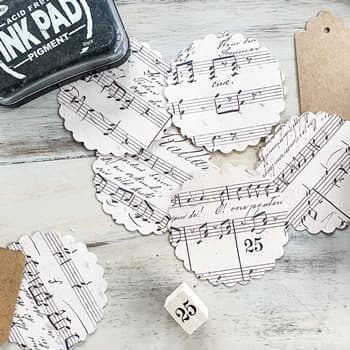
For the ornaments, I used a paper punch similar to this one to create a cut out. Then punch a small hole at the top. Finally tie a ribbon or string through the hole or adding paperclip(another trick I learned in Elementary school) to hang the ornament and you are DONE. They are great with or without some stamping, you decide.
For the tags I just traced a gift tag that I had on hand, but this tool would come in handy if you are going to make a lot of them. I love the detail they add to wrapped gifts. If there was ever a time to have fancy wrapped gifts, I think 2020 is it.
I hope this helps give you some ideas for easy projects. If you are antique shopping and find some pretty old papers and the price is right…GRAB THEM!! There are so many pretty uses for them.
Also speaking of pretty paper, the wrapping paper with the design was purchased through the artist, Jennifer Lanne’s online shop. She does inspiring work and sells them in many forms.
*Disclosure: This post contains affiliate links at no additional cost to you.*
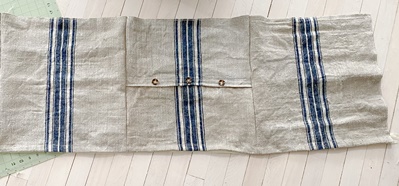
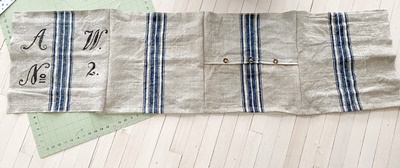
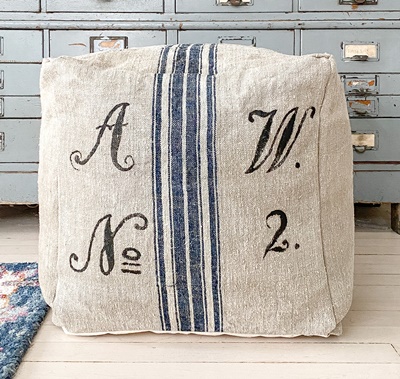
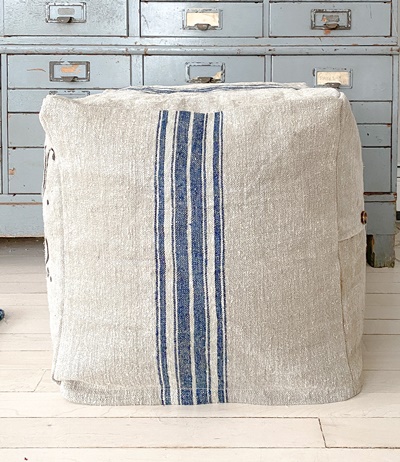
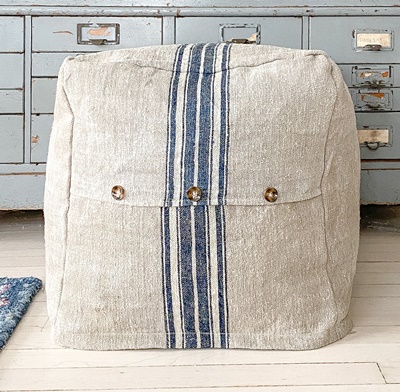
If sewing isn’t your thing or you don’t have the time but would still like to own a grain sack pouf…this pouf along with a couple others will be for sale. They will be avaliable at the grand reopening of Trend+Relic in St. Charles, Illinois on May 1, 2021.
Supplies
–Pouf insert, for this project I used a 16 inch cube insert. I generally just find an affordable pouf that advertises that it has a removable cover, so I can remove and use the insert.
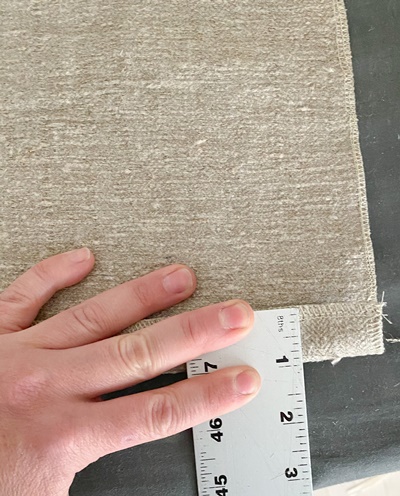
-3 pieces of choice washed fabric measuring 17 inches wide by 18 inches long for the sides (measurements depend on your pouf size, add one inch for seam allowance for the width and two inches for the length for fabric to cover the zipper)
-2 pieces of choice washed fabric measuring 17 inches wide by 17 inches long for side and top (measurements depend on your pouf size, add one inch to length and width for seam allowance)
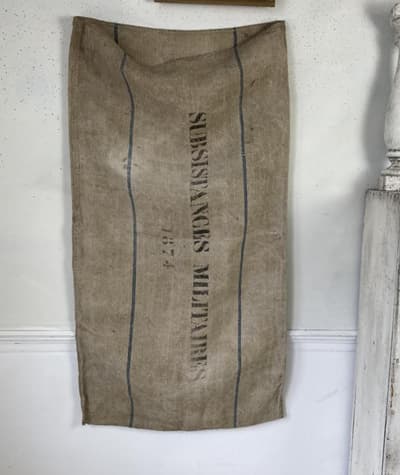
***I typically use one grain sack to sew a pouf this size, I might need a little bit of complimenting fabric to patch it together if I am short on fabric. Some good online shops that sell grain sack fabric include grainsack, Objekts1, and Parna UK.*** Grain sack fabric is great for poufs because it is very durable.
-1 piece of neutral washed canvas fabric for the bottom measuring 17 wide and 17 inches long(measurements depend on your pouf size, add one inch to length and width for seam allowance). You will want sturdy fabric for the bottom.
–Upholstery zipper measuring at least 50 inches (again this depends on the size of your pouf, but have a long enough zipper to go the full width of 3 side pieces sewn together).
-Optional Dacron if you like a full look, and upholstery thread to secure
-Optional buttons
Steps
1) Cut the fabric to size:
-3 pieces of 17 inches wide by 18 inches long for the sides
-2 pieces of 17 inches wide by 17 inches long a side and top
-1 piece of plain canvas for the bottom measuring 17 inches by 17 inches
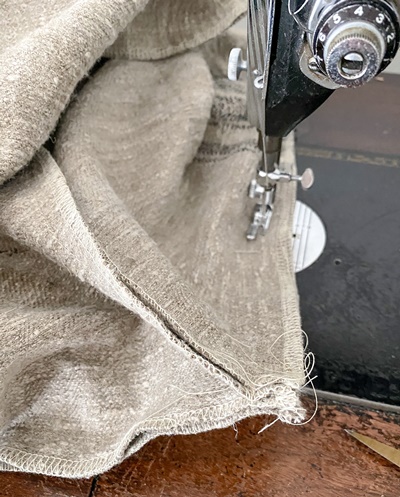
Amateur mock up of the 6 sides that need to be cut
~I have found grain sacks offer enough (sometimes ALMOST enough) fabric for the sides and top of a pouf this size. I have always had to piece together two smaller ends to make one complete side, I like the look of adding buttons. Pssst these buttons don’t work, they are just there for appearance, like a fake drawer. Sometimes I am just short some fabric here and I add complementary piece and it looks just fine.
2) Finish the edges of the fabric pieces with a zigzag stich on a sewing machine or if you have a serger finish the edges. This makes it possible to wash the pouf cover without the ends fraying. ***Make sure all your fabric is washed and dried before starting the project, otherwise it might shrink if washed later*** If you don’t plan on ever machine washing the pouf cover you could skip this step.
3) Place two of the fabric pieces that measure 17 by 18 right sides together, sew with a 1/2 inch seam allowance the length of 18 inches on one side. At the top I start sewing the stitch about a 1/2 inch from the top, this makes it easier when its time to add the top. I like stitch each line twice just to add stability for wear and tear. Then repeat this with the third piece of the same measurement. You will have a strip of three pieces of fabric sewn together like this:
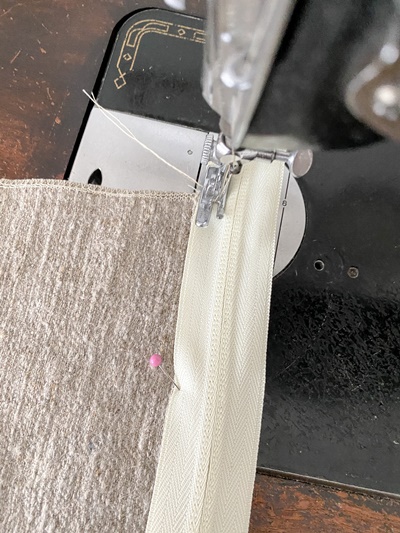
4) Take the long strip of the three pieces of fabric sewn together and at the bottom iron a inch fold in prepartion for the zipper.
5) Pin the zipper in place, I align the bottom of the zipper with the bottom of the folded fabric, and the right side of the zipper is facing the inside of the fold. The zipper should go the length of the three pieces sewn together. Then I stitch it in place using a zipper foot. I sew the top of the zipper to this piece of fabric. I also am sure to add a small piece of fabric to the ends of the zipper to make sure that handle doesn’t go sliding off. When I first attempted making a pouf, I tried to squeeze an insert into one length of a side where I added functioning buttons. That was impossible. You really need to have 3 sides of the cube open to fit the pouf inside.
6) Once the zipper is in place. This fabric should be about 17 inches tall and line up pretty close to the fourth side that is 17 inches by 17 inches. Then sew this fourth piece into place with right sides facing each other on the end of the other three sides, then connect the final two ends to start to shape your cube.
7) Then I add the bottom. I line up the corners of the bottom fabric with the corners of side fabric. I pin the bottom with right side with the right side of the zipper. I don’t add the 1 inch fold this time, I just line up the edges of the bottom fabric and zipper. I carefully sew the other side of the zipper to bottom piece. Then I continue on to sew it together to the side without the zipper, using right sides together, with 1/2 inch seam allowance. I open the zipper a couple of inches now because it gets kind of tricky to do it after the top is sewn in place.
8) I line up the corners of the top piece with the top corners of the side, with right sides together I pin in place. Then I finish off with 1/2 inch seam allowance.
9) Open up the zipper as much as you can and turn the pouf cover right side out.
10) You can stuff your insert in place, zip it up, and enjoy your pouf.
10)If you prefer a fuller look you can add dacron to the insert.
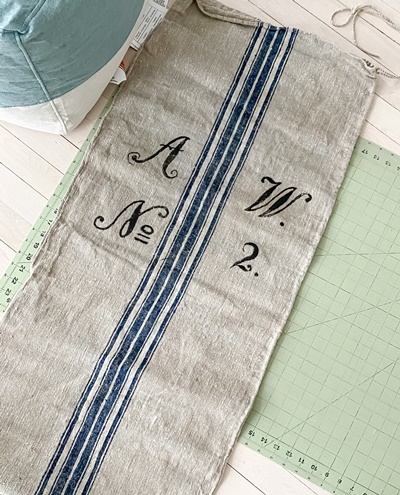
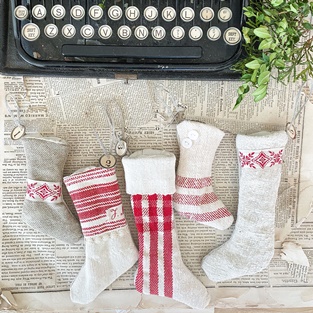
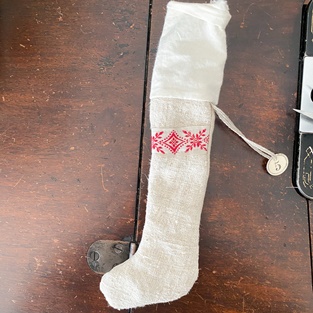
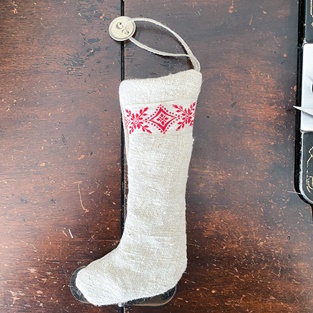
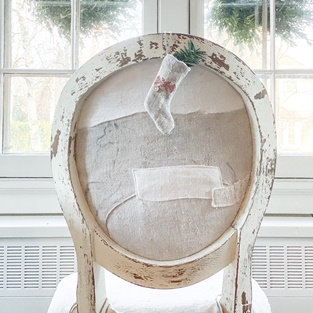
I kind of love these tiny stockings. They have been a bright little spot during this weird time. They are a relatively quick project, which means the mental reward for putting pieces together to create something cute comes faster. That is definitely welcome right now. I have really enjoyed mixing and matching fabrics, sizes, and embellishments to make tiny stocking sets. I am grateful that they have been a very popular item on my website, often selling out. If you prefer to purchase rather than create, please click here to check my shop. If there aren’t any available, contact me for custom set at pennyandivydecor@gmail.com.
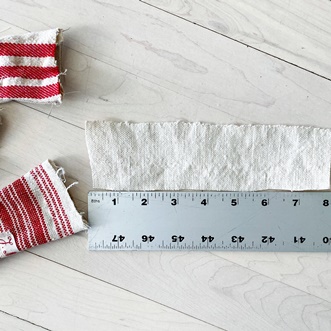
The included pattern is designed to offer 3 options of shapes and sizes of stockings that are approximately 2 ½ inches wide and 5-8 inches long, not including the hanging loop. Click here to download the pattern.
Supply list:
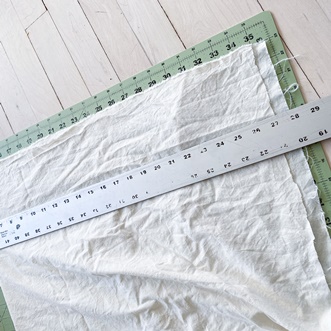
Fabric. Your choice, approximately 10-inch square needed for one tiny stocking. If you are using thick fabric, I recommend just using that for the front and using a thin fabric for the back. It is kind of tricky to turn it right side out if both sides are thick fabric.
A rotary cutter. I think its handy but not essential.
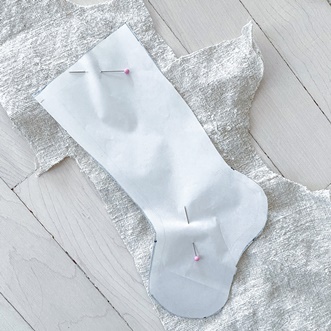
Step by Step
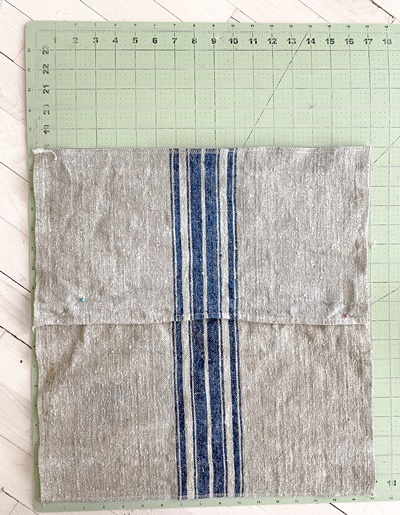
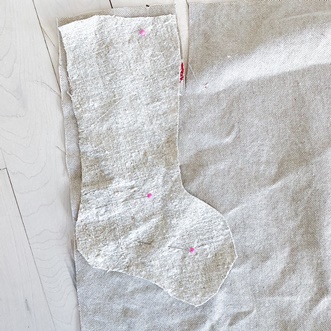
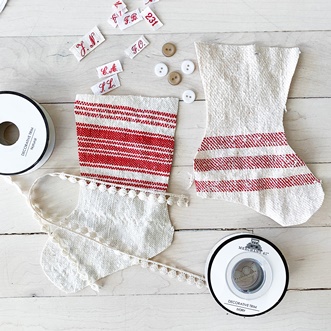
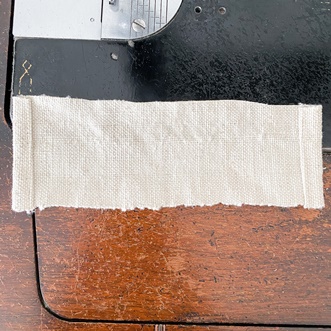
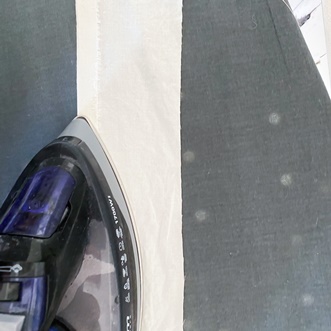
Pick a pattern and cut out two sides. My favorite is always grain sack fabric and this is really thick, so I back it with modern day, thin linen. These are a couple online shops I recommend for grain sack fabric: Linen by Sabine, Textile Trunk, and Grain Sack. As I mentioned above, if you have two sides of thick fabric it is really hard to turn the stocking right side out. It also helps to make my precious vintage grain sack fabric go farther. In addition to the grain sack fabric I also like to add some unique fabrics, I have found some very special ones on Etsy. This post highlights my favorite shops that I purchase these fabric from on Etsy. I also appreciate this project because not much fabrics is needed and its a great opportunity to use unique fabric remnants.
Take the cut-out piece of the front of the stocking and add whatever detail you would like. This is one of the best parts. The possibilities are endless and you don’t need a lot of anything to make an impact on tiny stocking. I love buttons. Any craft store should have a great assortment of trim, I usually pick mine up at Hobby Lobby. This year I discovered this shop on Etsy that sells French laundry tags. They are the sweetest.
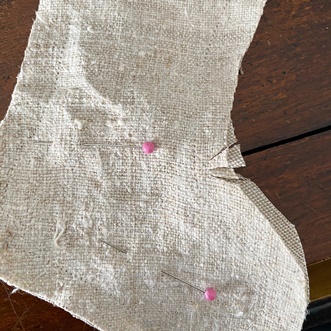
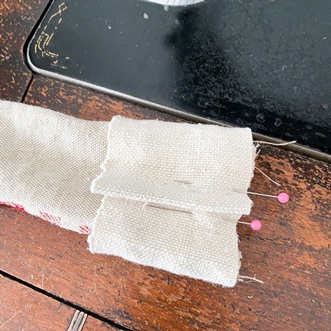
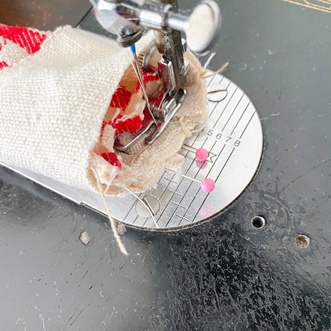
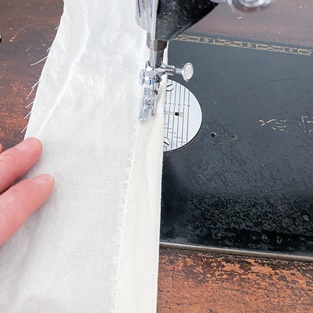
Once your front is decorated to your liking, take it and pin it together with the back piece wrong sides out.
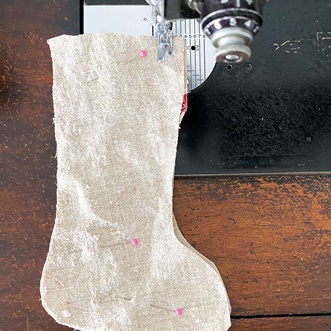
Sew it them together leaving the top open. This pattern was designed for a ½ inch seam allowance. It helps to trim some slits in the spots with curves.
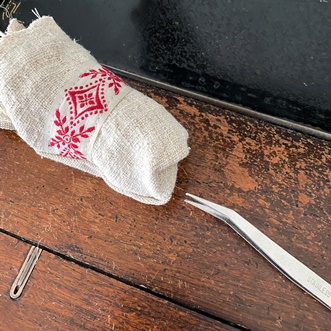
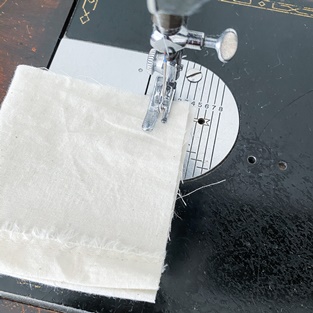
Flip the stocking right side out. Sometimes I need tweezers for the tight spots. Make sure your tweezer’s ends are blunt, so they don’t rip your fabric.
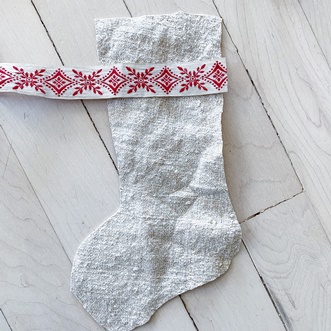
This is an optional step if you want a cuff on your stocking:
Cut an 8-inch strip of fabric at desired length. I cut mine 2 inches high along the finished edge of fabric so I did not have to hem it. But keep in mind you may need to hem your cuff fabric or not, I like frayed edge too. The design choice is up you.
Hem the ends of the fabric strip, I did mine with a 2/8 seam allowance folded over twice.
Pin the cuff off the stocking at the top with the end beginning in the back, wrapping around the front, overlapping the other end and ending in the back.
Do a stitch around the top of the stocking to hold the cuff in place.
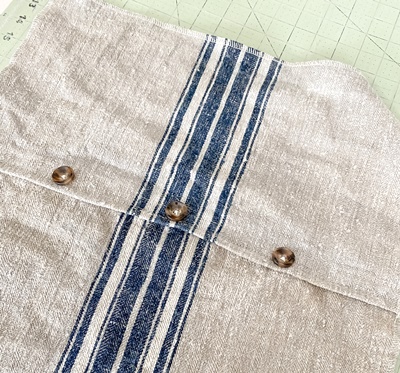
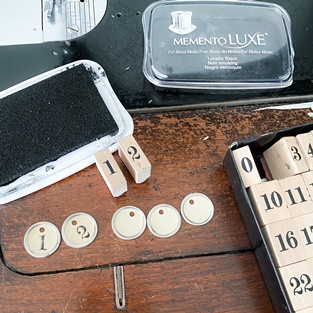
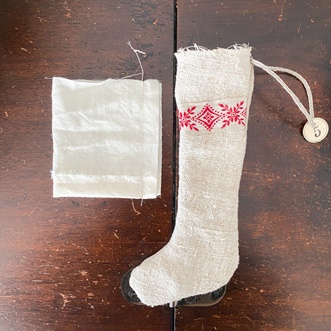
This is another optional step if you want number tags on your stockings. I get them all stamped up and ready now.
I used some vintage tags I purchased off of Etsy, but there are many options to get a similar look. Here are couple:
Let the tags dry while you do the next couple steps.
Cut 6 ½ by 4 inch strips of muslin, one for each stocking. Fold about ¾ inches of the fabric down on the 6 ½ side, iron, then sew in place.
Take this muslin strip and fold in half, wrong side out. Sew together the ends leaving the hemmed bottom and unfinished top open. Set this aside for the next couple of steps.
Cut 6-8 inch pieces of ribbon, trim or string for your stocking loops. Add the number tag to the loop now if you want them.
Then, with the loop folded in half, stitch the ends at the top corner of your stocking. The loop should be looping downward, opposite of how it will end up. You can also just pin it in place, but sometimes my pins shift and I have to do it all over. I think it is easier to quickly stitch in place.
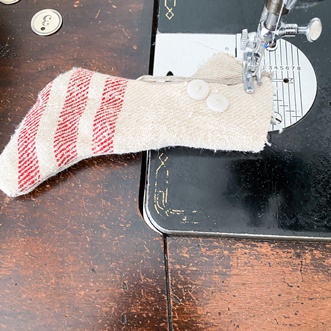
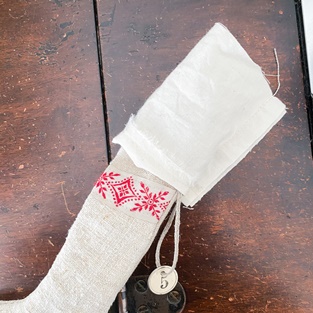
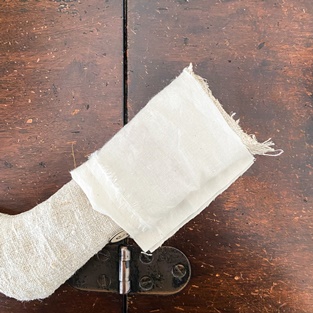
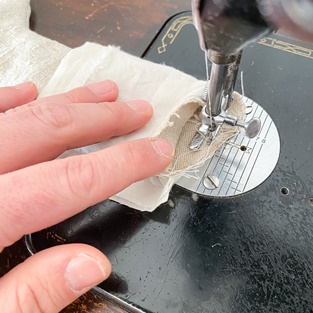
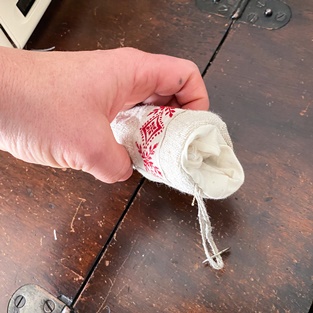
Take your muslin tube (wrong side out, and hemmed side down) and pull it down over the top of your stocking (right side out) until the unfinished tops meet.
Pin in place. Then stitch in place.
Then take the muslin, flip it right side out, tuck it in the stocking.
Voila! You have a tiny stocking!
I’d love to see pictures of your finish products! You can share them with by tagging me in your Instagram stories @pennyandivy.
Please subscribe to Penny & Ivy's email list to receive updates on future sales and a bonus 10% off welcome coupon code