Several weeks ago I found a vintage alphabet stamp set at an antique shop and scooped it up right away, I love anything that is associated with old typography. I didn’t buy it for the purpose of using it, I thought it would be a nice display. But when I got it home I started to think of all the cool things I could use the stamps to create, unfortunately the rubber of the stamps were very, very dry. I have tried to revive them, I will tell you all about it in a bit…
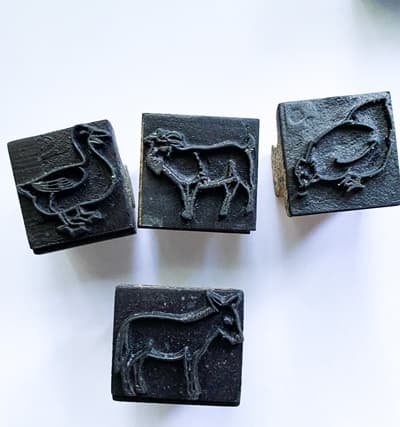
Then in just a couple of days after my first stamp purchase, my friend, Jenn (who I refrence all the time, because she is worth all the refrencing) listed a this vintage stamp set in her shop, Anthology Home. So I bought it, because I had no choice, all those vintage animals are so cute. And the rubber on the stamps are in perfect working condition which was very good news.
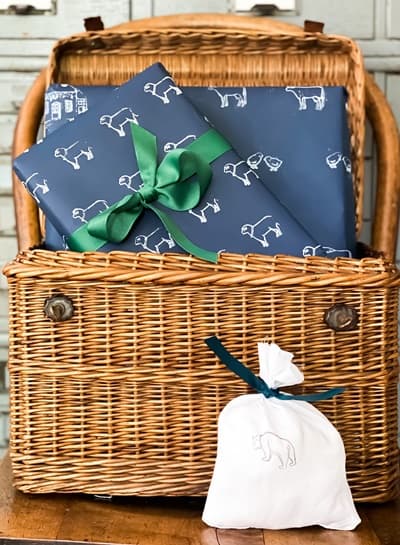
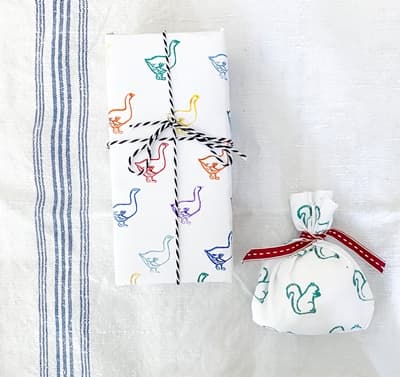
This has to be one of my very best purchases recently. My youngest daughter and I have spent hours creating with this set. It has been really fun to make wrapping paper, cards, and fabric sacks. I now have a dream of desigining wrapping paper professionally. I just thought I would put that out there in case anyone knows someone who knows someone.
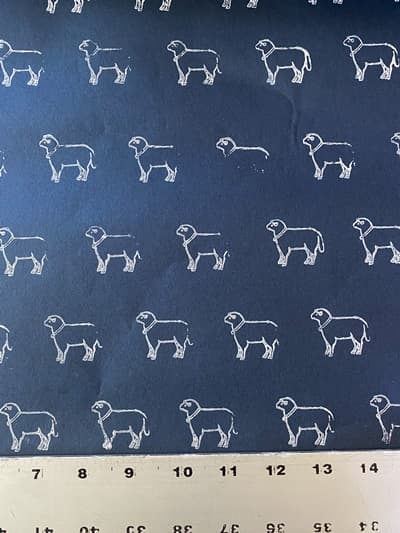
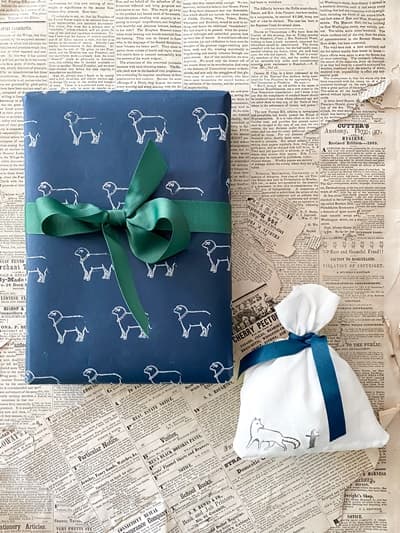
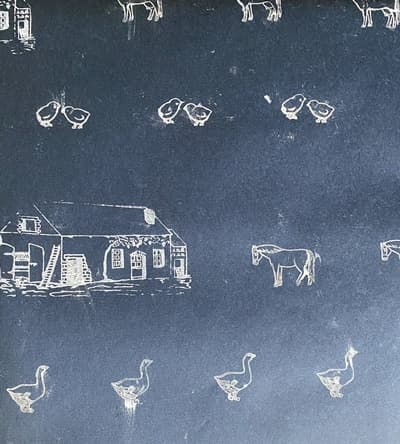
To make the wrapping paper I purchased this matte wrapping paper from amazon. I also got a variety of stamp pads that included this white one. I really liked the white color on the dark paper, but it takes a while to dry, I had the best success when I let it dry for several hours and then carefully blotted some spots that needed it.
Once I tried to rush through the drying step with the white ink and the finished product was not awesome. I do like that there are imperfections with stamping and sometimes the entire impression doesn’t take. But with this try, that I have pictured below, has too much smudging for my taste. As with anything DIY, its a learning process and always incudes a reminder that paitence is a virtue.
If you don’t want to mess with any dry time, I found the black and muli colored stamp pads that are made for mixed media seemed to dry much faster and were easy to use. I should note its handy to have some stamp cleaner available, this did a decent job, but I found that glycerin does a better job when the stamps need a really good scrub.
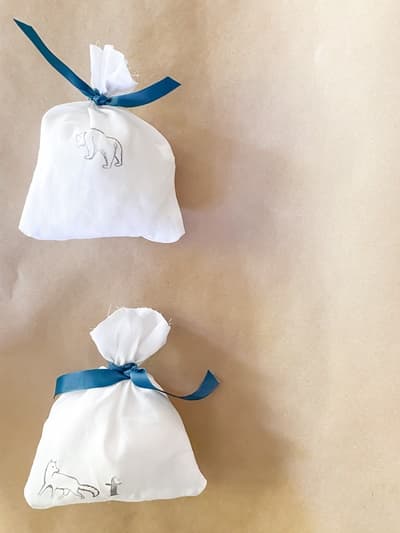
I loved that the mixed media stamp pads work great on fabric. I had some lightweight white fabric that absorbed the ink perfectly. This opens up and entire world of projects…gift sacks, lavender sachets, pillow covers, you name it. Or possibly for tiny Christmas stockings, here is a tutorial for them if you want to check them out, imagine adding some sweet images from stamps.
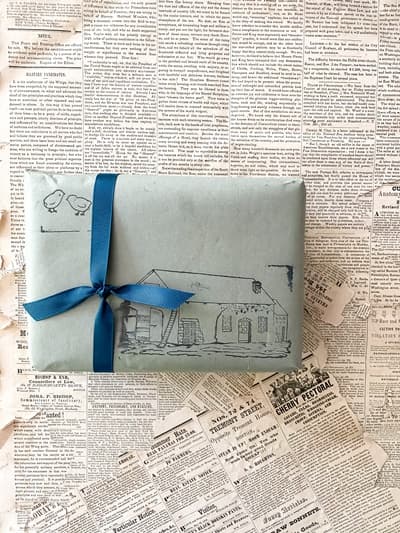
Since I am a vintage stamper now, I have to include stamp shopping when I check out Etsy. Here is a link to my successful search. There are many great options. Maybe don’t start shopping unless you are prepared to buy. Or maybe your willpower is greater than mine and you can window shop all day long. But a litte browsing led me to buying this French cottage stamp for me.
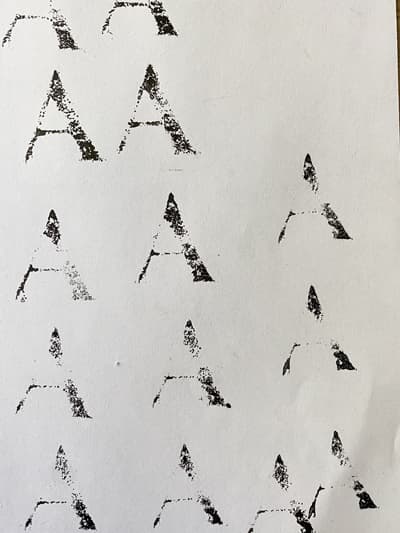
My advice when shopping for vintage stamps online, if you want to buy in order to use them, I would look for listings that have pictures of the impressions that the stamps make. Like I mentioned before the rubber in these old stamps can get dried out so they don’t work very well, like my alphabet set. I did some research on this, and the consensus from the internet is that its possible to bring these stamps back to life if you soak them in glycerin overnight after a light sanding. Some people raved about it. My dried out stamps have been soaking for a couple weeks now, I have seen some improvement in some, and very little in others. I think they might be too far gone, but that is okay, they are still cute and I will find a use for them. Here is my letter “A” that I have been experimenting with using after different periods of time in the glycerin soak, you can see results have not changed much:
Thanks for stopping by and have a great day!! And let me know if you catch the stamping bug, I would love to see your projects, send me a note pennyandivydecor@gmail.com or through Instagram.
***This post contains afflilate links at no additional cost to you***
Last week I stopped by a couple of my favorite antique shops to give myself a bit of a breather from all the summer fun and activity that is happening at our house. There is very little that we need in our house as far as home decor and furniture, but there is always room to change things around if a worthy piece is found. I was thinking my daughter’s dresser maybe needed a change if I could find a good replacement. I did not find a dresser but I found a couple things that were on my wish list for a long time. I know I can’t be the only one who feels like somehow the right pieces find themselves to the right owners. Or at least a shopper/hunter/picker who wishes for an item and somehow it magically appears when you least expect it. I found two items on this wish list of mine in one visit to Goodland Antiques. This is not the first time or last the last time this awesome shop delivered for me. One thing I had been hoping to find was some vintage wallpaper, and boy did they have it.
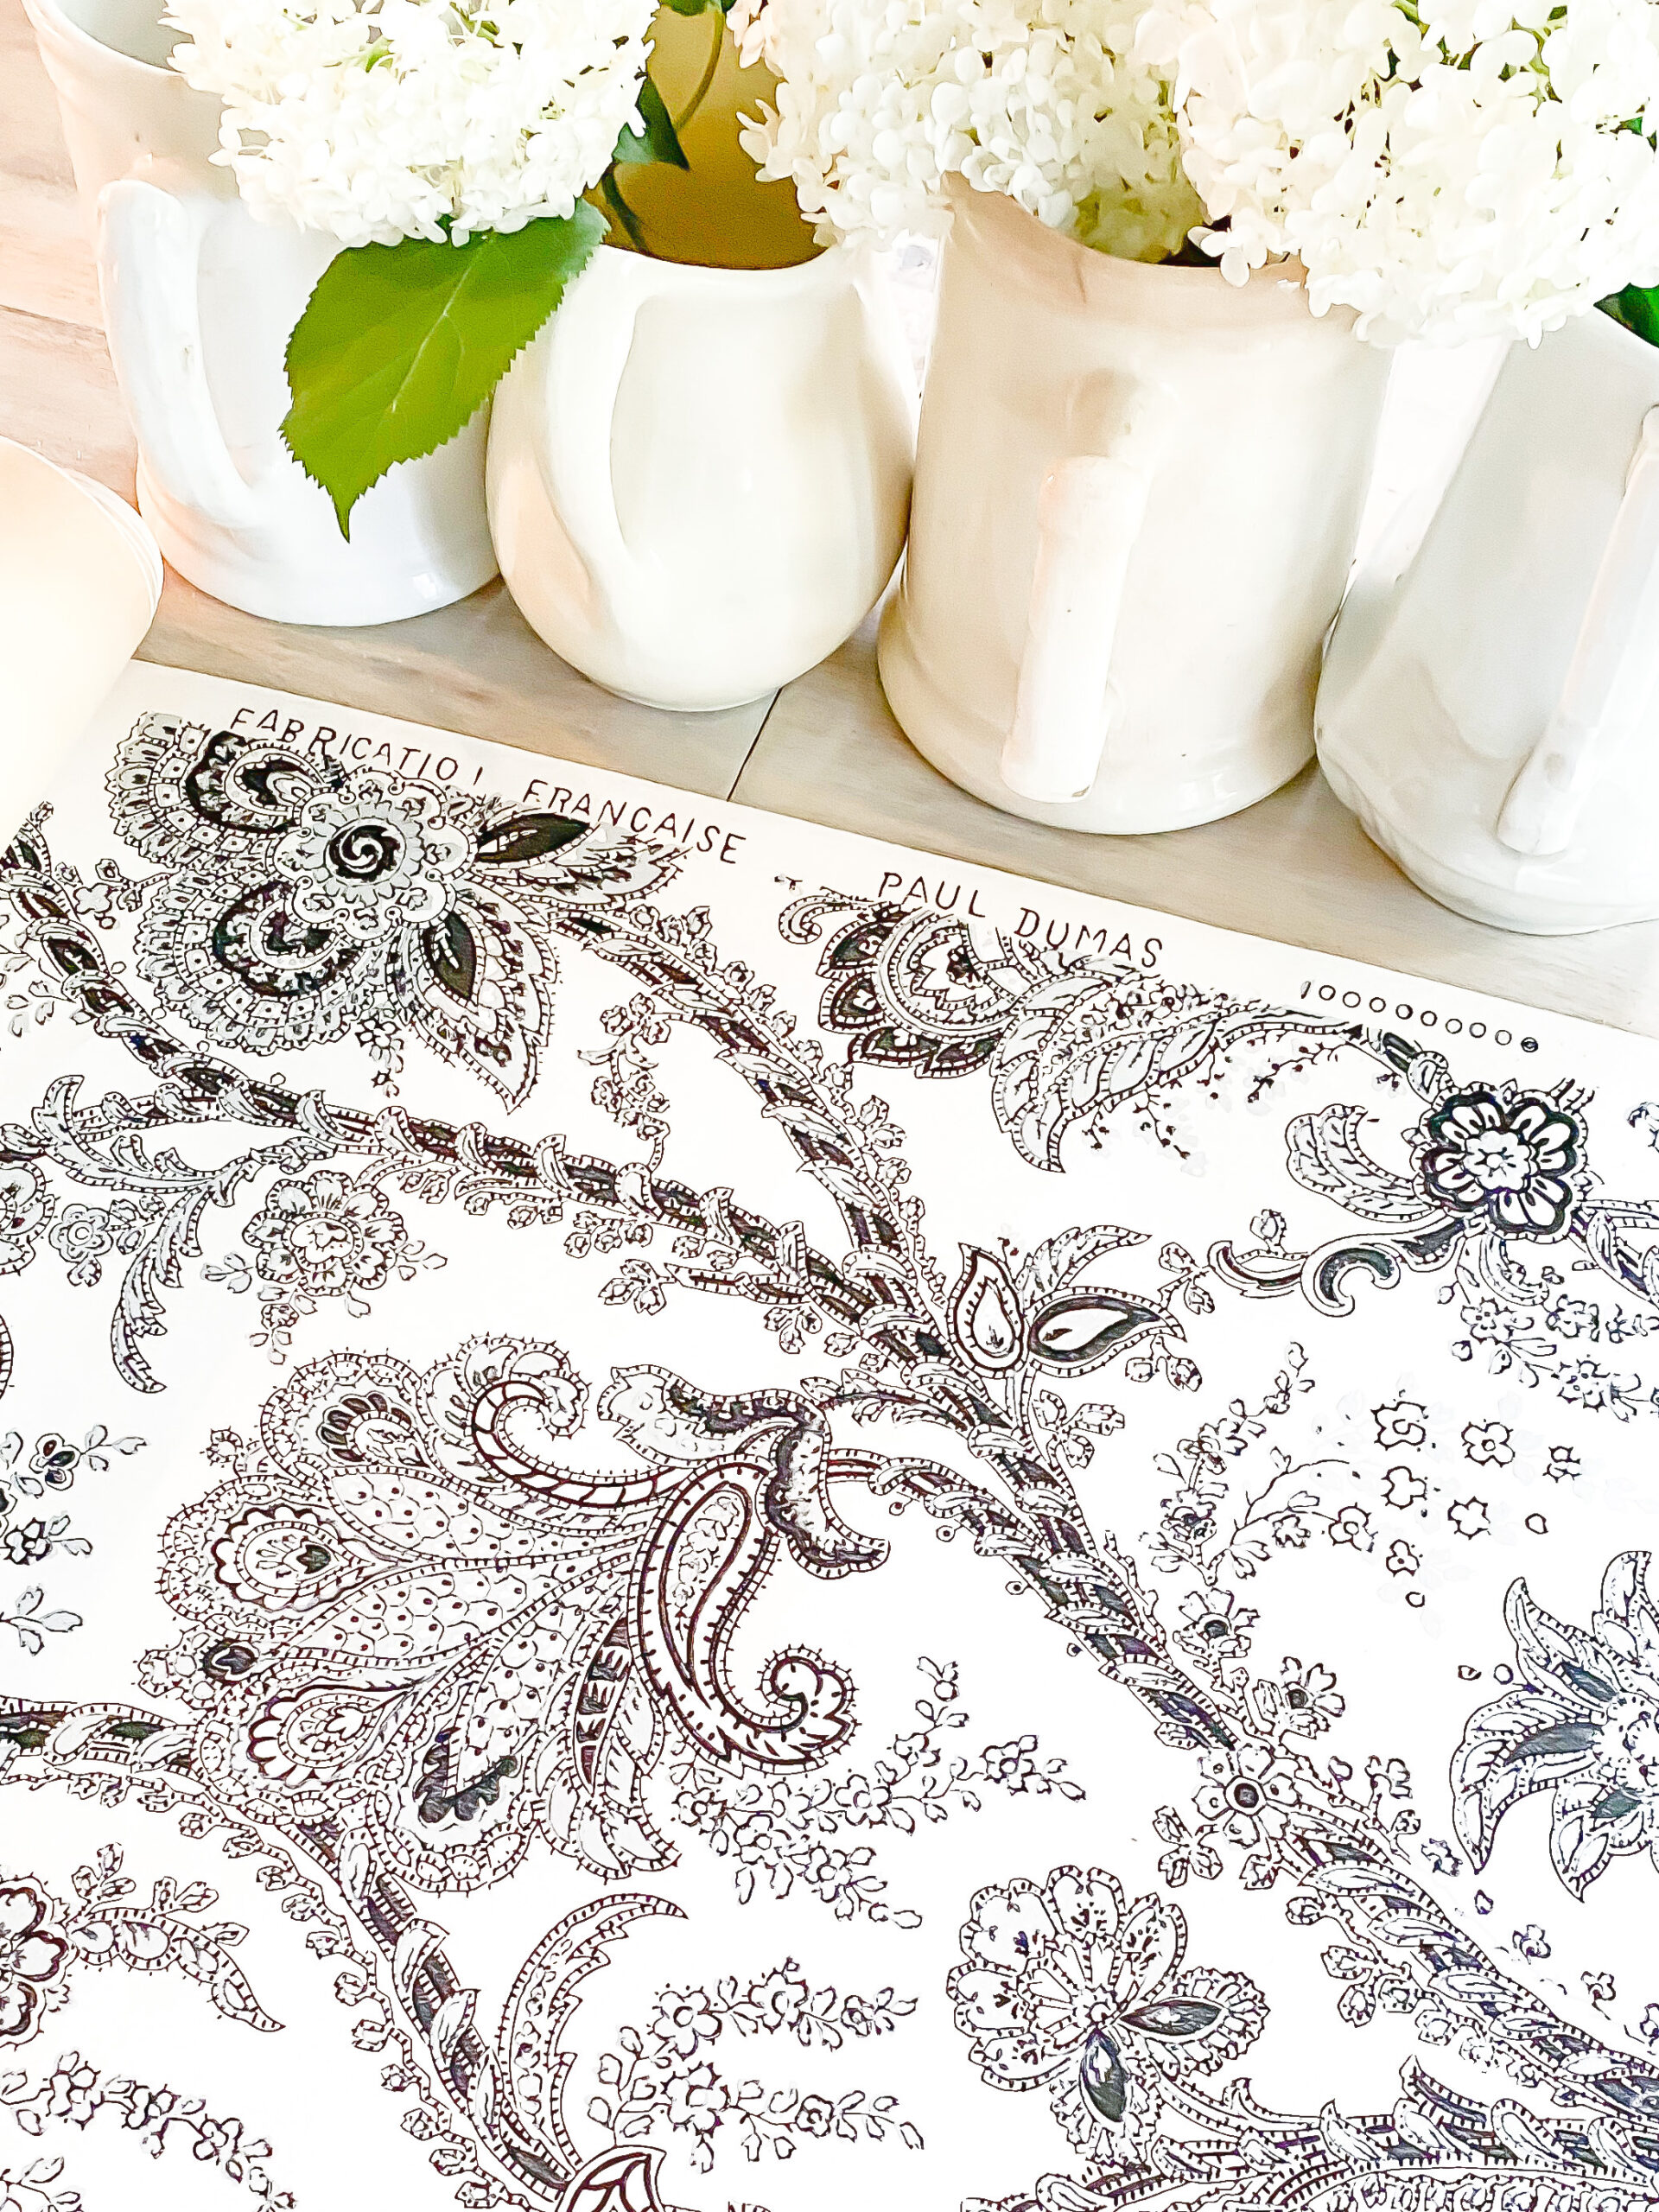
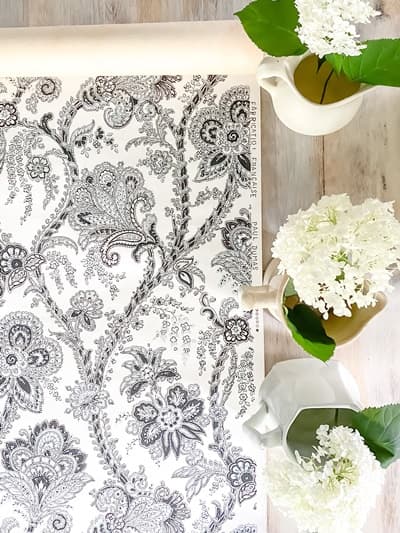
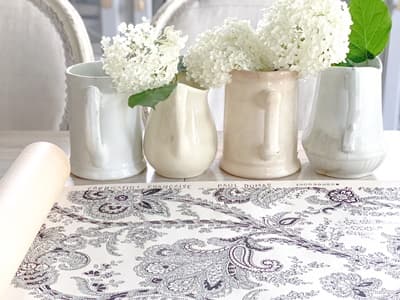
Several months ago I was inpsired by someone I was following on social media who was renovating their house and found some remnants of antique wallpaper. She spoke about possibly framing a piece. This got me dreaming of having a gallery wall pieces of antique and vintage wallpaper. I started searching for vintage and antique wallpaper on Etsy and eBay, I have found only a couple listings and none of them were the style I wanted. So when I unrolled a bit of a roll of vintage wallpaper that I found at Goodland Antiques and saw the beautiful black and grey design there was no thinking, it was coming home with me. I could tell there was a lot of it and I thought I will bring it home and I can use it for wrapping paper or a table runner for a special occasion. I was very excited about my find.
When I got it home I unrolled around 8 feet of it, and I could not believe my eyes, it was so pretty. It was in my colors too. And created by the French designer Paul Dumas and I love that it is written on the side. Also there is texture to design, I think the paint might have been stamped on or possibly hand painted. If anyone knows anything about how they printed or painted wallpaper, I would love to know more, please send me a note. According to my internet research it looks like this is probably from the 1920s. All of these details made me love this find so much more, but they also made me feel a little anxious. Because this is first wallpaper find for me, and I haven’t ever come across anything like it I felt a lot of pressure to not make mistake with it. What if this is my one and only opportunity to own this special paper like this?? But this is not rational, of course I will find something amazing and unique again, but this felt really special. However I do believe if you need/want/desire vintage wallpaper to decorate with too, it will find its way to you too:).
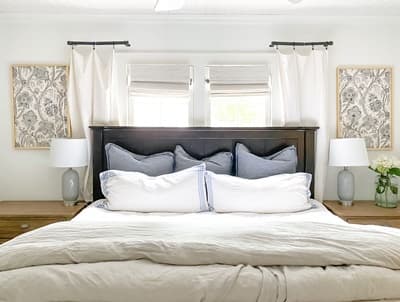
First I knew I wanted to display it in my house somehow. I thought about our bathroom, but then realized it would fit perfectly above our nightstands in my bedroom. It would have been nice to hold out for some large matching vintage frames to use, but I wanted it up ASAP, and also my house has some contemporary elements to it so I just chose these simple affordable frames from Target. I also love that they are clean and don’t detract from the wallpaper.
As what to do with the rest of it, it is NOT going to be used as wrapping paper or a table runner…I am going to wait for a bit until it feels just right. I know it would be amazing lining the back of a cupboard, using it for a book cover, or for creating a special notebook or sktechbook like my friend Toni does for her Etsy shop, Foolhardy Studios. The possibilities are endless. I will probably sell off some pieces in the future, I think rolls of it would compliment a Penny and Ivy booth perfectly. In my wildest dreams I would love to own a studio space one day that I can open up as an occasional shop, and this wallpaper would be front and center in my creative space. I hope you find whatever it is on your want list when antiquing soon!
I recently met the artist, Deanne Fitzpatrick through a mentoring group for creative business owners (The Creative Exponent Mentoring Group). We all meet through zoom regularly, it is an added bonus to see a bit of all the creative business owners homes in the background of their zoom squares. Deanne made an impact right away because she was sitting in a room that looked like it was in an attic with angles and white walls and she was surrounded with colorful yarn. She was organizing some yarn in preparation for her next project while engaging with us. It was apparent that her yarn was an extension of who she was. When she contacted me a couple months later and asked if she could send me one of her rug hooking kits, it was an immediate “yes.” I wanted to work with the beautiful yarn that I saw on the zoom call. It would be something new, but not completely different than working with fabrics. Maybe.
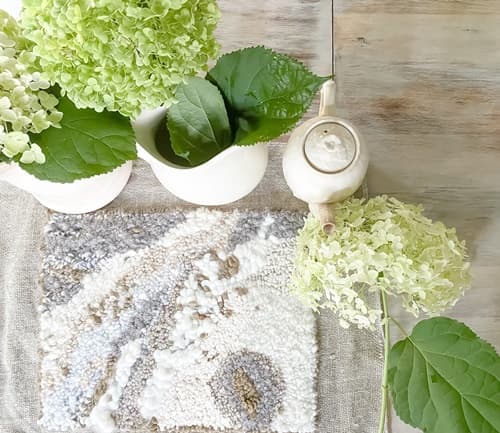
She sent me a kit to hook a small abstract rug with neutral colors. Just my thing. I am not sure if she researched me or not, but she nailed it with her choice for me.
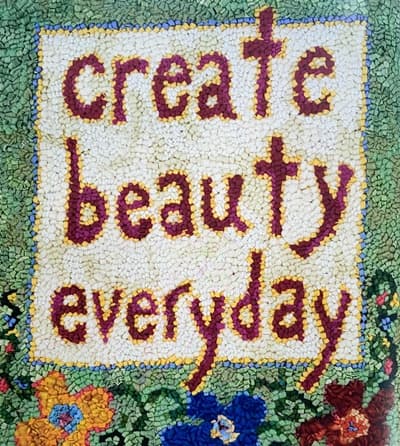
Included in the package were two of her books she had written. Both approriately titled, one being “Making a Life,” and the second being “Inspired Rug Hooking.” I am not sure what I expected with the books, probably more of them being in tutorial form as to how to rug hook. Although there are some pointers the books are much more about how Deanne lives her life as an artist. When I opened the the book “Making a Life,” I was so inspired artistically and personally. She speaks about how rug hooking is s part of her, and in turn how she learns about herself through the creative process of rug hooking. I loved reading about this in her words. I can relate to some of these feelings that she experiences when creating to what I feel when working with my fabrics. There are pure moments that happen that make me feel like I understand myself the best when I am creating. This is almost never about the final product but about the process. I found inspiration for my artisitic self, but I believe that her words carry over into all aspects of life. She writes of “creating beauty everyday.”
I do think if you are artistic, and really have personal connection with your craft, you find a way to incorporate it each day. But I also think everyone should pause and realize that they create beauty every day. This is the great joy in life. Every day, even the really hard ones can have a bit of beauty in them. Beauty is created through a homemade meal. Beauty is created by teaching a child to read. Beauty is created by sending a note to a friend. Beauty is created by making sure those around you know they are loved.
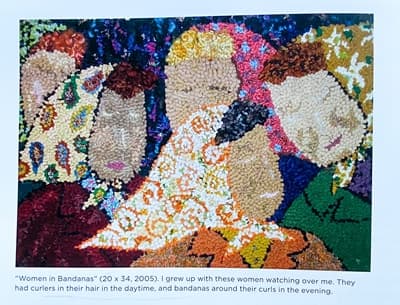
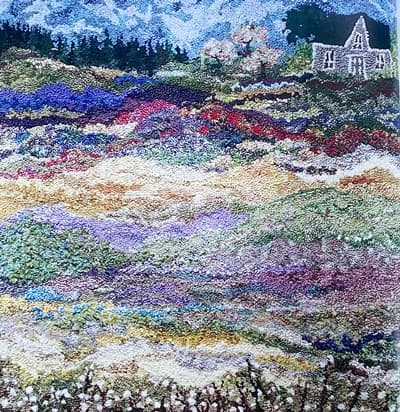
The rugs Deanne hooks are those of her life. They are display the beauty of the ordinary. And how she sees them. Some of my favorites include scenes of villages with cottages and ones that are women that are clearly friends supporting each other.
Her art is a creates an experience of seeing how she sees things. There is a quote from her book “Inspired Rug Hooking,” that says “My rugs of houses are picturesque, but when I hook them I imagine the houses as containers for lives, not just pretty scenes.”
Now I had the opportunity to try rug hooking for myself. The kit showed up with very little instruction, which is good for me because I get very impatient with reading instructions. It is a pretty straightforward task. But I also think that Deanne believes offering minimal instructions gives one the opportunity to find their own creativity through trial and error. She encourages beginners to approach it without fear of making a mistake. She has a quote from a friend in her book that says “there is nothing worse than being afraid when there is nothing to be afraid of.” I know it can cripple an creative activity if one is too afraid of making mistake. I don’t think mistakes are bad. Frustrating, yes, but if learned from and help to develop creativity they are good. I found a quote on her website in the beginner section where she says “There is no right or wrong to hook rugs. Just your way.” There is a lot to learn from having at it and finding your way. However if you need more instructions or pointers, she provides it. She does offer courses, including a free beginner course if you sign up for her newsletter (I do like getting her newletter in my inbox, it offers a positive thought and pretty glimpse of her projects). She also has a weekly Facebook live course. She is there to assist or encourage anyone to try this form of art.
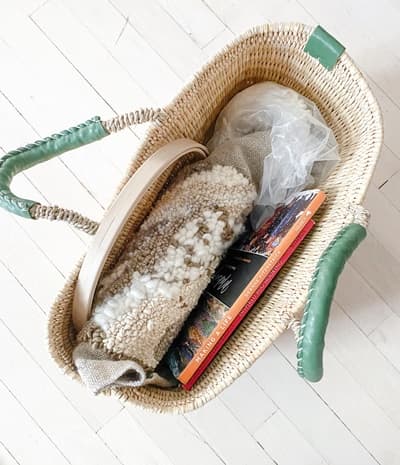
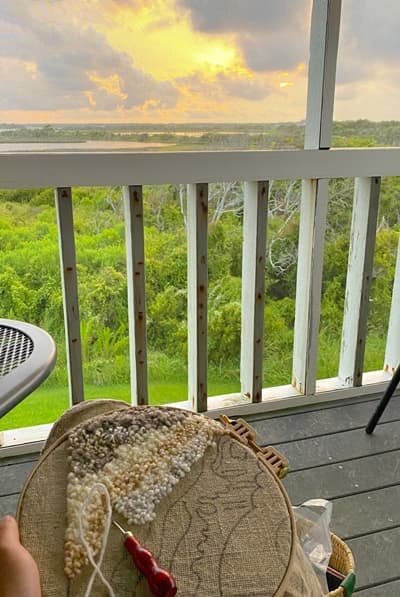
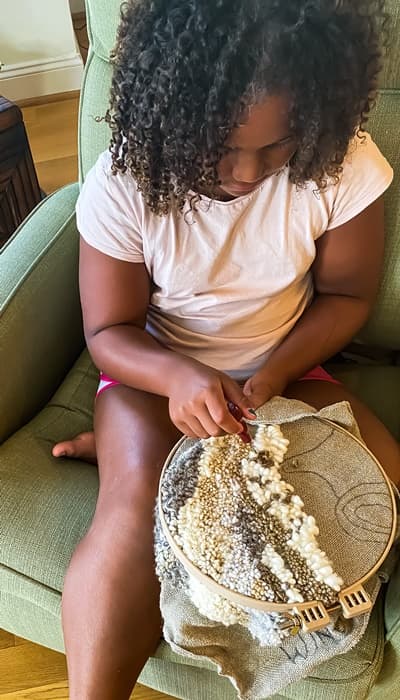
Admittedly it took me a little bit to get the hang of it. And during my first couple of hours I thought this is not my thing. But I ended up really enjoying it. I did the bulk of the hooking my little rug while I was on family vacation where we spent a week at a beach house in North Carolina with some of our closest friends. It was really nice to have something portable to work on while sitting on the deck, watching TV, or riding in the car. It feels good to have my hands moving and made our very, VERY long drive go much faster. Also it peaked the interest of some of the kids who were on the trip with us. My friend’s 7 year-old, Blythe, took over my rug couple times. She was very patient and commited to getting her hands working to hook some of the yarn for me. I left it with her once and came back to a bunch of random olive green yarn hooks throughout the piece. She was definitnely following her own creative inclinations. But it was perfect. I kept them and sprinkled some more random olive green throughout the rug. Its my favorite part.
On Deanne’s website her shop offers a variety of kits, each one more charming than the last. I am eyeing a couple of them right now, remember how I said intially I didn’t think it was my thing, well that has officially changed. It is great project to pull out for a couple minutes or a couple hours depending on how your day is going. It is a slow project, but relaxing. The kits also require very few tools, which is really nice when trying something new. Sometimes a new creative venture can break the bank with all the tools required.
It am certainly glad that my path has crossed with Deanne, it has been an joy learning about her and her artwork.
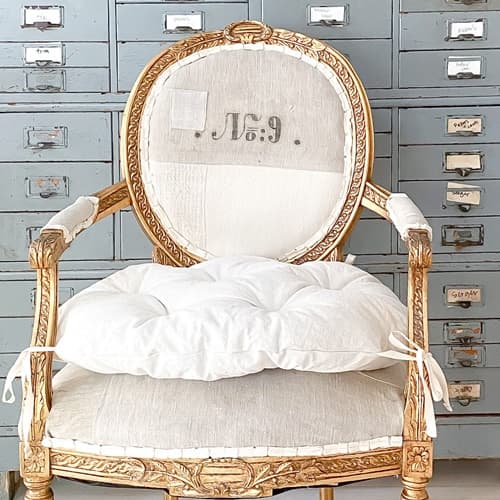
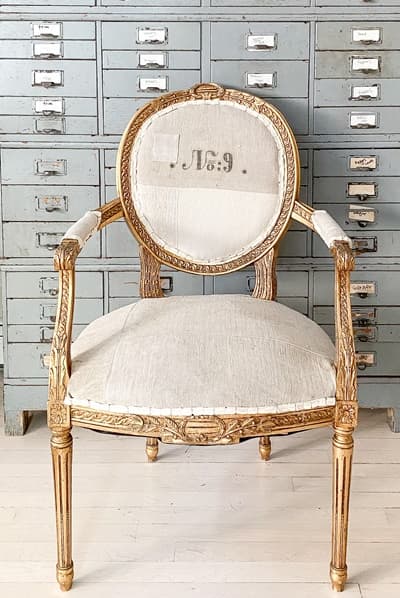
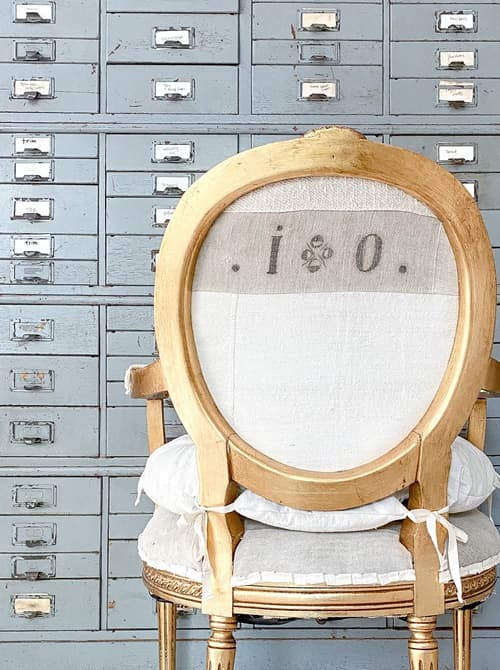
I purchased this pretty gold chair from an estate sale. I loved the gold detail. I instantly had a vision to reupholster it using an antique German grain sack. It was structurally sturdy, which is a very important thing to consider when purchasing a piece of furniture to rehab. I have been enticed by furniture that needed some structural help in past, some of the time I can fix it, but other times I end up wasting a lot of time and money into a piece that ends up not being very functional. I did notice that the padding needed to be replaced. The padding on the arms was pretty much nonexistent, and the seat had a crunchy feel to it. I thought that it might be horsehair. I am not a fan of a crunchy feel in upholstering, so that needed to be fixed. This is an easy job that adds new life to a piece.
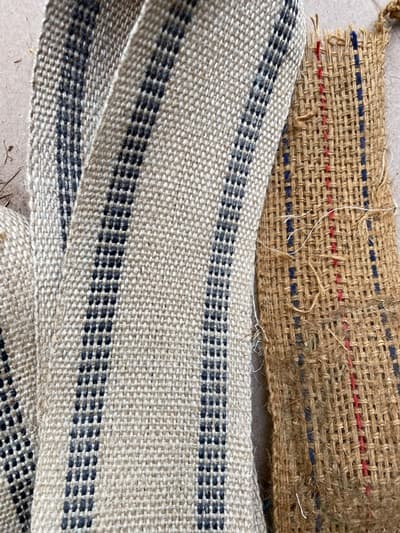
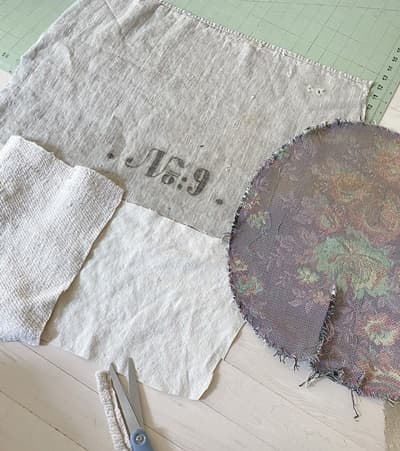
To execute my vision, I purchased a German grain sack from one of my favorite shops, Objekts1. There are a few other shops on Etsy that carry these special sacks, I find them with this search. When working with this fabric I typically piece it togther with some plain vintage hemp. This plain fabric can be found on Etsy. The Germain grain sacks are expensive and this offers the ability to get several projects out of it. I also love the look of the pieced togther complimentary fabrics.
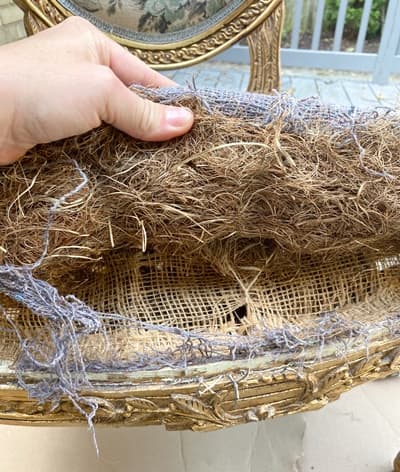
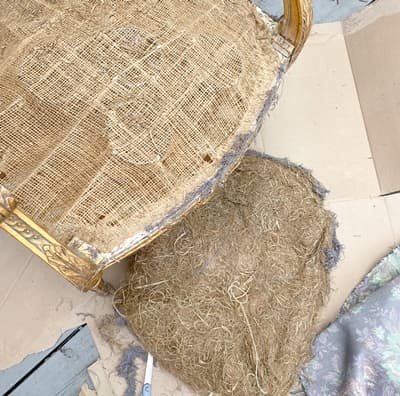
To begin my work, I removed the seat cover. I have learned the most about how to do upholstery from carefully disecting a piece. If you are a beginner carefully remove the old fabric and take notes and pictures on how it was placed and secured. As always I removed the staples of the original fabric with pliers and a small flathead screwdriver, careful to not harm the wood. Underneath the fabric what I found it wasn’t horsehair, it was hay. A lot of hay. This made more sense, horsehair was used in some really high quality antique upholstery pieces, it usually isn’t THAT crunchy when I find it. It was past time to get rid of the hay seat in my opinion.
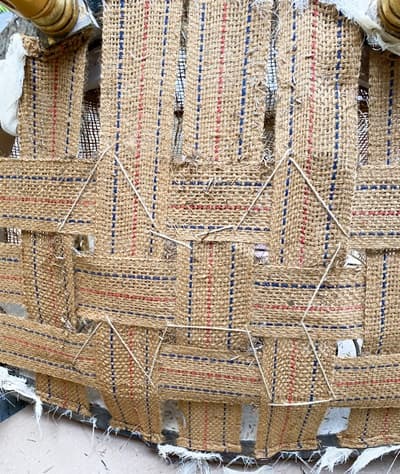
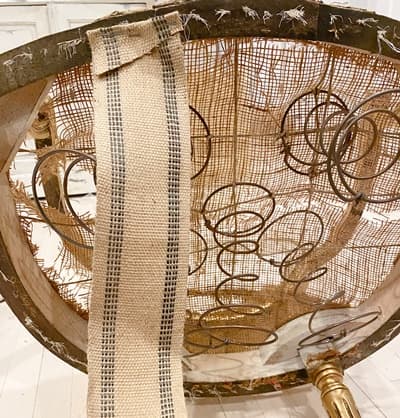
Underneath the seat you never know what you are going to find. In this case the springs were tied down perfectly with really strong twine. That was a bit of good news. I will and have retied springs on several occasions, its not a hard task, it can just take up a chunk of time. But the webbing holding the springs in place was very frail.
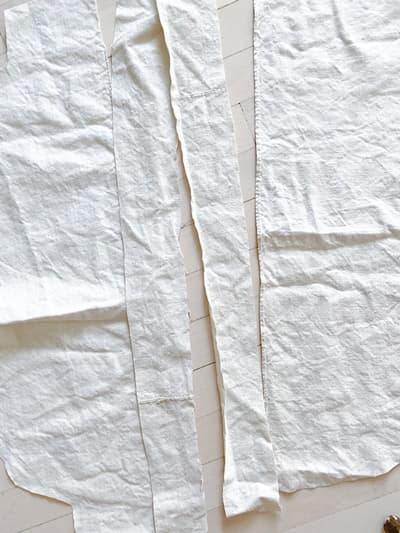
New webbing versus old
That needed to be replaced. This is how I did it:
-I removed the old webbing.
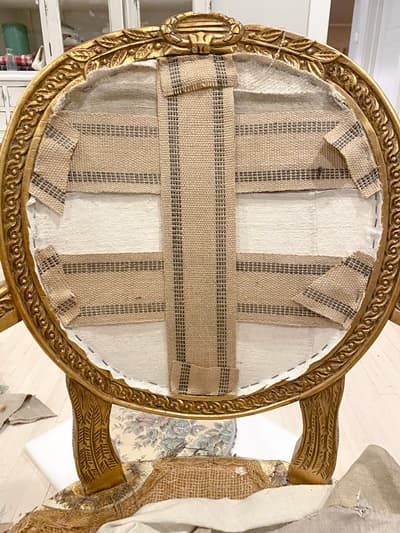
-Using this webbing, I secured it with my staple gun with a 2-3 inch excess on the outside. I folded this excess over and stapled it down to add further reinforcement. I recommend using at least 1/2 inch staples for this step. I use this staple gun with a compressor, it is great, but if you don’t want to invest in a air compressor this staple gun will work. It will take a bit more elbow grease and manipulating, but it will do the job.
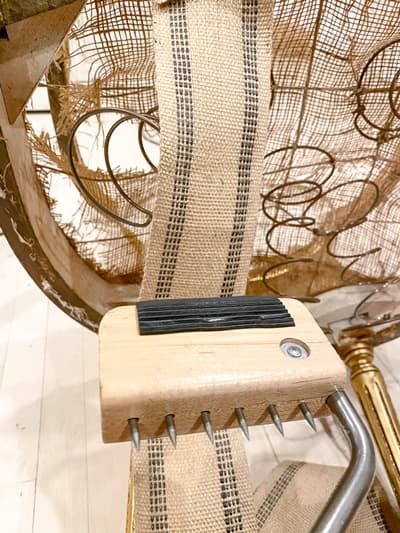
-Using a webbing tool like this one, I ran rubber side along the length of the webbing 5-6 times, this loosens up the fibers so I could get it really taut. Then I use the scary, sharp side to pull the webbing as tight as possible across the bottom of the chair to the other side, when that is done I secure it with my staple gun the same way I did on the other side. I recommend using at least 1/2 inch staples for this step. I use this staple gun with an air compressor, I really like it. But if you don’t want to invest in a compressor this staple gun will be okay, it takes a little more elbow grease and manuvering, but it will do the job.
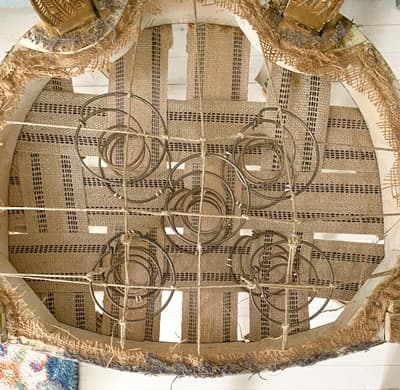
I repeated this with all the strips of webbing, weaving the strips together in a basket weave pattern until it covered the bottom of the seat.
-I was able to work around the springs without a problem. It did take some manipulating, but it worked and the ties were still in perfect condition so it saved me from having to retie them down. But generally the springs would be replaced following the webbing.
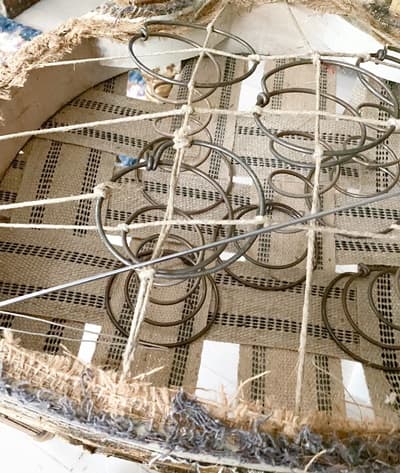
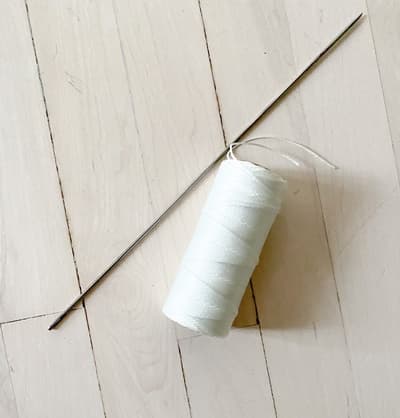
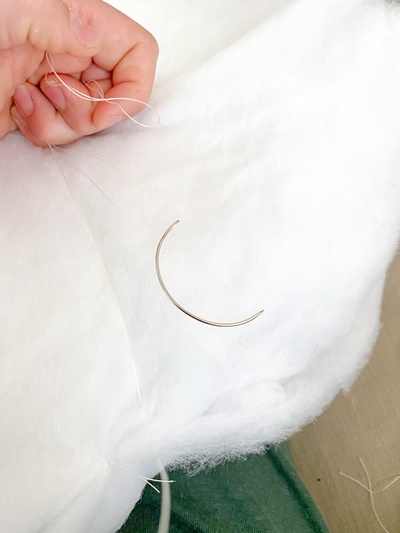
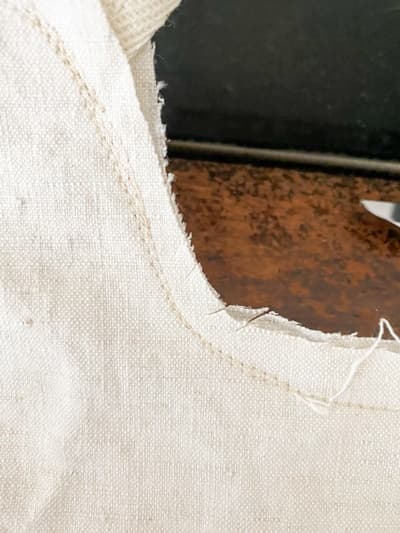
-After the webbing was in place, the under side of the springs needed to be tied down to the webbing. I used this 12 inch needle and tufting twine to stitch the springs in place. I did 3 sets of stitches per spring, and doubled the stiching around each stitch. After this I could already feel the improvement in the seat. It was time well spent.
notice the white stitches of twine holding the springs in place
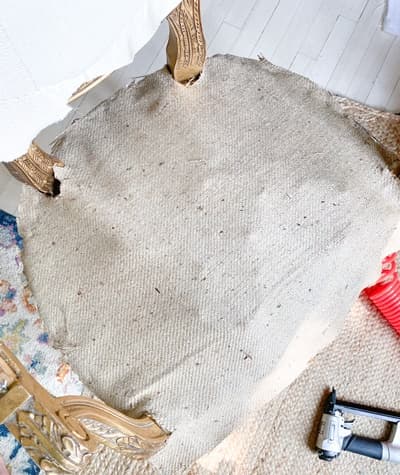
– I added a layer of burlap and stapled it down it on top of the springs.
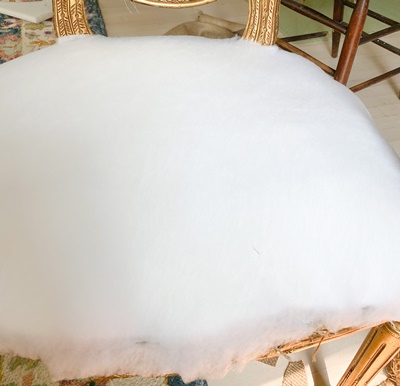
-On top of the burlap, I added a layer of 2 inch foam, I placed it on the seat and used it as a guide for cutting. You could use the removed fabric as a pattern to cut the foam.
-The next layer was a dacron, I stapled this in place with a few staples.
-The final layer is the fabric, using the previous fabric as pattern I cut out my fabric. I typically try to add about an inch when cutting just to make sure I have plenty. I stapled this in place, stapling approximately every half inch. I try to get as close to where visible wood part of the chair is so that it is easy to cover the staples with trim. For this process I always have my pliers ready to remove the staples that end up in the wrong place, there are always a few of those. It also helps to start with shorter staples, such as 1/4 inch staples that are easy to remove for the first few, then when it looks like the fabric is just how you want it use longer 1/2 inch staples to completely secure the fabric.
– To trim the fabric very close to the staples, I used these used these scissors.
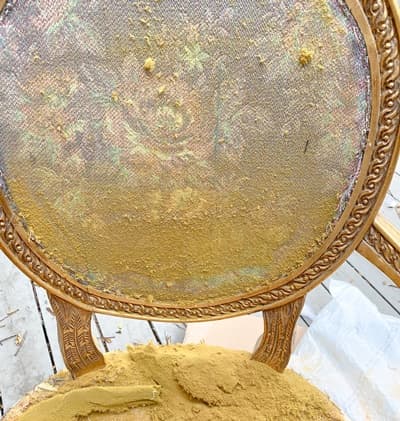
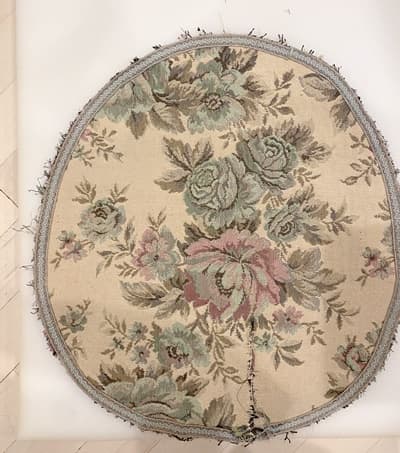
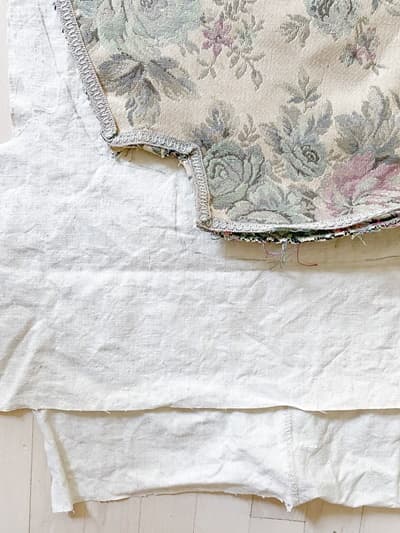
-Then it was onto the back of seat. As I removed the fabric I also tried to keep the fabric intact so I could use it as a pattern, remember how I did this with the seat? When I got the front of the back fabric off the previous foam that was in place it completely disintegrated, a sure sign new foam is needed. After cleaning that up I removed final piece of fabric that was used for the back of the back.
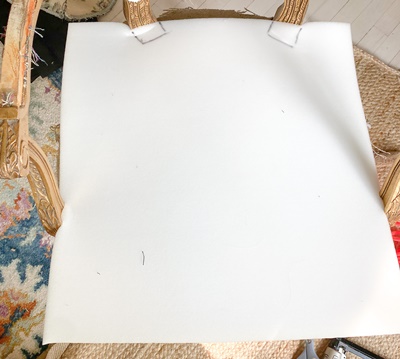
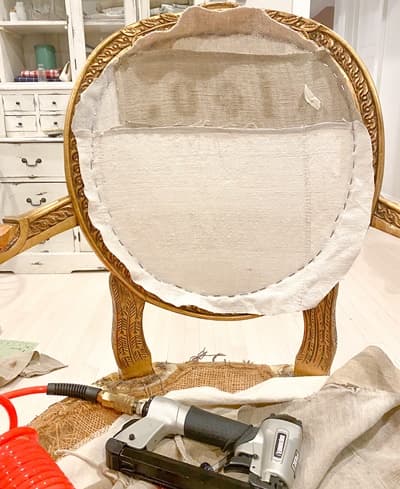
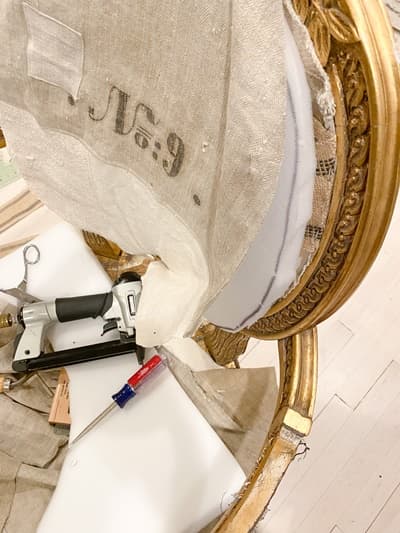
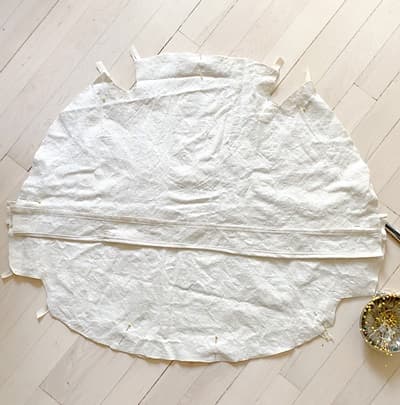
-Using the back piece of fabric as a pattern I cut a piece of new fabric that size. I stapled this in place. Typically with these chairs the back of the back is stapled to the front of the chair facing the back first, as pictured.
-For added stability I stapled in place some webbing as shown. I used the same process as the seat, but I didn’t worry about completely covering this part with webbing, its just for a little added support.
-Next I added a layer of 1 inch foam to the back, cut out using the old fabric pattern. Then covered it with the fabric used for the front of the back, and stapled it into place using the same techinique as mentioned above with the seat. And trimmed up the fabric edges.
-I used this same process for the arms of the chair.
-One of the final steps was I adding trim. I used this trim and for added texture I sewed it in a folded pattern. I used a glue gun to secure it over the staples.
I decided to try adding a tufted cushion to the top of this chair. These are the steps that I took to sew the cushion:
-I used the fabric removed from the seat as a pattern. I cut two pieces of canvas fabric about an inch bigger than the original fabric. I sewed these two pieces together leaving a 3 inch opening, next I stuffed it with shredded memory foam (down feathers would work too) to create a full pillow. I sewed up the 3 inch opening. When I sew anything upholstery related I sew two sets of stiches to offer added stability.
– I covered this pillow with 2 layers of dacron and secured the it in place with a loose whip stitch using this needle and upholstery thread.
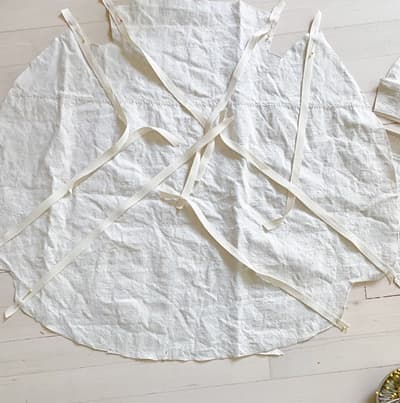
-Again using my orinigal fabric pattern I cut two pieces of my new fabric with 1 inch added to all sides. I used a 1/2 inch seam allowance when sewing, but cut the fabric 1 inch bigger than the seat pattern to allow for enough fabric to cover the height of the cushion. I wanted this pillow to have an envelope closure, so I took one of those sides and cut it in half. I added 3 inch strips of fabric to these pieces half pieces with a hem on the edge.
– As added detail, I secured two pieces of trim to each corner where the legs were. I pinned the trim in place so that at least 1/2 inch was on the outside (which will be inside when turned right side out), and about a 15 inches on the inside.
– I took the two halves and lined them up so that they overlapped and lined up with the other complete piece of fabric. I pinned the two sides together with the right sides in.
-With 1/2 inch seam allowance, I sewed the two pieces together. I made small cuts just short of the seam on the corners to help the fabric to lie flat.
-After turning the cushion cover right side out I stuffed it in the cushion. Next up is adding the tufts. I measured out the placement of the tufts and used pins to mark them. I made sure to place three tufts to hold the envelope closure in closed. I used this needle (I do think using a smaller guage long needle would have worked too) and tufting twine. I started these tufts from the bottom and did two stitches per tuft crossing the stiches in a “X” on the top. Then I pulled the twine as tight as possible on the bottom and did one tufting knot, next I added a tiny bit of glue from my glue gun on the knot to its barely visible and finish it with one more tufting knot. Then I trimmed the twine to about a 1/2-1 inch in length from the knot.
-Finally I hemmed the trim on the ties for the legs to the desired length and then completed the tufted cushion.
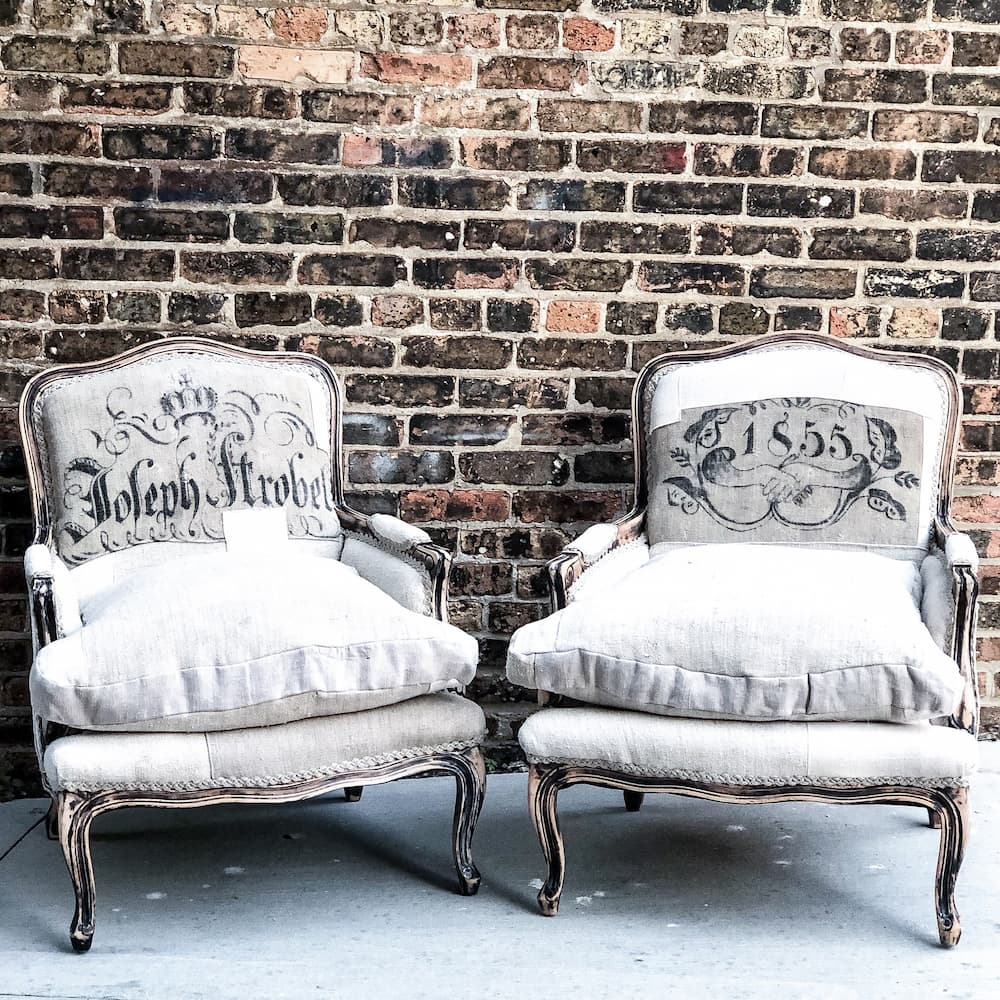
I am very pleased with the way this chair turned out. I brought it into the shop, Anthology Home, and it did sell. I heard it went to a great home :). If you are more interested in purchasing a piece like this than reupholstering one yourself, if you are local to the Milwaukee area I will be selling more. Please email me if you have any questions, pennyandivydecor@gmail.com.
Thank you for stopping by the Penny & Ivy blog. I hope that this little spot on the internet offers you a bit of inspiration and confidence to create a space in your home that makes you happy.
Following blogs and online tutorials have been such a sweet spot in my life. Projects helped to balance out the “have to dos” with some “want to dos”. I started out copying what was posted on a tutorial or design ideas with precision. But with some experince, I started to have my own ideas. I have come to develop a look that is mine. I believe my work has an artisitic element to it. This all is a piece of who I am…and I really like this piece.
My business started with projects for my own home squeezed into a my kid’s naptime and has been evolving for the past 5 years. I have learned things I never thought I would be able to do. I reupholster sofas. I can drive a trailer loaded with furniture across several state lines. I run an online shop when I am naturally technologically challenged. I can style spaces, and now I am writing a blog. All of those things I never thought I would or could do. Seven years ago I would have surely classified myself out of all those lanes. My little successes have been a great reward to me. I hope that I can pass on an idea or two that will help you to try something new, or enjoy your space more.
Please subscribe to Penny & Ivy's email list to receive updates on future sales and a bonus 10% off welcome coupon code