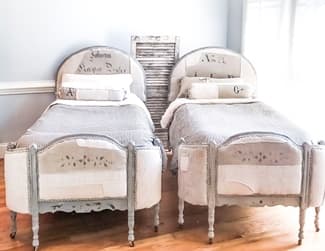
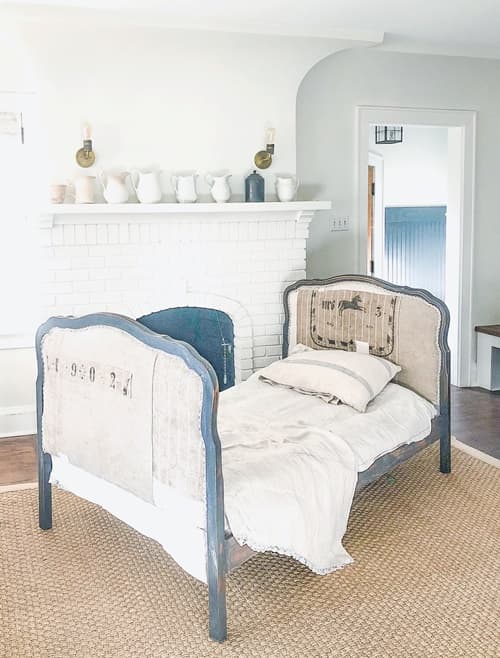
Upholstering the headboard of a solid wood bed is a good beginner DIY project. Probably one of the most important steps to a successful outcome is picking the right piece, one with a flat surface with the exception of the trim framing it. With my experience thrift shopping, this is neither a hard or expensive furniture piece to find. Remember what a difference a little bit of paint can make, add in your favorite fabric, and you can end up with a really special piece that started out looking A LOT less pretty. The following is an example of a set a beds that I redid for the June 2018 City Farmhouse Show in Franklin, TN. I was thrilled that they sold before the show began to one of my favorite vendors for her guest room. They found their way to a very good home.
The Step by Step...
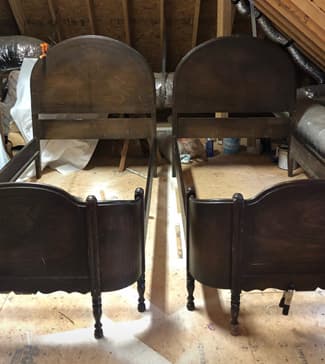
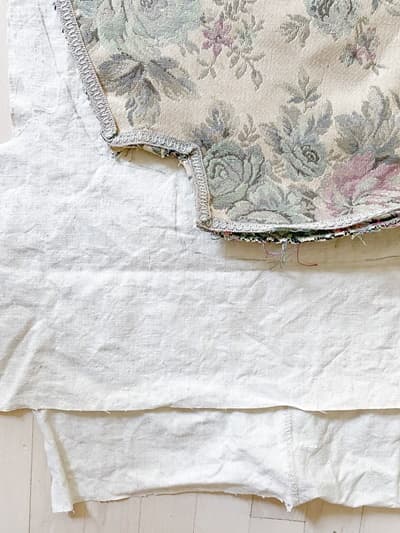
I used this technique more recently on a daybed. Here are plans being made:
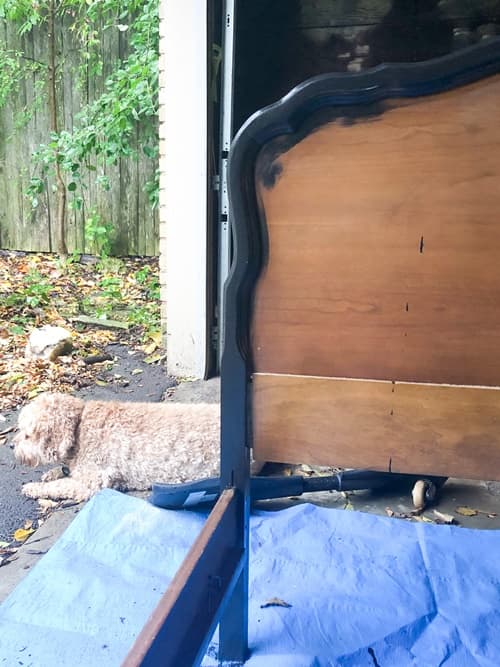
I had wanted to upholster a rustic French style daybed for a couple years, but any potential pieces were always way out of my price range. I found this piece at a local Habitat for Humanity. It was a bargain because I think the bed was originally two headboards that someone put together as a daybed. The backs of the headboards were not very polished. They did have a flat surface and a bit of trim that made it possible to upholster, though, so it was perfect for my needs. I love it when pieces are priced lower because of their faults, and then their faults fit perfectly into my project needs! It feels like fate while trhift shopping. I know you thrifters can relate to the thrill of finding the right piece that seemed to be waiting for your vision at a killer price!
The above picture shows how the bed is put together. Note to self… if you are going to blog about a project pick, a more picturesque place to do the project and take pretty pictures 😊.
Make Everything Stable
The first step in the proces is to make sure everything is stable, and to do any gluing, patching, or reinforcing that needs to be done with the piece before painting. I have often been lured into buying a cheap piece that needs a lot of structural work.This is not my expertise, and never turns out well for me. Some dings or missing trim, however, is almost expected with any second hand piece. Address these issues at the beginning before painting with wood glue or wood filler.
Painting
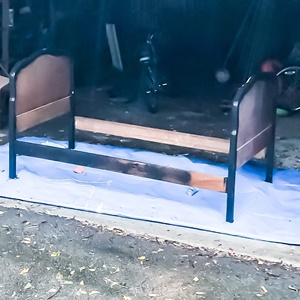
For the second step, I painted the bed. I chose my go to Miss Mustard Seed Milk Paint, in one of my go to colors, Typewriter. I love this paint because it gives an original old look. I also love that it has a mind of its own. Although you can learn tricks to control how it will dry, I like that it sort of does its own thing with a piece and in the end I believe this is what lends to its authentic look. In this case, there was very little chipping, so I distressed it once dry with fine sandpaper and sealed with Miss Mustard Seed Clear Wax.
Cute original Penny always keeping me company.
Adding foam
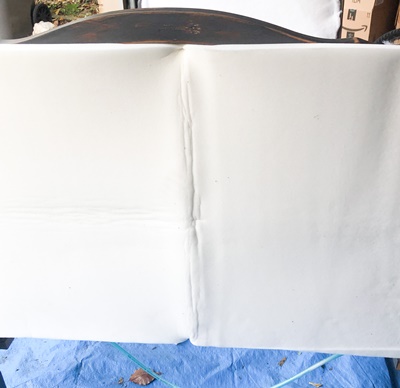
Once the painting was all done, I added foam. In this case, I used 1 inch foam. This added the thickness of padding that I wanted and it was thin enough to use scissors to cut it into the desired shape. I stapled the piece in place and cut it to shape. Another way to do this is to make a pattern using wrapping paper, and outlining it on your foam. I really don’t worry too much about this being perfect because I add dacron (upholstry batting) on top of the foam that covers imperfections.
**Note about the staple gun** This is the link to the one that I use attached to my compressor, Surebonder staple gun. I have really liked it and I can control it really well. But if you are just starting out and can’t invest in a compressor, this is another option, manual staple gun. It will get the job done. Its drawbacks are the staple placement is a bit more difficult and your hand will get a serious work out. But it works! If investing money into a compressor is holding you back from trying an upholstery project, I say give it try with the cheaper staple gun. PS – If you do use the Surebonder, make sure you oil after every use. I was lazy about this and it jammed, damaging it really quickly.
**Another note** I like to have at least two sizes of staples on hand. In the beginning of the project I use the smaller ones so they are easy to remove when I am still working on the piece. Then when I am ready to commit, I use the bigger staples. Also, staple size is an individualized thing according to the thickness of the wood, and fabric. This is another reason why it is nice to have options.
Dacron
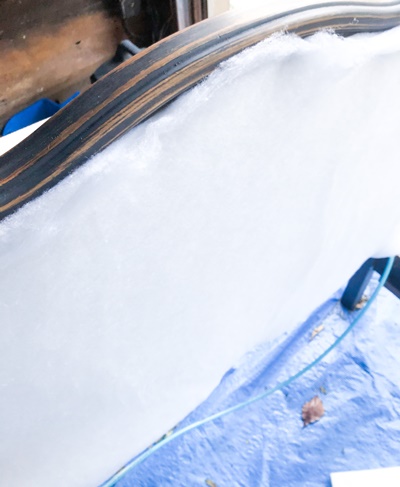
The fourth step is adding dacron. This upholstery grade batting is a game changer. It adds padding and a stuffed look. I love this, and I love that it covers up imperfections. I use my smaller staples to secure the dacron and then trim it down as close to possible to the edge. This is where these scissors come in handy.
Stapling
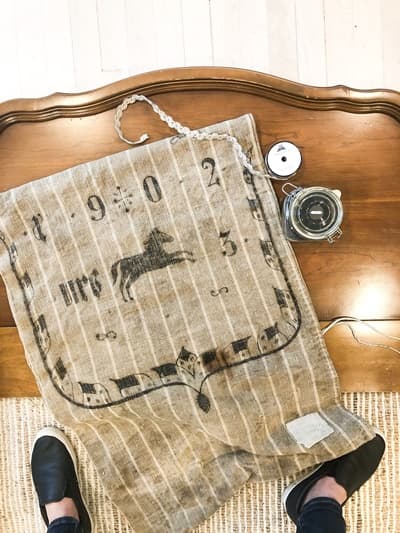
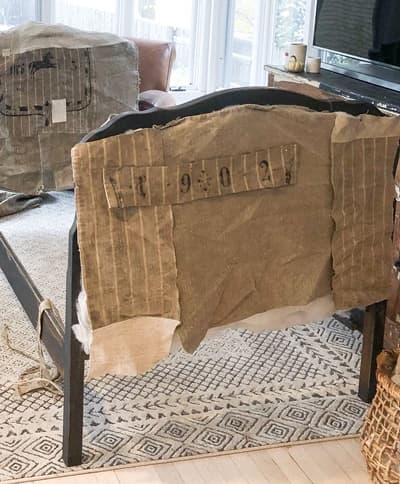
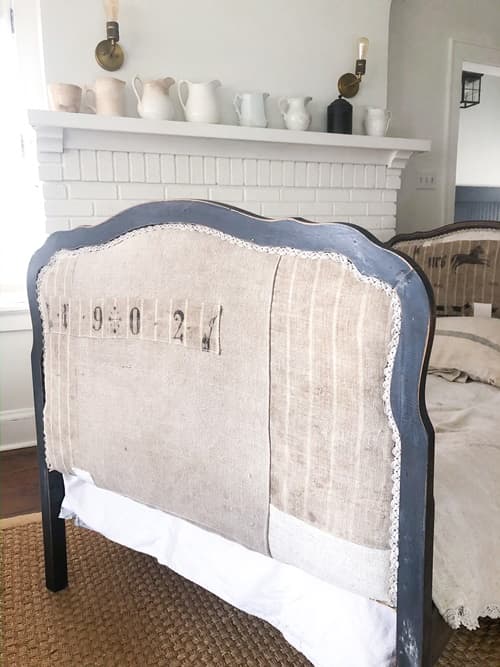
The next step is stapling the fabric in place. The fabric is up to you. I am most definitely partial to antique linens and grain sack, so naturally that is what I used. Again, start with the smaller staples. I like to space a couple of these out to hold the fabric in place loosely, and then fill in with staples between. I almost always have to remove a couple staples to get the right placement. When it looks good I fill in with bigger staples. Try to keep the staples in line with each other as close as possible to make it easier to cover them all with the trim. This is the fun part. It is when the piece starts to look like a real piece of furniture.
Trim the fabric
Sixth, when everything is stapled in place trim, the fabric down as tight as possible to the staples.
Add Trim
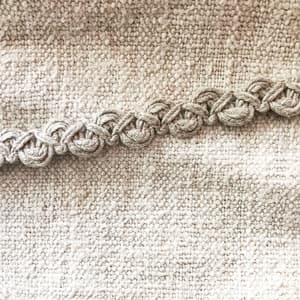
Seventh and last, add trim to cover the staples. This is one of my favorite trims because it has a really natural look and I also think the color tone works nicely with the hemp linen I like to use. To secure the trim in place, use a glue gun. I do like a $20 glue gun versus a $3 one. It feels easier to control the glue and I think it holds better, but work with what you have.
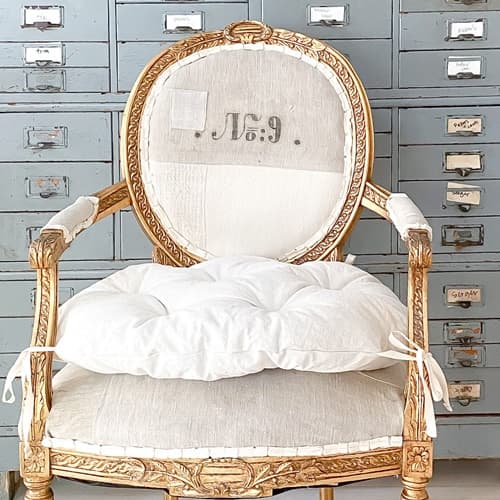
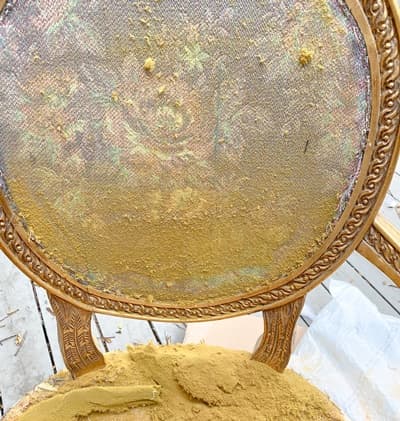
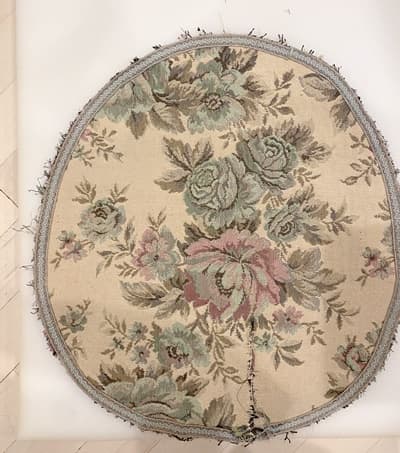
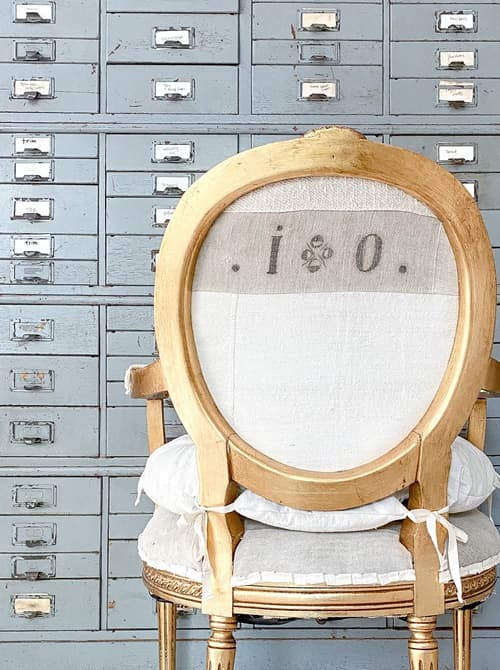
I purchased this pretty gold chair from an estate sale. I loved the gold detail. I instantly had a vision to reupholster it using an antique German grain sack. It was structurally sturdy, which is a very important thing to consider when purchasing a piece of furniture to rehab. I have been enticed by furniture that needed some structural help in past, some of the time I can fix it, but other times I end up wasting a lot of time and money into a piece that ends up not being very functional. I did notice that the padding needed to be replaced. The padding on the arms was pretty much nonexistent, and the seat had a crunchy feel to it. I thought that it might be horsehair. I am not a fan of a crunchy feel in upholstering, so that needed to be fixed. This is an easy job that adds new life to a piece.
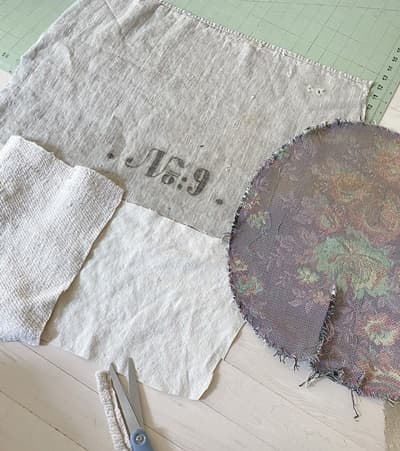
To execute my vision, I purchased a German grain sack from one of my favorite shops, Objekts1. There are a few other shops on Etsy that carry these special sacks, I find them with this search. When working with this fabric I typically piece it togther with some plain vintage hemp. This plain fabric can be found on Etsy. The Germain grain sacks are expensive and this offers the ability to get several projects out of it. I also love the look of the pieced togther complimentary fabrics.
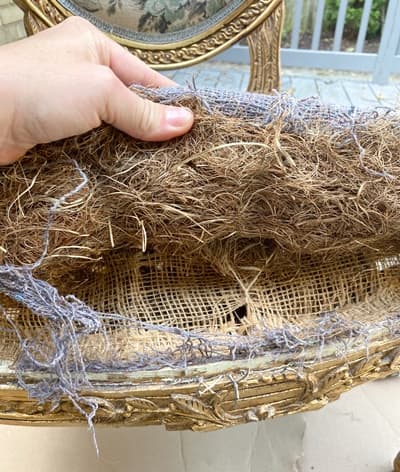
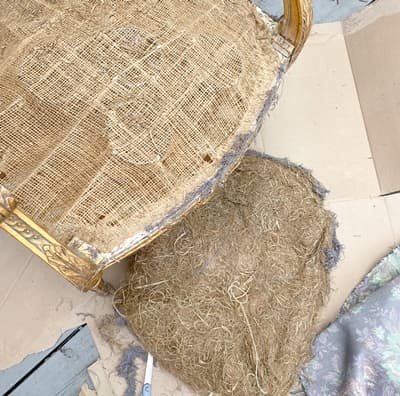
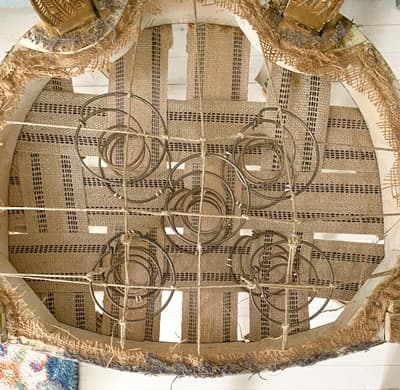
To begin my work, I removed the seat cover. I have learned the most about how to do upholstery from carefully disecting a piece. If you are a beginner carefully remove the old fabric and take notes and pictures on how it was placed and secured. As always I removed the staples of the original fabric with pliers and a small flathead screwdriver, careful to not harm the wood. Underneath the fabric what I found it wasn’t horsehair, it was hay. A lot of hay. This made more sense, horsehair was used in some really high quality antique upholstery pieces, it usually isn’t THAT crunchy when I find it. It was past time to get rid of the hay seat in my opinion.
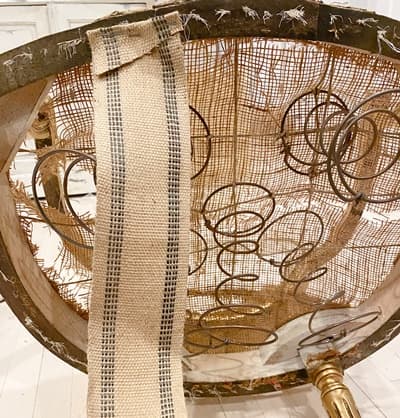
Underneath the seat you never know what you are going to find. In this case the springs were tied down perfectly with really strong twine. That was a bit of good news. I will and have retied springs on several occasions, its not a hard task, it can just take up a chunk of time. But the webbing holding the springs in place was very frail.
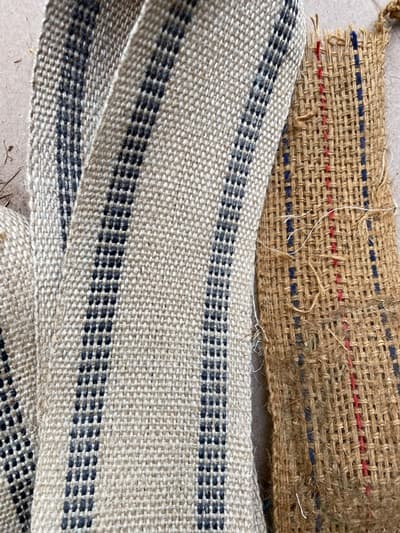
New webbing versus old
That needed to be replaced. This is how I did it:
-I removed the old webbing.
-Using this webbing, I secured it with my staple gun with a 2-3 inch excess on the outside. I folded this excess over and stapled it down to add further reinforcement. I recommend using at least 1/2 inch staples for this step. I use this staple gun with a compressor, it is great, but if you don’t want to invest in a air compressor this staple gun will work. It will take a bit more elbow grease and manipulating, but it will do the job.
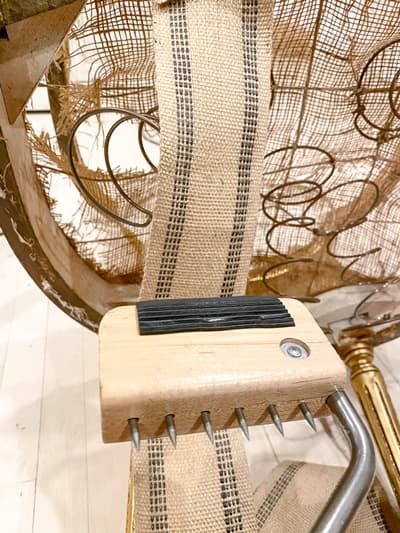
-Using a webbing tool like this one, I ran rubber side along the length of the webbing 5-6 times, this loosens up the fibers so I could get it really taut. Then I use the scary, sharp side to pull the webbing as tight as possible across the bottom of the chair to the other side, when that is done I secure it with my staple gun the same way I did on the other side. I recommend using at least 1/2 inch staples for this step. I use this staple gun with an air compressor, I really like it. But if you don’t want to invest in a compressor this staple gun will be okay, it takes a little more elbow grease and manuvering, but it will do the job.
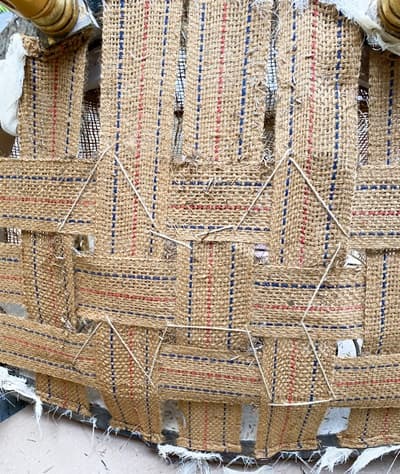
I repeated this with all the strips of webbing, weaving the strips together in a basket weave pattern until it covered the bottom of the seat.
-I was able to work around the springs without a problem. It did take some manipulating, but it worked and the ties were still in perfect condition so it saved me from having to retie them down. But generally the springs would be replaced following the webbing.
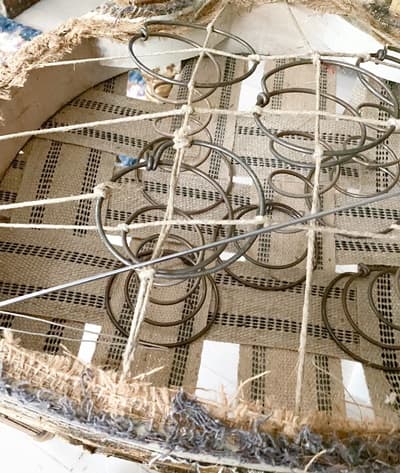
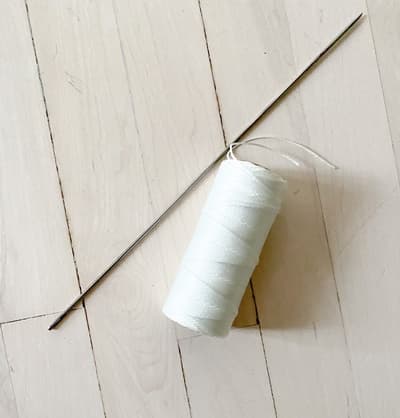
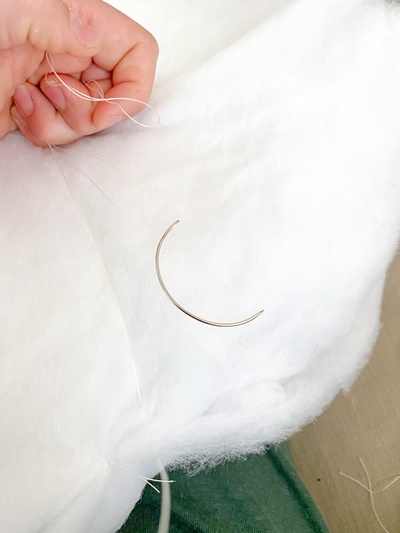
-After the webbing was in place, the under side of the springs needed to be tied down to the webbing. I used this 12 inch needle and tufting twine to stitch the springs in place. I did 3 sets of stitches per spring, and doubled the stiching around each stitch. After this I could already feel the improvement in the seat. It was time well spent.
notice the white stitches of twine holding the springs in place
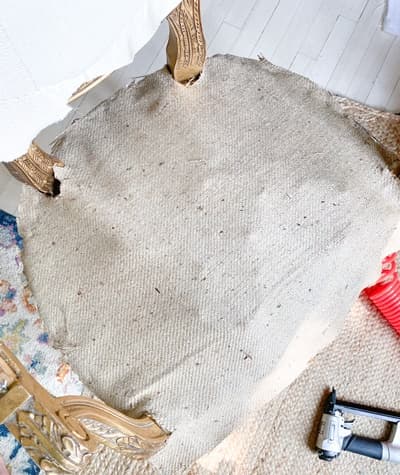
– I added a layer of burlap and stapled it down it on top of the springs.
-On top of the burlap, I added a layer of 2 inch foam, I placed it on the seat and used it as a guide for cutting. You could use the removed fabric as a pattern to cut the foam.
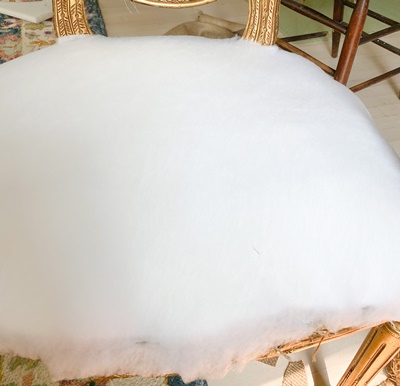
-The next layer was a dacron, I stapled this in place with a few staples.
-The final layer is the fabric, using the previous fabric as pattern I cut out my fabric. I typically try to add about an inch when cutting just to make sure I have plenty. I stapled this in place, stapling approximately every half inch. I try to get as close to where visible wood part of the chair is so that it is easy to cover the staples with trim. For this process I always have my pliers ready to remove the staples that end up in the wrong place, there are always a few of those. It also helps to start with shorter staples, such as 1/4 inch staples that are easy to remove for the first few, then when it looks like the fabric is just how you want it use longer 1/2 inch staples to completely secure the fabric.
– To trim the fabric very close to the staples, I used these used these scissors.
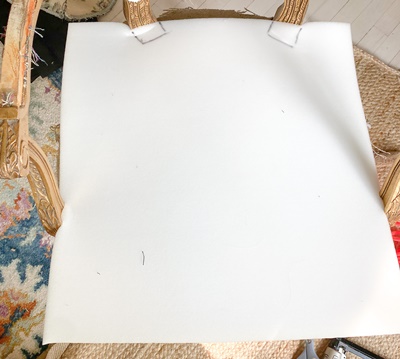
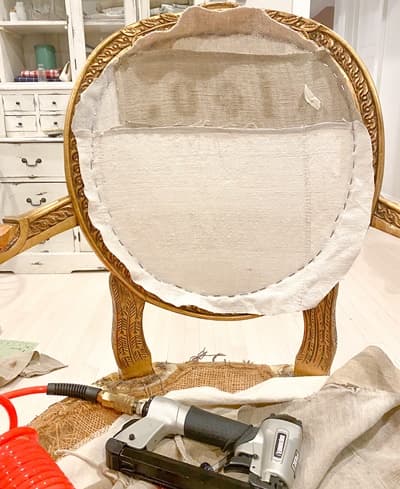
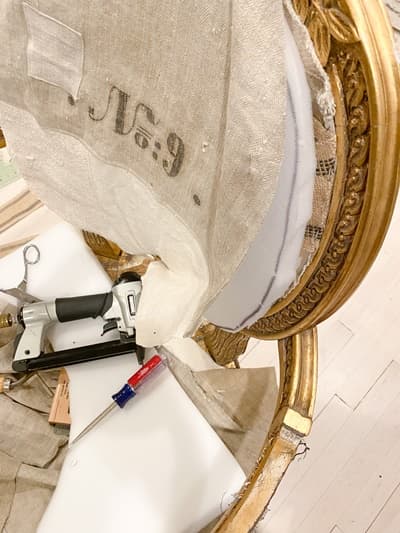
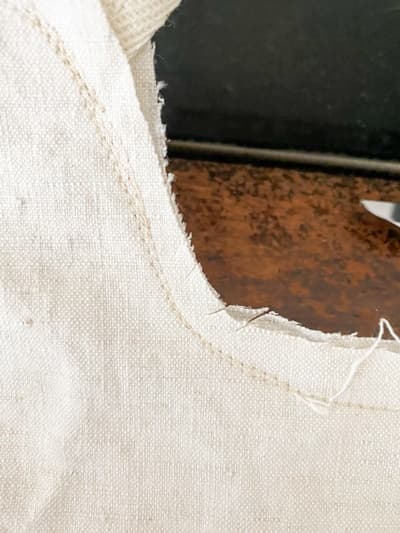
-Then it was onto the back of seat. As I removed the fabric I also tried to keep the fabric intact so I could use it as a pattern, remember how I did this with the seat? When I got the front of the back fabric off the previous foam that was in place it completely disintegrated, a sure sign new foam is needed. After cleaning that up I removed final piece of fabric that was used for the back of the back.
-Using the back piece of fabric as a pattern I cut a piece of new fabric that size. I stapled this in place. Typically with these chairs the back of the back is stapled to the front of the chair facing the back first, as pictured.
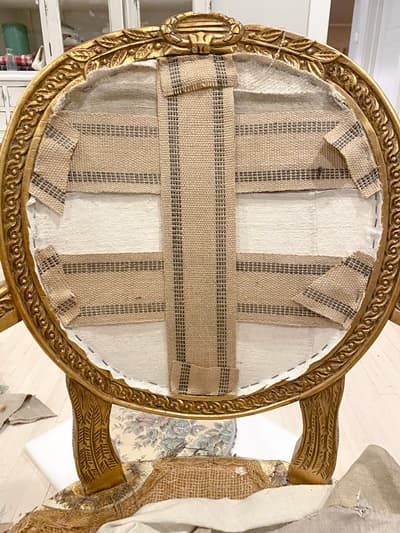
-For added stability I stapled in place some webbing as shown. I used the same process as the seat, but I didn’t worry about completely covering this part with webbing, its just for a little added support.
-Next I added a layer of 1 inch foam to the back, cut out using the old fabric pattern. Then covered it with the fabric used for the front of the back, and stapled it into place using the same techinique as mentioned above with the seat. And trimmed up the fabric edges.
-I used this same process for the arms of the chair.
-One of the final steps was I adding trim. I used this trim and for added texture I sewed it in a folded pattern. I used a glue gun to secure it over the staples.
I decided to try adding a tufted cushion to the top of this chair. These are the steps that I took to sew the cushion:
-I used the fabric removed from the seat as a pattern. I cut two pieces of canvas fabric about an inch bigger than the original fabric. I sewed these two pieces together leaving a 3 inch opening, next I stuffed it with shredded memory foam (down feathers would work too) to create a full pillow. I sewed up the 3 inch opening. When I sew anything upholstery related I sew two sets of stiches to offer added stability.
– I covered this pillow with 2 layers of dacron and secured the it in place with a loose whip stitch using this needle and upholstery thread.
-Again using my orinigal fabric pattern I cut two pieces of my new fabric with 1 inch added to all sides. I used a 1/2 inch seam allowance when sewing, but cut the fabric 1 inch bigger than the seat pattern to allow for enough fabric to cover the height of the cushion. I wanted this pillow to have an envelope closure, so I took one of those sides and cut it in half. I added 3 inch strips of fabric to these pieces half pieces with a hem on the edge.
– As added detail, I secured two pieces of trim to each corner where the legs were. I pinned the trim in place so that at least 1/2 inch was on the outside (which will be inside when turned right side out), and about a 15 inches on the inside.
– I took the two halves and lined them up so that they overlapped and lined up with the other complete piece of fabric. I pinned the two sides together with the right sides in.
-With 1/2 inch seam allowance, I sewed the two pieces together. I made small cuts just short of the seam on the corners to help the fabric to lie flat.
-After turning the cushion cover right side out I stuffed it in the cushion. Next up is adding the tufts. I measured out the placement of the tufts and used pins to mark them. I made sure to place three tufts to hold the envelope closure in closed. I used this needle (I do think using a smaller guage long needle would have worked too) and tufting twine. I started these tufts from the bottom and did two stitches per tuft crossing the stiches in a “X” on the top. Then I pulled the twine as tight as possible on the bottom and did one tufting knot, next I added a tiny bit of glue from my glue gun on the knot to its barely visible and finish it with one more tufting knot. Then I trimmed the twine to about a 1/2-1 inch in length from the knot.
-Finally I hemmed the trim on the ties for the legs to the desired length and then completed the tufted cushion.
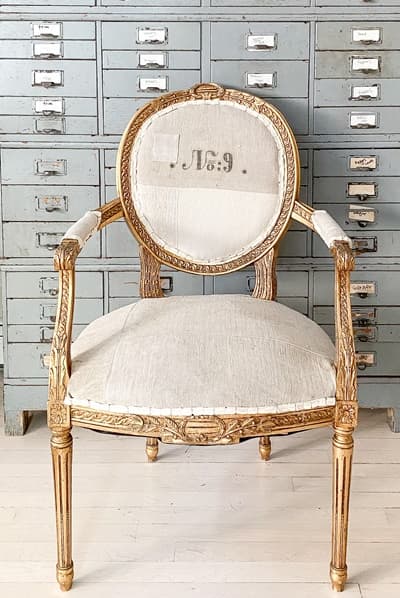
I am very pleased with the way this chair turned out. I brought it into the shop, Anthology Home, and it did sell. I heard it went to a great home :). If you are more interested in purchasing a piece like this than reupholstering one yourself, if you are local to the Milwaukee area I will be selling more. Please email me if you have any questions, pennyandivydecor@gmail.com.
Please subscribe to Penny & Ivy's email list to receive updates on future sales and a bonus 10% off welcome coupon code