Vintage Linen Roman Shades + New Wallpaper

Vintage Linen Roman Shades + New Wallpaper

My daughter’s Emerson’s room was remodeled last year. It was really fun to design and turned out just how I wanted.  A post with all those details is found here.  But as with any room there are always spots to add a little something or make changes.  Is any room ever official done? Not in our house. 

I love the possibilities that peel and stick wallpaper has added to the DIY design world.  I also really, really love adding a some pretty pattern to a wall or two in a room.  When the two local Milwaukee companies, Chasing Paper and I SPY DIY collaborated to design a line of peel and stick wallpaper, I knew it was going to be good. These companies are owned by two women who I admire for their design talent, and their ability to serve their communities of small businesses and artists.  I started by ordering the sample pack of the this line. Each nature inspired design was lovely, but floral play was a clear winner for the space.  And in the blush shade.  I almost never decorate with pink and my daughter (since it is her room afterall) isn’t a huge pink fan either.  But this is surely worth stretching our typical color palette.  

Installing the wallpaper was pretty easy.  It is very high quality peel and stick wallpaper, as I learned when I spilled a vase of flowers filled with water on 4 rolls of it waiting to be hung.  That was not a good moment.  But I quickly wiped off the water and spread them out to dry.  The water wiped almost completely dry immediately and there was no damage.  That was a relief.

There are a couple tricks that I helped me with installation:

  -Using a kitchen pan scraper to work out the any air bubbles in the wallpaper works like a charm. Also keeping it close by for several days after installation to smooth out places I missed the first time around.

  The second is I found it helpful to overlap the wallpaper in some places.  Because my walls are not 100% strait/flat it was difficult to get the wallpaper to line up without leaving a gap in someplaces.  I found that if I overlapped a piece of wallpaper in these places it looked better to me.  I didn’t overlap entire rolls, just in spots that the space in the seam was very obvious, I took a smaller remnant and overlapped it.  Eventhough there are more seams, it still looks cleaner in my opinion.

Third if I needed to cut a piece, using my fabric rotary cutter with mat was the way to get a strait edge.

Finally an exacto knife is a must to cut off excess after it is installed. It took some trial and error to get a clean cut where the paper ended on the corner entering the room.  I had the best luck in spots where I left at least a half inch excess and just ran an exacto knife down the seam carefully to cut of the excess.  

The first roll that went up, I realized this was going to be better than I expected.

Then with it all in place, it created an added feeling to the space. I am not sure how to explain it.  How do explain when a design element makes your heart happy? It’s sort of like listening a good song that makes you feel good.  I think of wallpaper as a art form, and living amongst this beautiful art serves my soul.

Because this little nook was getting an upgrade, I wanted to change out the blinds. These windows are really small and tight, and I needed a window covering that was very low profile.  Roman shades were a great canidate.   Again, Jenni Yolo of I Spy DIY inspired me no sew roman shades she created for her office, since I do sew I tried a sewn version.  

This is the process that I used:

*****Please note do not make these for a space for small children, there is a choking harzard with the cords***

Supplies:

– Vintage tea towel plus coordinating fabric

Fabric liner

Four 1/4 inch dowels cut 1 inch short of the width of the shade

One 1X2 piece of wood cut 1 inch short of the width of the shade

Roman shade kit

-Sewing machine/thread

-Sewing needle for hand stitching and strong thread

– eyelet screws

staple gun and staples

-screws or brackets for installation

1) In the beginning I had to pick the right fabric.  I wanted something fun.  I did a quick search on the internet and didn’t find anything.  Then I thought about trying these vintage grain sack styled tea towels, that I bought from the lovely etsy shop, Linen by Sabine.  I don’t think that I ever would have sought out putting this blue stripe in with the blush wallpaper, but when I put them togther it totally worked in my opinion. Also the tea towels were almost the perfect size.  The towels measured approximately 17 1/2 inches wide by 37 inches long.  The window that I needed a shade for was 16 1/4 inches wide by 31 inches long.  When all the pockets for the dowels were sewn, the tea towel was just a little short of the needed length, so I added 2 inches to the top with a coordinating fabric. So I needed a 17 1/2  by 39 inch piece of fabric to cover that size of window.  If you are cutting a piece of fabric you need to allow for more fabric for a hem.

2) I cut a piece of fabric liner measuring 18 1/2 by 40 inches to sew on the back of the towel.  This liner adds thickness to the fabric and helps to keep out the light.

3) I folded a half inch of the fabric liner around all the edges and ironed it in place.  Then I pinned and sewed it in place on the back of the tea towel.  If you are using linen or similar fabric it has a lot of stretch to it, make sure to pull it taut when sewing your backing in place.  

4) Next I had to measure out where to sew the pockets for the dowels. I took the number 39 and divided by 4 which equals 9.75 inches.  Then marked increaments of 9.75 inches down the side both sides of the fabric.

5) To sew the pockets, I folded the fabric over with right sides together at the marked spots and sewed a line with a half inch seam allowance.  Then at the bottom I sewed a half inch hem to allow for a pocket for the dowel. Then I slid the dowels into place.

6) With the 1 x 2 inch piece of wood I stapled one inch of fabric over the top of it on the 2 inch side and attached 2 eyelet screws to the back of the wood 2 1/2 inches from the side.  I attached an eyelet screw to the side of the wood that would be the outside of shade.

7)Then I hand stitched the plastic circles that came with roman shade kit 2 1/2 inches from the side on the back of each dowel pocket.  I used strong upholstery thread for this step.

8) Next up is was getting the cord in place, I used two long pieces and tied the end of each one to the bottom circle on each side, then I fed the cord through each of of the plastic circles and the two eyelet screws at the top.  I took one of the cords and fed it through the opposite side eyelet screw, then both cords through the side eyelet screw.  This is super confusing to explain, but it is an easy task.  Here is a somewhat unpolished diagram:

Just keep in mind which side you want your cord to be on with the shade is up and feed both cords over that side and through the side eyelet screw.  I found this extra eyelet screw made it much easier to pull the shade up.

***notice the eyelet screw on the side***

9) Next up was installation, what made the most sense for this window was just screwing the wood directly into the wooden window frame.  My shade ended up very light, so I just used one screw.  But brackets could come in very handy for installion if your window set up is different.

Thanks for following along.  Please contact me with any questions or if you give it a try I would love to see a picture.  My email is pennyandivydecor@gmail.com or send me a DM on instagram.

Basement TV Room Remodel

Basement TV Room Remodel

Another room that was touched in our remodel was our basement TV room space.  It was a bit of a blank slate and not in bad condition at all.  But a souped up TV/hang out space is what my husband’s dreams are made of, and when our contractor mentioned a wall of built ins highlighting the TV we were committed.  Here is the before, not particularly clean of course :). They pictures were taken by our amazing contractor, MKE Design Build.

There really was not much that needed to be redone aside from paint and the TV wall.  We potentially could have relocated the pipes in the ceiling but it wasn’t worth the investment for us, and they are nearly to the far wall so they don’t get in our way.  

As for the built ins that were supposed to frame our TV…that is a funny thing.  We started with a beautiful plan of built ins with shelves, cabinets, and sconces.  Then we got the quote. Nope.  Custom built ins are not cheap.  Then I found an idea that was used by Chris Loves Julia of semi built ins using IKEA cabinets.  But even THAT with the added carpentery was pushing our budget.  Our budget was in the midst of getting a serious work out.  That is when the idea of installing this floating Ikea cabinet framed with floating shelves was born.  You know what? it was like 1/20th of the price of custom built ins and I love it.  I think it looks nice, we have storage, and it meets all our needs for a basement TV space.  I would definitely do this plan all over again. 

A fun design piece to this area is that we had this accent wall wallpapered.  It actually looked great without the wallpaper, but we had purchased the wallpaper before it was completely finished.  I might have decided not to wallpaper if I had seen the finished product first.  But the decision had been made and it looks great in our opinion.  My contractor introduced me to the commerical grade geometric wallpaper that almost looked like leather.  I really fell hard with the sample, and the finished product it just adds a bit more of dimension.

To finish out this space we had to purchase a new sofa.  Our sectional that we had previously would not fit down our tight stairs.  We wanted something big and comfy that would fit our family for movie nights.  I always and forever want a Restoration Hardware Cloud Sectional, but it wasn’t in the cards, for the most obvious reason.  I found this World Market Sectional (psst if you are considering this or anything from World Market they often have sales).  It met all my criteria, so I pulled the trigger on one of their friends and family sales.  But when it arrived my husband had a total panic attack because of conflicting emotions.  He loved the sofa, that he named “the couch bed.”  It has all the space to lounge and watch TV. It is very comfy cozy.  But we have two teenage daughters. Its potential of being a scene for A LOT of comfy cozy moments for our teenagers and any of their visitors was VERY alarming for him.  He came up with two plans in keeping the sofa.  One is that if any boys came to watch a movie he would just camp out and practice his ping pong skills in the adjacent room.  The second plan is since the sofa is modular he can just move all the pieces to seperate corners of the basement.  Neither plan will make our girls very popular, but at least he feels okay about life for a moment :). I never thought that buying a sofa one of the variables to consider was to think like a teenage boy.  

PS did you notice the pretty canvas by Jennifer Lanne? I can never get enough of her work.  

Thank you for stopping by for this little glimpse into our home and experience. If you would like to see more remodeling posts check here and here.

Our Basement Rec Room Remodel

One of the last of our remodeled rooms that I have to share with you is our basement rec room.  Our basement in this 1920s bungalow created an opportunity for our family to live very comfortably.  As I have mentioned before we chose to down size (A LOT)  in order to buy in a home in our neighborhood.  The market here was insane two years ago, I can’t imagine trying to buy a home now, bless you if you are trying to purchase a home.  We really lucked out in getting our home that had received a something like 7 offers the first day.  

The home had a great feel, but was significantly smaller than what we lived in previously.  Instead of adding on we used every bit of space in our basement, which was a much more econimical with investment in both money and time.  This room is surely a luxury, but also a really important one because we have a bunch of kids and we want them to have a space to bring their friends.

As with the attached TV room, this did not start out bad.  It did have a storage closet  that needed an overhaul, but other than that there wasn’t much that needed to be done. At least that is what we thought, we did have a surprise in the process.

We started out with this storage.

 Then thanks to the magic of our contractor, MKE Design Build we ended up with this:

I love, love my new cupboard. So much.  It’s really deep and perfect to store games, books, and photo albums.  I worked closely with our designer, Michelle, to come up with this custom cupboard and use of space.  I am very pleased with the end result.  We wanted to add a drink fridge, so we would look like we are really cool.  But I hate my kids drinking or eating downstairs because they are not very tidy, so its mostly empty.  However it is a perfect for hiding spot for restaurant left overs that we don’t want to share with our kids : ).  Don’t worry they are well fed.  Maybe someday when socializing is in full force again we will stock that beverage fridge, and hope for the best.  Also, it made me very happy to find a place for my thrifted German sign.

The other side of the room started out like this:

And ended up like this:

This side of the room we just added paint and new carpet.  We picked the color Naval by Sherwin Williams to compliment the wallpapered TV wall in the adjoining room.  The shutters on the lower level of the wall cover our heating system.  They aren’t my favorite, but changing them and our heating system was not how we wanted to spend our budget. We did have one of those costly surprises came about when part of the ceiling was removed to install the plumbing for the bathroom next door.  It was discovered that some of the floor joists were not up to code and needed to be changed out.  That surely wasn’t my first choice to spend money on, but after they finished the job they were able to raise the ceiling height by a couple inches, which was an expensive win.  

Here is a little peek of the navy wallpaper on the TV wall. 

This is what we had in the before

Bringing my treasures together for the decor of this room has been really fun. Thankfully there was a spot for my arch.   I loved embracing the colors.  Everything felt complete when I recently found the tall trunk in the corner. I was shopping with a friend, good friend who was willing to help me haul the trunk from one end of an antique mall to another.  Make friends like that.  This trunk is pretty special in my opinion, I haven’t come upon one that looked like this before.  I love the green, the size, the intials, and that its made from metal with a wood top. The woman who checked me out at the shop said “my husband’s body would fit in there.” Hmmmmmmmm…  She is right, at least one body will fit in there. When I brought it home my daughter immediately started sizing it up for hide and seek.  But when I insepcted it further for safety and cohabiting with my kids, my stomach sunk.  It has a layer of metal on each side and two solid latches at the top.  The potential for disaster if someone got stuck in in a tightly sealed metal trunk still makes me feel a little sick.  I made it so the latches won’t close, I filled up the trunk with blankets and pillows so no one can fit in there, and talked to my kids about NOT climbing in.  Anyway…There is a lot to consider when choosing home decor. 

This is a space that serves us well. We have used this work station a lot over the past year.  I look forward to using it and conquering in Ping Pong (just kidding, that’s not really my thing) for a long time to come.  If you missed the information about our TV room remodel, the post is here if you would like 🙂

PS I didn’t plan on keep this pillow that I made out a nautical flag, but I am feeling pretty glad it never sold now.  Also finally after nearly 22 years the Pendelton blanket we got as a wedding gift found a decent spot to be showcased.

***all before pictures are courtesy of MKE Design Build***

Losing A Kitchen Wall

The decision to make a couple of changes to our kitchen during our renovation was a good one.  The previous owners of our home did an a great job remodeling the space, so we started with a very pretty slate that opened up into our dining room.  However the changes we made the space serve our family better.  

Our kitchen is very typical size for an older home. It is not a grand kitchen with a big island, but it is plenty big enough for a couple cooks. However, we all have our favorite same corner of the kitchen that we fight over.  But when we moved in, it felt claustraphobic to me.  Even if it actual wasn’t that tight, it had the feeling of it.  Spending a good portion of each day in my kitchen I started to wonder about tearing down the wall and opening up the staircase.  Here is the before:

Once our contractor’s engineer concluded that we could safely remove the wall.  I never looked back. The process of removing the wall I don’t recall taking longer than a week.  I feel very fortunate that I didn’t feel very stressed with our renovation.  I attribute this to the fact that I liked the workers and felt comfortable with them in my home.  But also I hardly went through a kitchen renovation.  THAT must be very stressful to live without a kitchen for several months, a week was plenty.  But I would totally do it if it meant I got to design a kitchen, it just was not needed in this house, which I can not complain about.  

Of course the wall did not come down without a set back, that is the nature of the the reno game.  There was a heating pipe buried in the wall that fed into our upstairs bathroom.  Our contractor did his best in assessing what potentially could be found when the wall was removed, but there is no way to really know until the sheetrock is removed.  Relocating the pipe was not a big issue, but the worry was that the pipe had a abestos wrap.  We had no choice but to have it professionally abated, that fortunately turned into a half day project and was not a big deal.  

A big beam was installed that ran across the ceiling to support our house structurally, it blends in with the wall perfectly.  We had an incredible wood worker mimic our nearly 100 year-old banister. The newer banister doesn’t have the patina of the older one, but I don’t think anyone could have created a more closer match.

I love that this has opened up so many sight lines in my house.  I love being able to see the front of my house that is lined with windows from the back hall.

Also if I am cooking in my favorite corner I have sight line into the living room and side door.  I much prefer the feeling this creates versus to feeling just a little cut off before with the wall.

Before wall was removed there was a penisula in place.  We had mixed feelings about it.  It did offer more counter space and some seating, but it cut into the room a bit.  If we were to remove the wall, that had to go too, so the decision was made for us to ditch the penisula.  We replaced it with a 10 inch deep bar that is perfect for a quick solo meal.  I am pleased with it.  We also added shelves with brackets from World Market that have seen a variety of displays of my thrifted finds in the past year.  They are another loved part of this makeover for me.

One of the last pieces of the kitchen renovation was adding pantry. I wanted more storage. I specfically wanted storage for my beloved crock pot. There is a cut out area in our living room that connects directly with the kitchen that seemed to be wasted space. It was only about 2 square feet, but every inch counts in this house.  I believe this originally was where a laundry shoot was located.  I thought this would be a good spot for a cabinet.  We designed a cabinet with the priority being that my crock pot would fit.  But custom cabinetry is not cheap.  We were very surprised by the quote, and our contractor said we could buy a cabinet that was a furniture piece and build it in as a more affordable option.  I found a cabinet from Ballard Designs that would have worked, it was pretty, and it would have saved a bit of money. Ulitmately my husband felt like since this was the most visable part of our house, you can see it right from the front door, it needed to be done perfectly.  I think it was a good call. We went with the custom built cabinet.  This cabinet takes a beating and holds up great, I am grateful for its quality and glad this was something we didn’t compromise on.

We finished off making this MY kitchen by changing out the light fixture over the sink and adding new pulls. 

Thanks for joining along with my kitchen tour.  This is has been the closest it has gotten to having visitors in a year.  Sigh.  Hopefully someday soon friends and family will be visiting. Also I need to credit our great contractors that made this possible is MKE Deisgn and Build.

Bunk Bedroom Renovation

As part of the renovation that we completed on our home we included some mostly comestic updates to my son’s room.  This is our version of a “built-in” bunk bedroom.  The original plan was to have a custom built in bunk bed placed, but the quote for our design was legitimately the cost of a year’s college tution.  Maybe not a year at an Ivy League, but for sure a solid State school with room and board.  It was one of those things that was so shocking you have no choice but to find it funny and laugh.  I actually prefer it that way instead of it being slightly out of reach, thats when I get frustrated.  So it was time to find a plan B.  But before we get into that, here are some (embrassing, why didn’t I tidy a little?? then I cropped out the really messy parts(also thank you to Michelle of MKE design and Build for taking the before pictures ;))) before pictures of the room:

Pre-quarantine we were going to have my son and youngest daughter share the room and use the small attached room as playroom for them.  Plans changed during construction and my daughter ended taking the playroom as her own, see the post here.  With our intial plan needing to get two beds in this space a bunk bed seemed logical. Its a decent size room but with the doors, windows, and the cut outs on the main wall made bed placement tricky.  Our contractor drew up a stunning plan for a custom bunk bed that had us very excited, but when the bid came back she immediately came up with the idea of a semi built in bunk bed situation.  Even if we had had the money to spend on the custom bunk bed it would not be something that would have increased the value of our house, it would have been purely for enjoyment. I should note that we didn’t shop around, there likely are options of carpenters that will build a bunk bed affordably, but with all the decisions we were making at the time we just didn’t look into other carpenters. This is not something we wanted THAT badly.  When I started looking at options of bunk beds to purchase I got very excited about this one from Restoration Hardware, it had the look and the feel of our custom deisgn.  It too was an investment, but a tiny one compared to the custom one, and we can bring it with us if we move.

To make the bed feel like it belonged in the space our contractor did some work to the area.  They brought part of the back wall out to make it flush, they added the shiplap to the back wall, they lined the head of the bottom bunk with shiplap, and added coat hooks to the nook at the top of the bed. We I chose dark paint to compliment the light wood of the bed.  The paint color is Farrow and Ball railings color matched in Sherwin Williams paint.  We are happy, and my son is happy. We have 8 foot ceilings, so that top bunk is a snug space, it wouldn’t be my choice to sleep up there, but my son loves it. There is something about that cozy space where basically just he ever goes that makes him feel very safe at night. It has been a great solution for practical and design reasons. Speaking of design the sconces totally do it for me.

The structural change that we did make in this room was to add a closet, it did not have one before.  This should be a good real estate investment because now with a closet it is a legal bedroom, not to mention we NEEDED a closet. This is the before:

After

I would most definitely do the barn door set up again.  I love how it turned out. I REALLY wanted a vintage door with character and I think I got that.  The door was a door I purchased on FB marketplace.  It was important that I found one that had very close measurements to what was needed, my contractor warned against having to make too many adjustments to a door.  It took months of shopping to find the right size, but totally worth it.  Here is what the door looked like before I got it:

I stripped it.  I had to remove the cute door knob so it could operate like a barndoor.  It was a stubborn door knob, I ended up have to hand saw it off which was unfortunate. I filled in the holes with wood filler.  Then I painted it using a mixture of Miss Mustard Seed Milk Paint ArtissimoBoxwood, and Schloss.  I couldn’t tell you the exact recipe but I believe it there is more Boxwood than Artissimo then a tiny bit of Schloss.  This brand of paint is really easy to mix and create a pretty color, every time I have tried I have had success.  I sealed the paint the Tough Coat.  The handle and number stickers were finds from an antique shop, good finds if I do say so myself.  Our contractor finished off the job by installing the door using simple black barn door hardware. 

To finish out the tour of this space, we changed out the ceiling fan because. Lowish ceilings + bunk bed + ceiling fan is not a safe equation.  Picking a light fixture was a decision that I was forced into making really quickly, it turned out fine.  I like the amazon purchase.  Finally to keep you in the know as to the whole space here is the side of the room that was not changed except for a little paint:

To finish out the tour of this space, we changed out the ceiling fan because. Lowish ceilings + bunk bed + ceiling fan is not a safe equation.  Picking a light fixture was a decision that I was forced into making really quickly, it turned out fine.  I like the amazon purchase.  Finally to keep you in the know as to the whole space here is the side of the room that was not changed except for a little paint:

Emerson’s Bedroom Remodel

During our remodel my daughter’s bedroom was my little creative baby.  Nothing that we did in her room was essential, but it was all very fun, didn’t break the bank, and the outcome has made us all happy. In order to get to her cozy room you have to walk through my son’s room.  We originally thought that we would bunk her and my son in one room and then use this as their playroom.  Those two really are a pair, but after a couple months of quarantine Emerson declared that she was taking the playroom as her own room.  Too much together time gets to the best of us.  So now she has a dedicated space to herself, but she still often sleeps in her brother’s room on his bottom bunk. 

The room was just fine before, and probably a little of paint would have gone a long way. Here are some before pictures. Oh man they are embarassing.  Do you ever think when you see before pictures if they would just pick up a little then the space would look so much better? Well there was no staging this mess.  My contractor took them about a week or two after we moved in and it is a legit mess, moving mess, shoving things whereever we could find a corner.  But this is all I have as before pictures. So here we go…

I loved the idea of adding shiplap to the walls in the space to accentuate the angles and attic like feel of the room.  I might be a little behind on the relevance of shiplap, but eventhough the intense fad seems to be passing, I think it suites this room perfectly.

Before the remodel this room two of the walls had short closets that offered storage in the angle of the roof.  I thought using a one of these spaces to build a bed similar to one that I had been admiring on pintrest would be a great use of space.  The combination of beadboard and shiplap adds to it. Eventhough this orginallywas  going to be a playroom, I thought it is always handy to have an extra bed for when guests come, and plus the cute potential had me very excited.  The thing about this bed is that the cost was relatively low.  Our contractor was to take my idea and draw up a detailed design that there carpenters executed.  We had hoped to install built in bunk beds in my son’s room, but those required hiring a specialty woodworker and the quote was waaaaaay out of our budget.  So you never know, I do believe it is worth getting quotes for whatever your dreams are and then doing an evaluation on what really can be done. 

Shopping for lights for this space was one of my favorite parts of the entire remodel.  And picking out these sconces  was my favorite part of that favorite part.  We added an affordable Ikea pendant in the bed, and honestly because the ceiling is angled getting it to fit right was a challenge.  It is in place right now, but I am not sure that it will last very long, we may have to replace in the future. But I don’t hate the idea of being forced into more shopping for lights.  We added a vintage light to the window space.  I actually purchased this for our previous home and never used it, I was glad it finally found a spot out of storage, and like that it adds a little color.

The ways in which we saved money after our intial quote in this room was with a little labor.  I painted to closet doors and they turned out fine, it was worth the cost savings for a couple hours of work.

Our plan for the floors was to pull up the carpet, plywood underlayment, and expose the wooden subfloor planks.  As we got into the project and the carpet was ripped up our carpenter realized this would not be a good option.  The planks had pretty wide gaps, there likely would be layers of glue that held the plywood in place on top, and it would be a mess.  This was one of the last parts of our last projects.  Our budget was spent, so installing hardwood floors was not an option and I didn’t want carpet.  Luckily I had just read Miss Mustard Seed’s Blog posts about painting a checkerboard pattern on her studio floor.  I thought this was a worth a try.  I followed her tutoria and painted right on the underlayment. In this room some of the underlayment is plywood and some is particle board, so the floor is not a polished look, but I love how it turned out.  I actually did two rounds of painting and taping off these squares.  I first did white and a greige color squares.  The griege appeared more pinkish tan on the floor and I couldn’t live with it.  So then I tried the Farrow and Ball Teresa’s Green color matched with Sherwin Williams Porch and Floor Enamel.  That was a winner.  It was fun, but neutral enough to go with a variety of decor.  It was funny at the time the painters in our house thought I was crazy. They did not understand the vision and one thought I was doing an actual black and white checkerboard for my kids to play checkers on, I am not that fun of a mom to do something like that.  But they seemed okay with it when I finished, the boss even joked about hiring me.  I will take that as a compliment.

                                  -the process-

I wasn’t feeling this greige color, so I had to tape off again, luckily I could just follow the lines of the squares and the second time was much faster.

I had a helper.  She was putting her sweat equity into her room too.  I must say I am impressed with her multitasking.

The other special thing about this room is that it has a secret hideout.  Our carpenter discovered a decent size storage room hidden behind a closet that I had forgotten about.  I must say the whole family loved this carpenter, especially my dogs, they would wait for him at the door.  He was friendly, cheerful, and sang loudly and did not care who heard him.  I liked having him and his singing in our house.  He saw this space and said “this needs to be a hideout.” He had fond memories of playing in just this kind of hidden place as a kid.  So we had them roughly throw up plywood over the insulation to make it safe, and I took a day and painted it all white.  It is a fun little space and perfect storage for some pieces I have collected but don’t have a space for, but don’t want to let go of yet. 

Before painting, but after the plywood had been placed.

Painted.  This space wasn’t my favorite to paint with all the angles,  but the outcome was worth it.

The thing that worked out great and took a lot of ingenuity on the part of my contractor and carpenters was figuring out the access door for the hideout.  The bed had already been partial built, and like my contractor said doing either the bed or the hideout would have been easy, but figuring out how to squeeze a door in with the bed was challenge.  But they were up for it.  I believe they had a loose idea before they started construction as to how they would create a door, but they said they just needed to start building and see what fell into place.  We needed an insulated door because the hideout space was not 100 percent insulated and Wisconsin winters require a minimum of 100 percent insulation. In the end they built a crawl space door that is easy to get through, seals tightly with magnetics, and fits in with all the molding.  We are so glad they made it work and it looks great.  If we had even an inch or two of less space the hideout would have not been an option.  It was a bit of a miracle, which is always welcome in a remodel.

Why We Decided to Remodel

This past summer we completed a 5 month long remodeling project on our home.  This was basically our first experience making big changes to a home.  We did have to remodel a bathroom that flooded a couple years ago, but aside from that any of the changes we made to our houses were limited to very basic comestic upgrades with paint and lighting fixtures.  We have relocated several times with the company that my husband works for and for ease of adjusting to a new location we have always picked houses that don’t require work.  That all changed with this move, and because I am so pleased with the outcome I might be looking for another project next time we move.

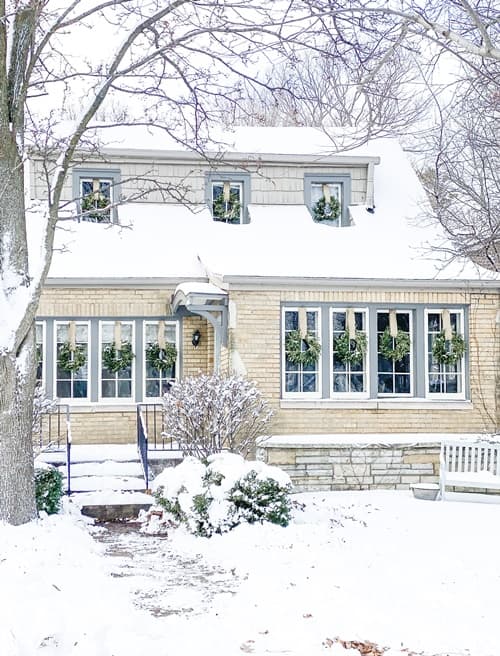
We relocated from Raleigh, North Carolina to the Milwaukee area in the summer of 2019.  In Raleigh we lived in a beautiful planned subdivision that had parks, a neighborhood pool, running/biking paths and newer homes with lots of square footage.  We loved it there and had carved out a happy life.  I remember the day when my husband was approached about a position in Wisconsin and driving onto my street feeling so sad that I might be calling this home much longer.  But over the next couple months as the decision to move and give my husband this professional opportunity evolved we decided it would be best for our family.  When he interviewed for the position I came with him to scope out the area.  If you do any amount of internet research about good family neighborhoods to live in Milwaukee you will find that place we landed, a walkable historic neighborhood right on Lake Michigan that is a 10 minute drive to downtown.  This neighborhood was my first stop in exploring the area and I fell in love immediately, it made the idea of moving a little better.  The houses are old, but very charming.  The lake was a beautiful backdrop to local playground.  I grabbed lunch at one of the resturaunts in the neighborhood and there were a couple girls ahead of me in line who were about 10 years-old buying cookies at the bakery, I could see that they had just biked there.  I was sold on this kind of life for my family.

Fast forward a couple months later when it was time to house shop. We looked at many different houses in many different areas.  Eventhough I knew where I wanted to live, my husband wasn’t as convinced.  Also it is always wise to look at all options, you never know.  But house hunting was eye opening to say the least.  I believe every location has its own real estate culture, that includes the difference in the style of home down to what is expected in a real estate transaction.  We looked at newer suburban homes that would be similar to what we had in Raleigh.  They were nice, but different than what we had.  But not different enough.  In the end we decided that by doing something totally different in neighborhood and house it might make the transition easier. That way we wouldn’t always be comparing it to what we had in Raleigh.  So we committed to finding an older home in the village of Whitefish Bay. We decided to trade a big kitchen island for quick walk to school, an attached garage for living by Lake Michigan, and a master bathroom for the charm of an old house.  

But with an old home that meant a remodel of some sort, any homes that were completely remodeled were out of our price range.  To further complicate finding a home that didn’t need any work the real estate market in our then desired neighborhood is insanely competive.  There was no option of taking a weekend and shopping for the best 4 bedroom 3 baths house avaliable.  It would be a miracle if there was even a house that met those standards in our price range on a random weekend, let alone a selection of them.  Houses generally come on the market on Tuesdays and are gone in no time if they are good ones, and priced right.  So we waited with bated breath, talk a lot to our awesome realtor, and made many quick trips up to Milwaukee, and realized we had to think outside of the 4 bedroom 3 bath box.  I love looking at houses, but this way of living and with life up in the air got old real fast. Obviously we eventually bought a house, but it was after getting outbid in the 11th hour on a house I really loved, but the one we ended up is better in a lot of ways.   The house we bought had come on the market a month or two before, the pictures were very cute, but I discounted it because I thought it would be too small for our family.  It sold immediately anyway, and later I found out had 8 offers.  But when that sale fell through our realtor encouraged us to consider it.  At that point we would have bought it sight unseen, I wanted an address, its hard to make plans for kids without an address.  The pictures were really nice, the previous owners did a lot of updating and I loved it all, it did seem cozy, but doable, and it was in demand. Our relator said the worst thing that could happen is if ended up being too small we could put a for sale sign in the front yard and have no trouble reselling. Everything fell into place travel wise and I was able to fly out the next day to take a look.  But the house sold again in a couple hours.  Eventhough it was under contact they still let us tour it and my husabnd and I both felt really good in the house, we decided to write a back up offer.  

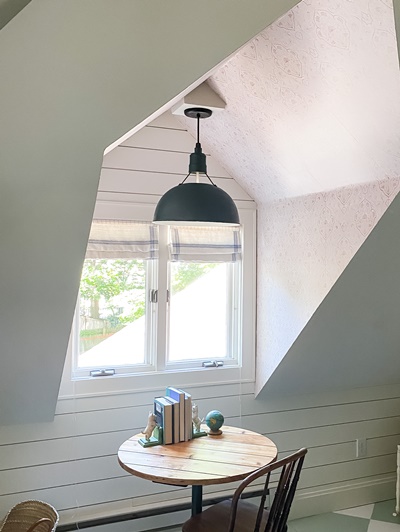
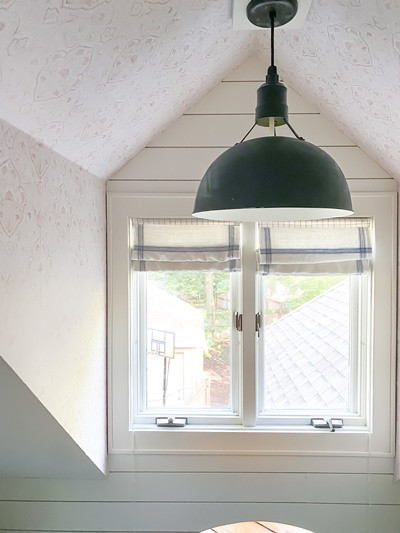
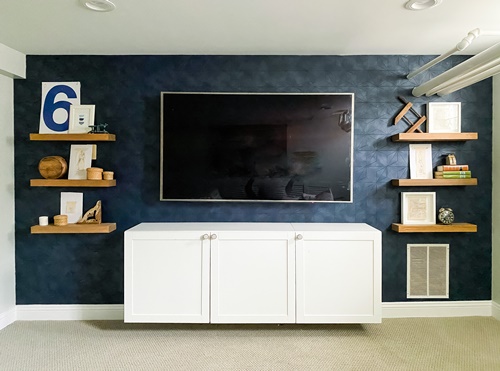
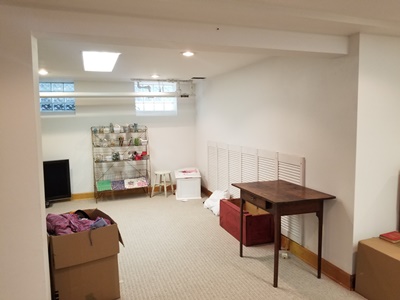
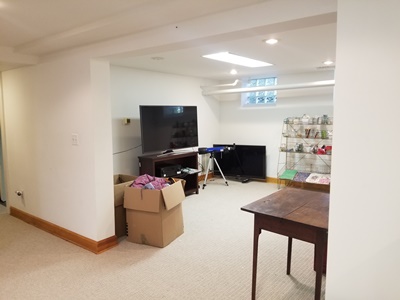
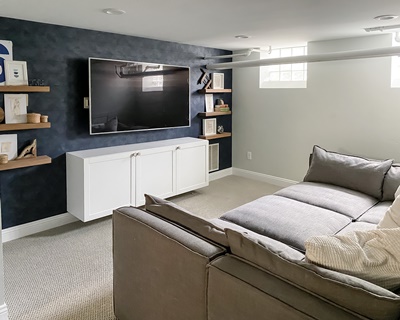
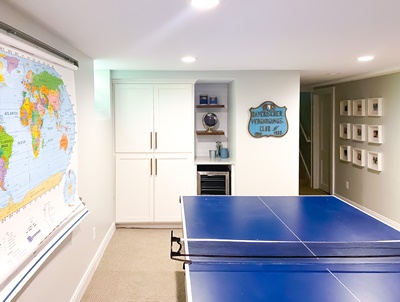
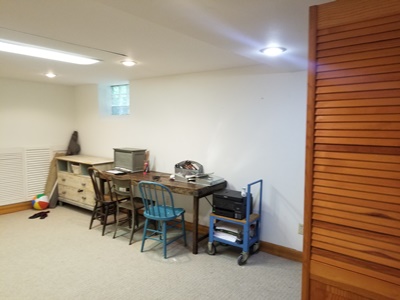
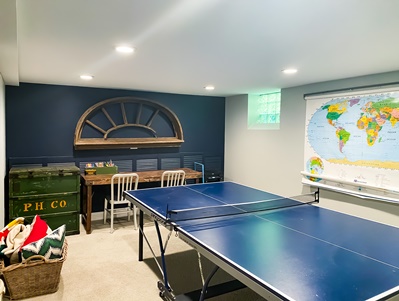
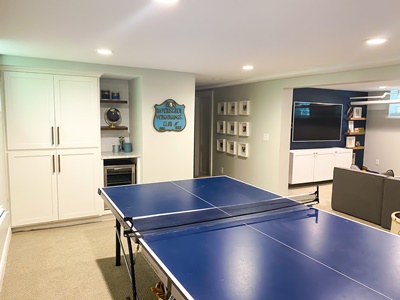
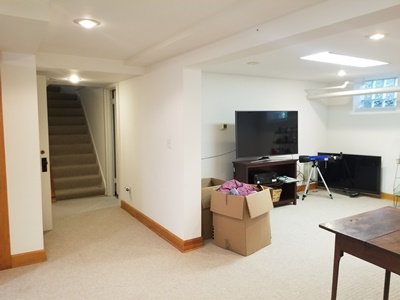
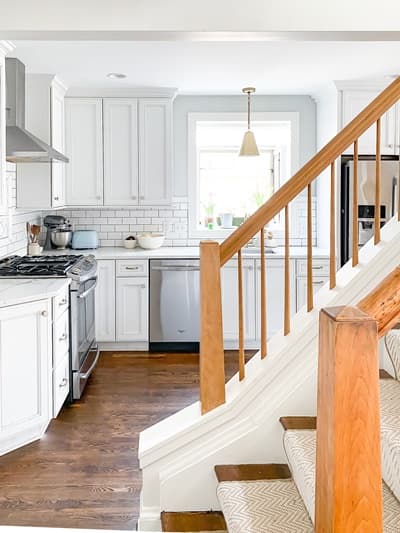
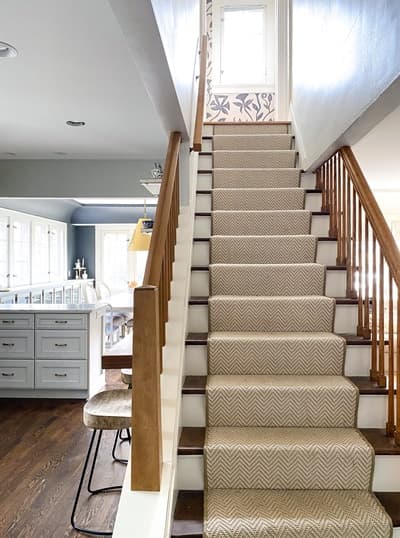
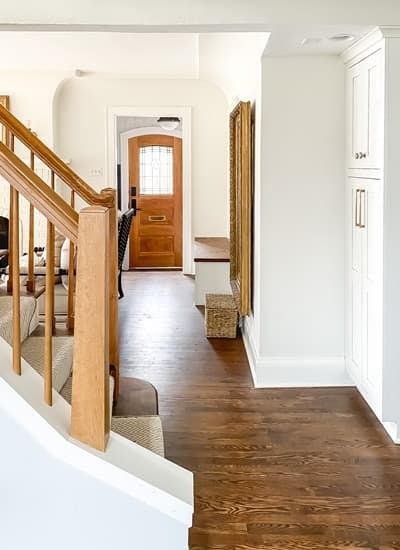
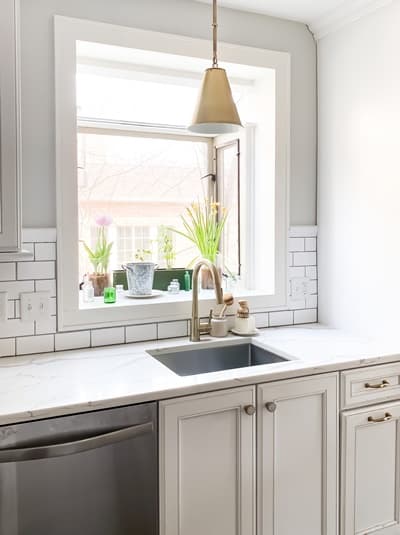
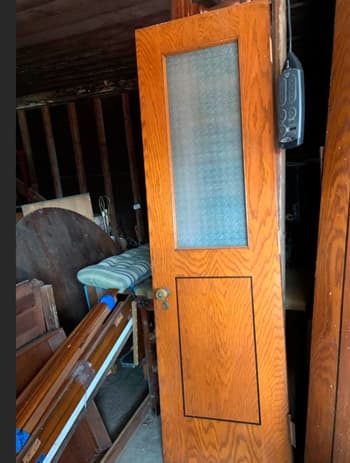
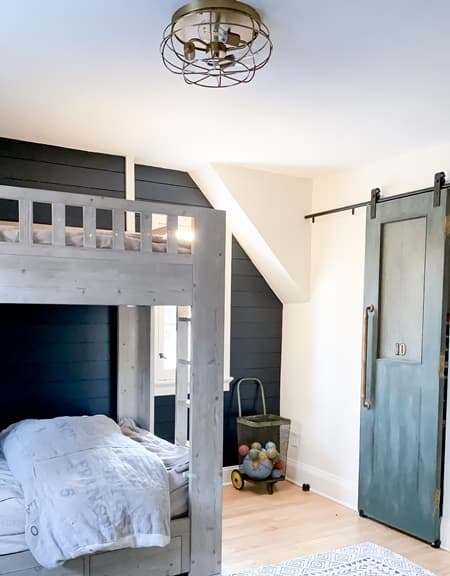
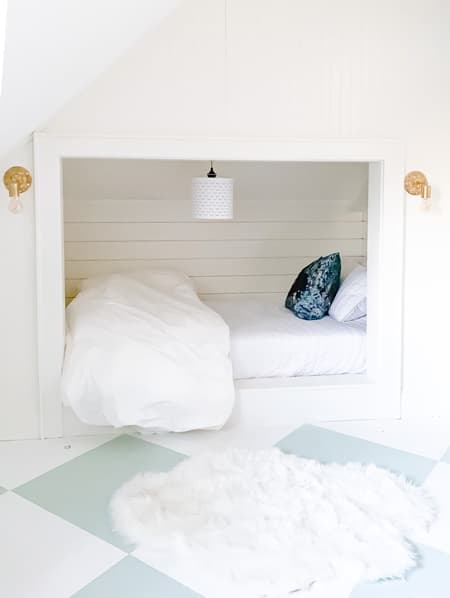
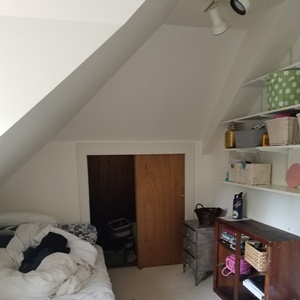
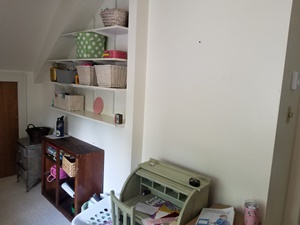
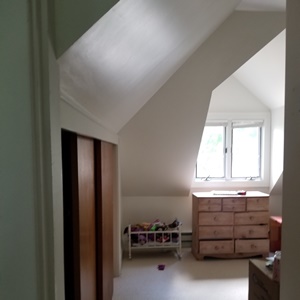
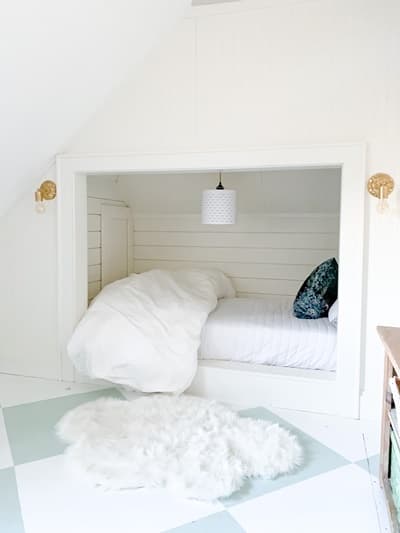
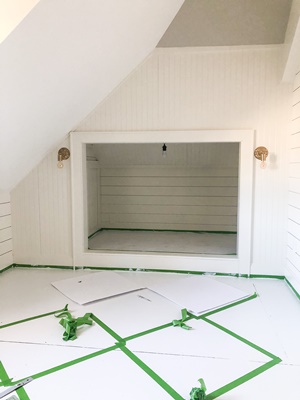
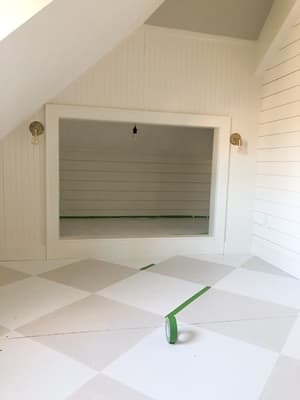
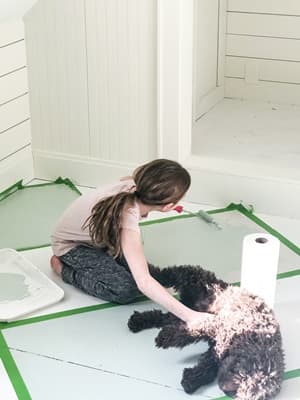
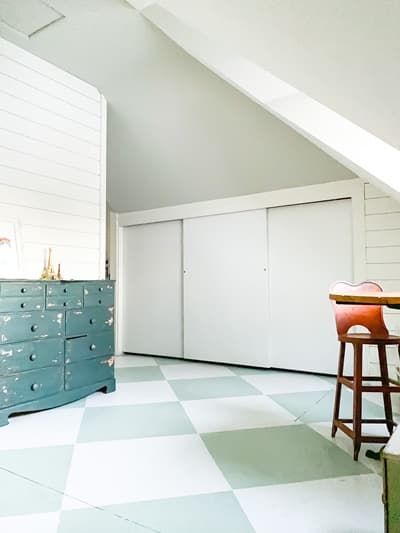
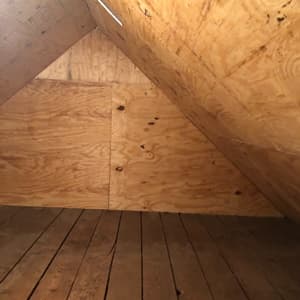
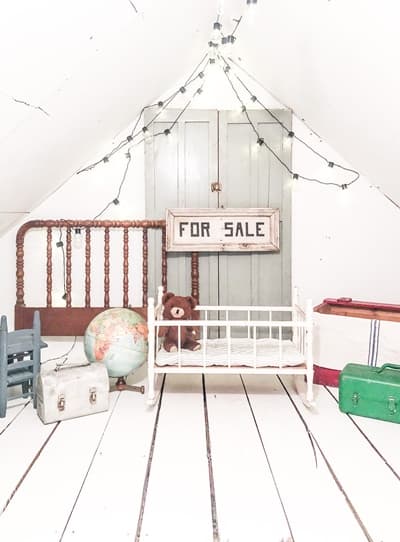
Luckily we got the house.  But now we were cutting our square footage in half, and ending up with 2 small bathrooms compared to the 6 (six is really too many bathrooms in my opinion) we had before.  We could try to live very cozy, but ideally we wanted to add a bedroom and bathroom somehow, so that brings us to the remodel. Under the reccommendation of our contractor we decided to add a legal bedroom in the basement with a egress window and a bathroom.  We thought of possibly adding onto the back of the house but with regards to time and money the basement made the most sense.  We also decided to include some other projects to the remodel to make the most of the house for our family.

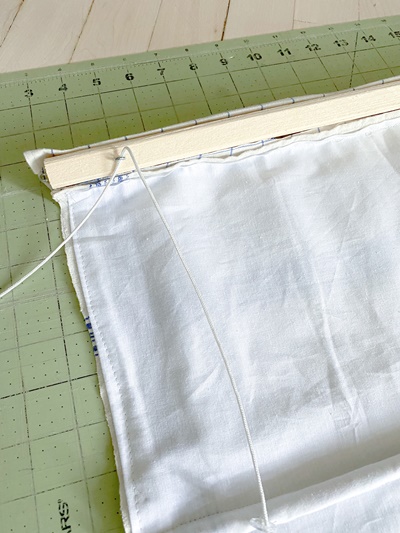
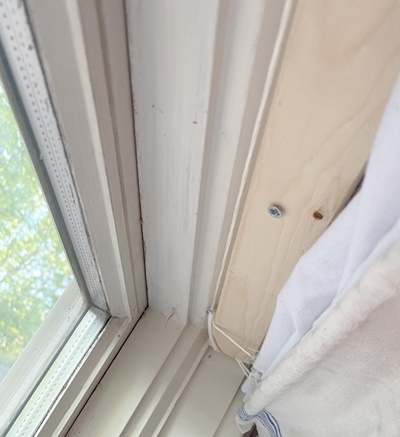
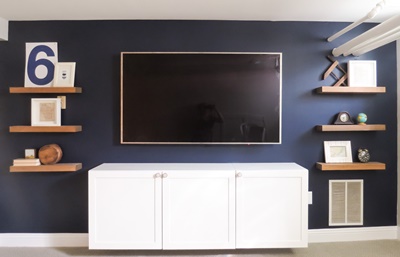
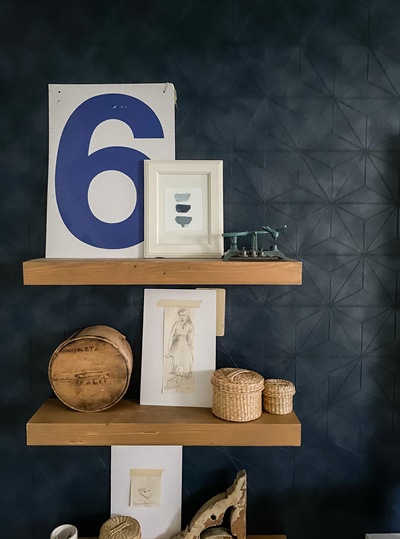
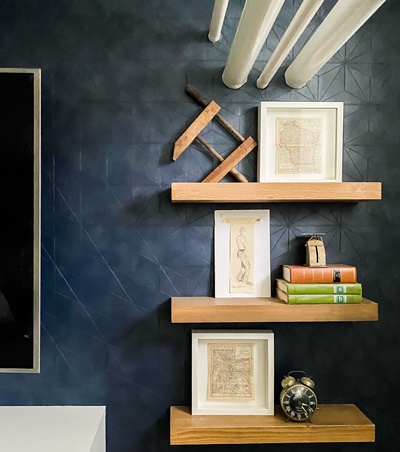
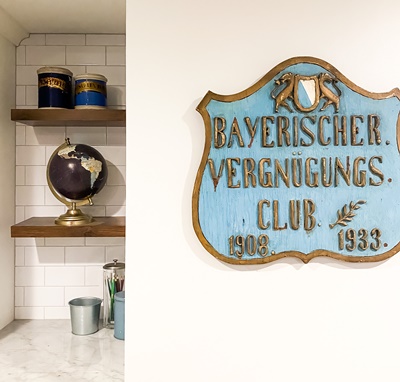
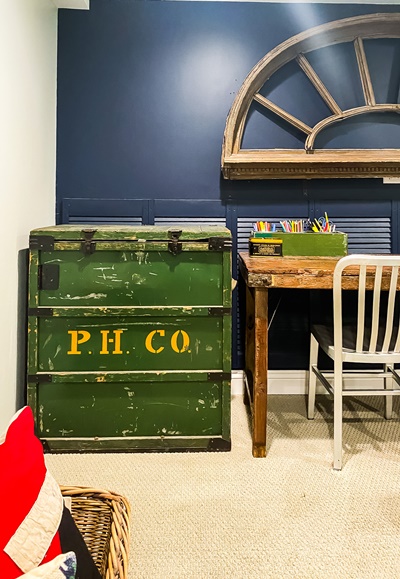
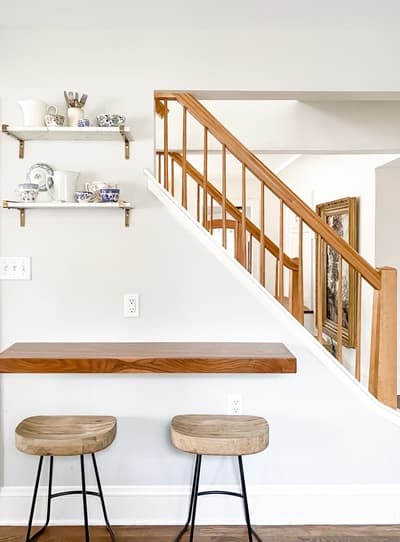
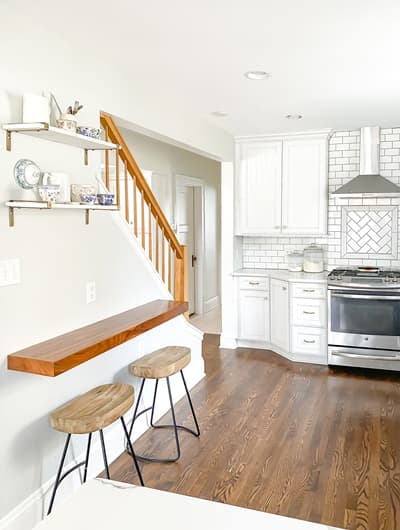
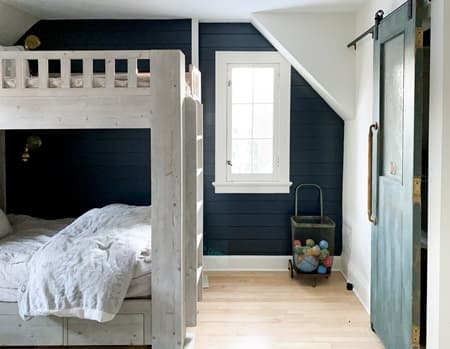
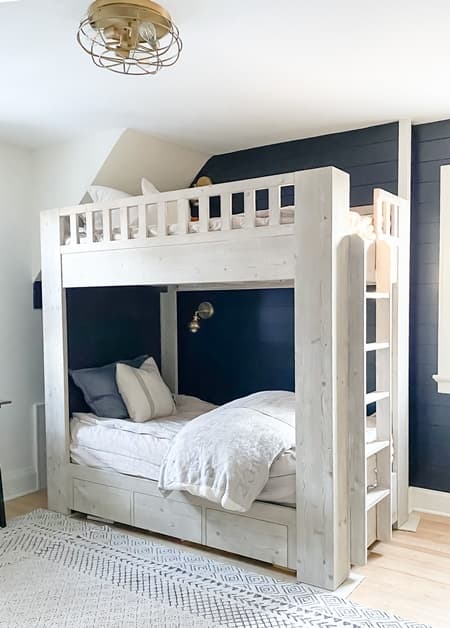
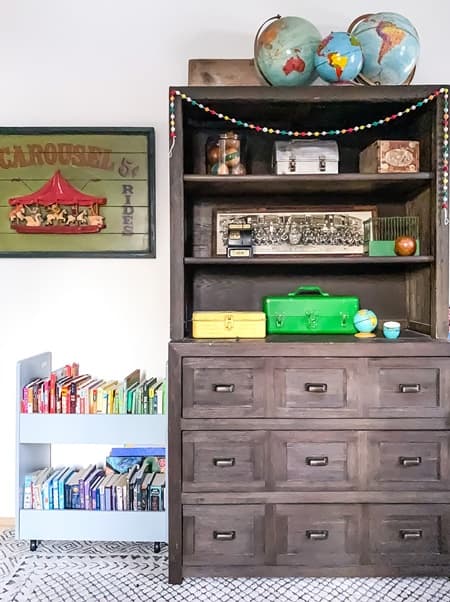
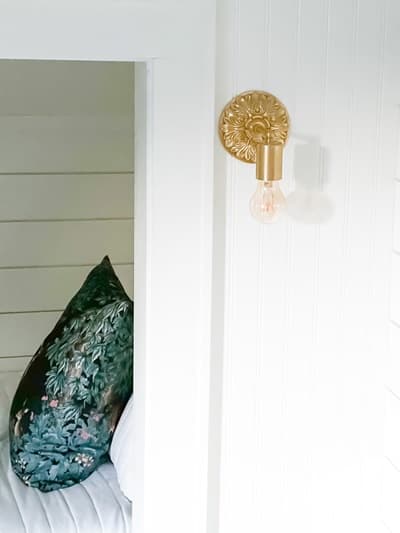
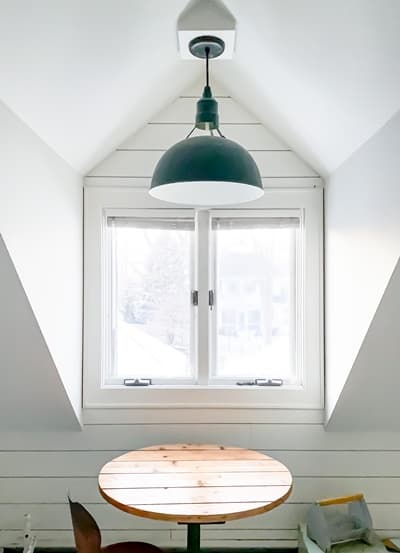
I really loved our contractors, for those local, we used MKE Design and Build.  They did a quality job and stayed very close to the time line.  They also worked hard to stay in our budget.  They intially gave us a rough estimate, then over a couple of months we made more detailed plans, picked finshes and of course adding some more items to the project. We naively thought that none of these add ons would make that much of a difference. Wrong. When we got our final quote it was well over 50% of our intial quote. That was rough day. There was no way we could afford it and even if we could it wouldn’t have been smart for resale.  But our contactors were amazing.  They sat down and went through everything with us and found ways to cut the cost.  We didn’t completely eliminate anything, we just did things differently.  In the end I am so pleased with it all and don’t feel like we missed out on anything or compromised on quality.  As I go through the write ups on the remodeled spaces I will point out the changes we made to save money.  

I am now most attached to this house compared to any of the four other houses we have owned in the past.  There is something about putting your own stamp on a space that feels so good, and it really was a good house to begin with. I think the changes we made turned it into a very comfortable home, which is especially important since we have spent so much time at home this past year.  But I should tell you, my husband misses his McMansion everyday : ) .  He loves big and new.  I like old and cozy.  But it works.  He is happy and will tell you in same breath how much he misses his master suite that he loves being a short bike ride from downtown.  Moving is never about even trades, but there are always good things.

Please subscribe to Penny & Ivy's email list to receive updates on future sales and a bonus 10% off welcome coupon code