
It is ALMOST holiday sale time. Just a couple more hours…purchasing begins at 7 pm Central Standard Time. I really love creating these pieces with vintage fabrics, I am pleased with how they have turned out, and I am really hoping they bring cheer to a lot of homes. If you miss out on an item, I can likely make one similar for you, just reach out. Although there are a couple exceptions in which I don’t have anymore similar fabric.
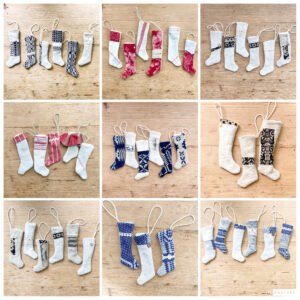
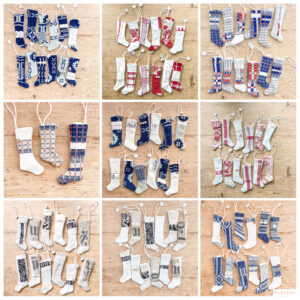
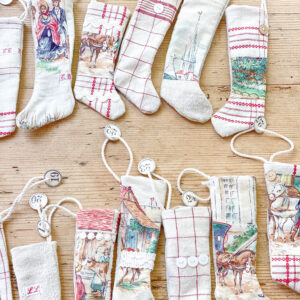
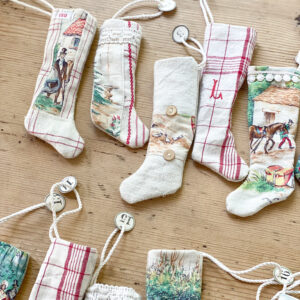
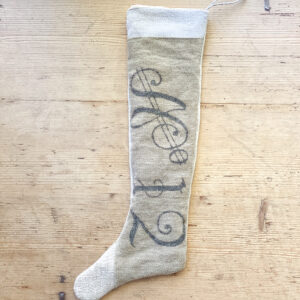
A couple years ago, I tried out sewing some tiny stockings, they have turned into my most favorite product to sew. I love that some small pieces of old fabric can still be enjoyed in a stocking even if its just the smallest of remnants. I love adding details to each one and then coordinating them into a set. They are somewhat labor intensive, but making them is a very joyful for me :). This round of stockings, for the first time I created stockings with some pieces of vintage wool coverlets. I love the texture and pattern of the material. I added in some sets with blue and red grain sack and vintage fabrics. The price of the sets are $45 for a 3, $85 for 6, $165 for 12, and $335 for 25. The tiny stockings are each about 2 inches wide and 5-7 inches long.

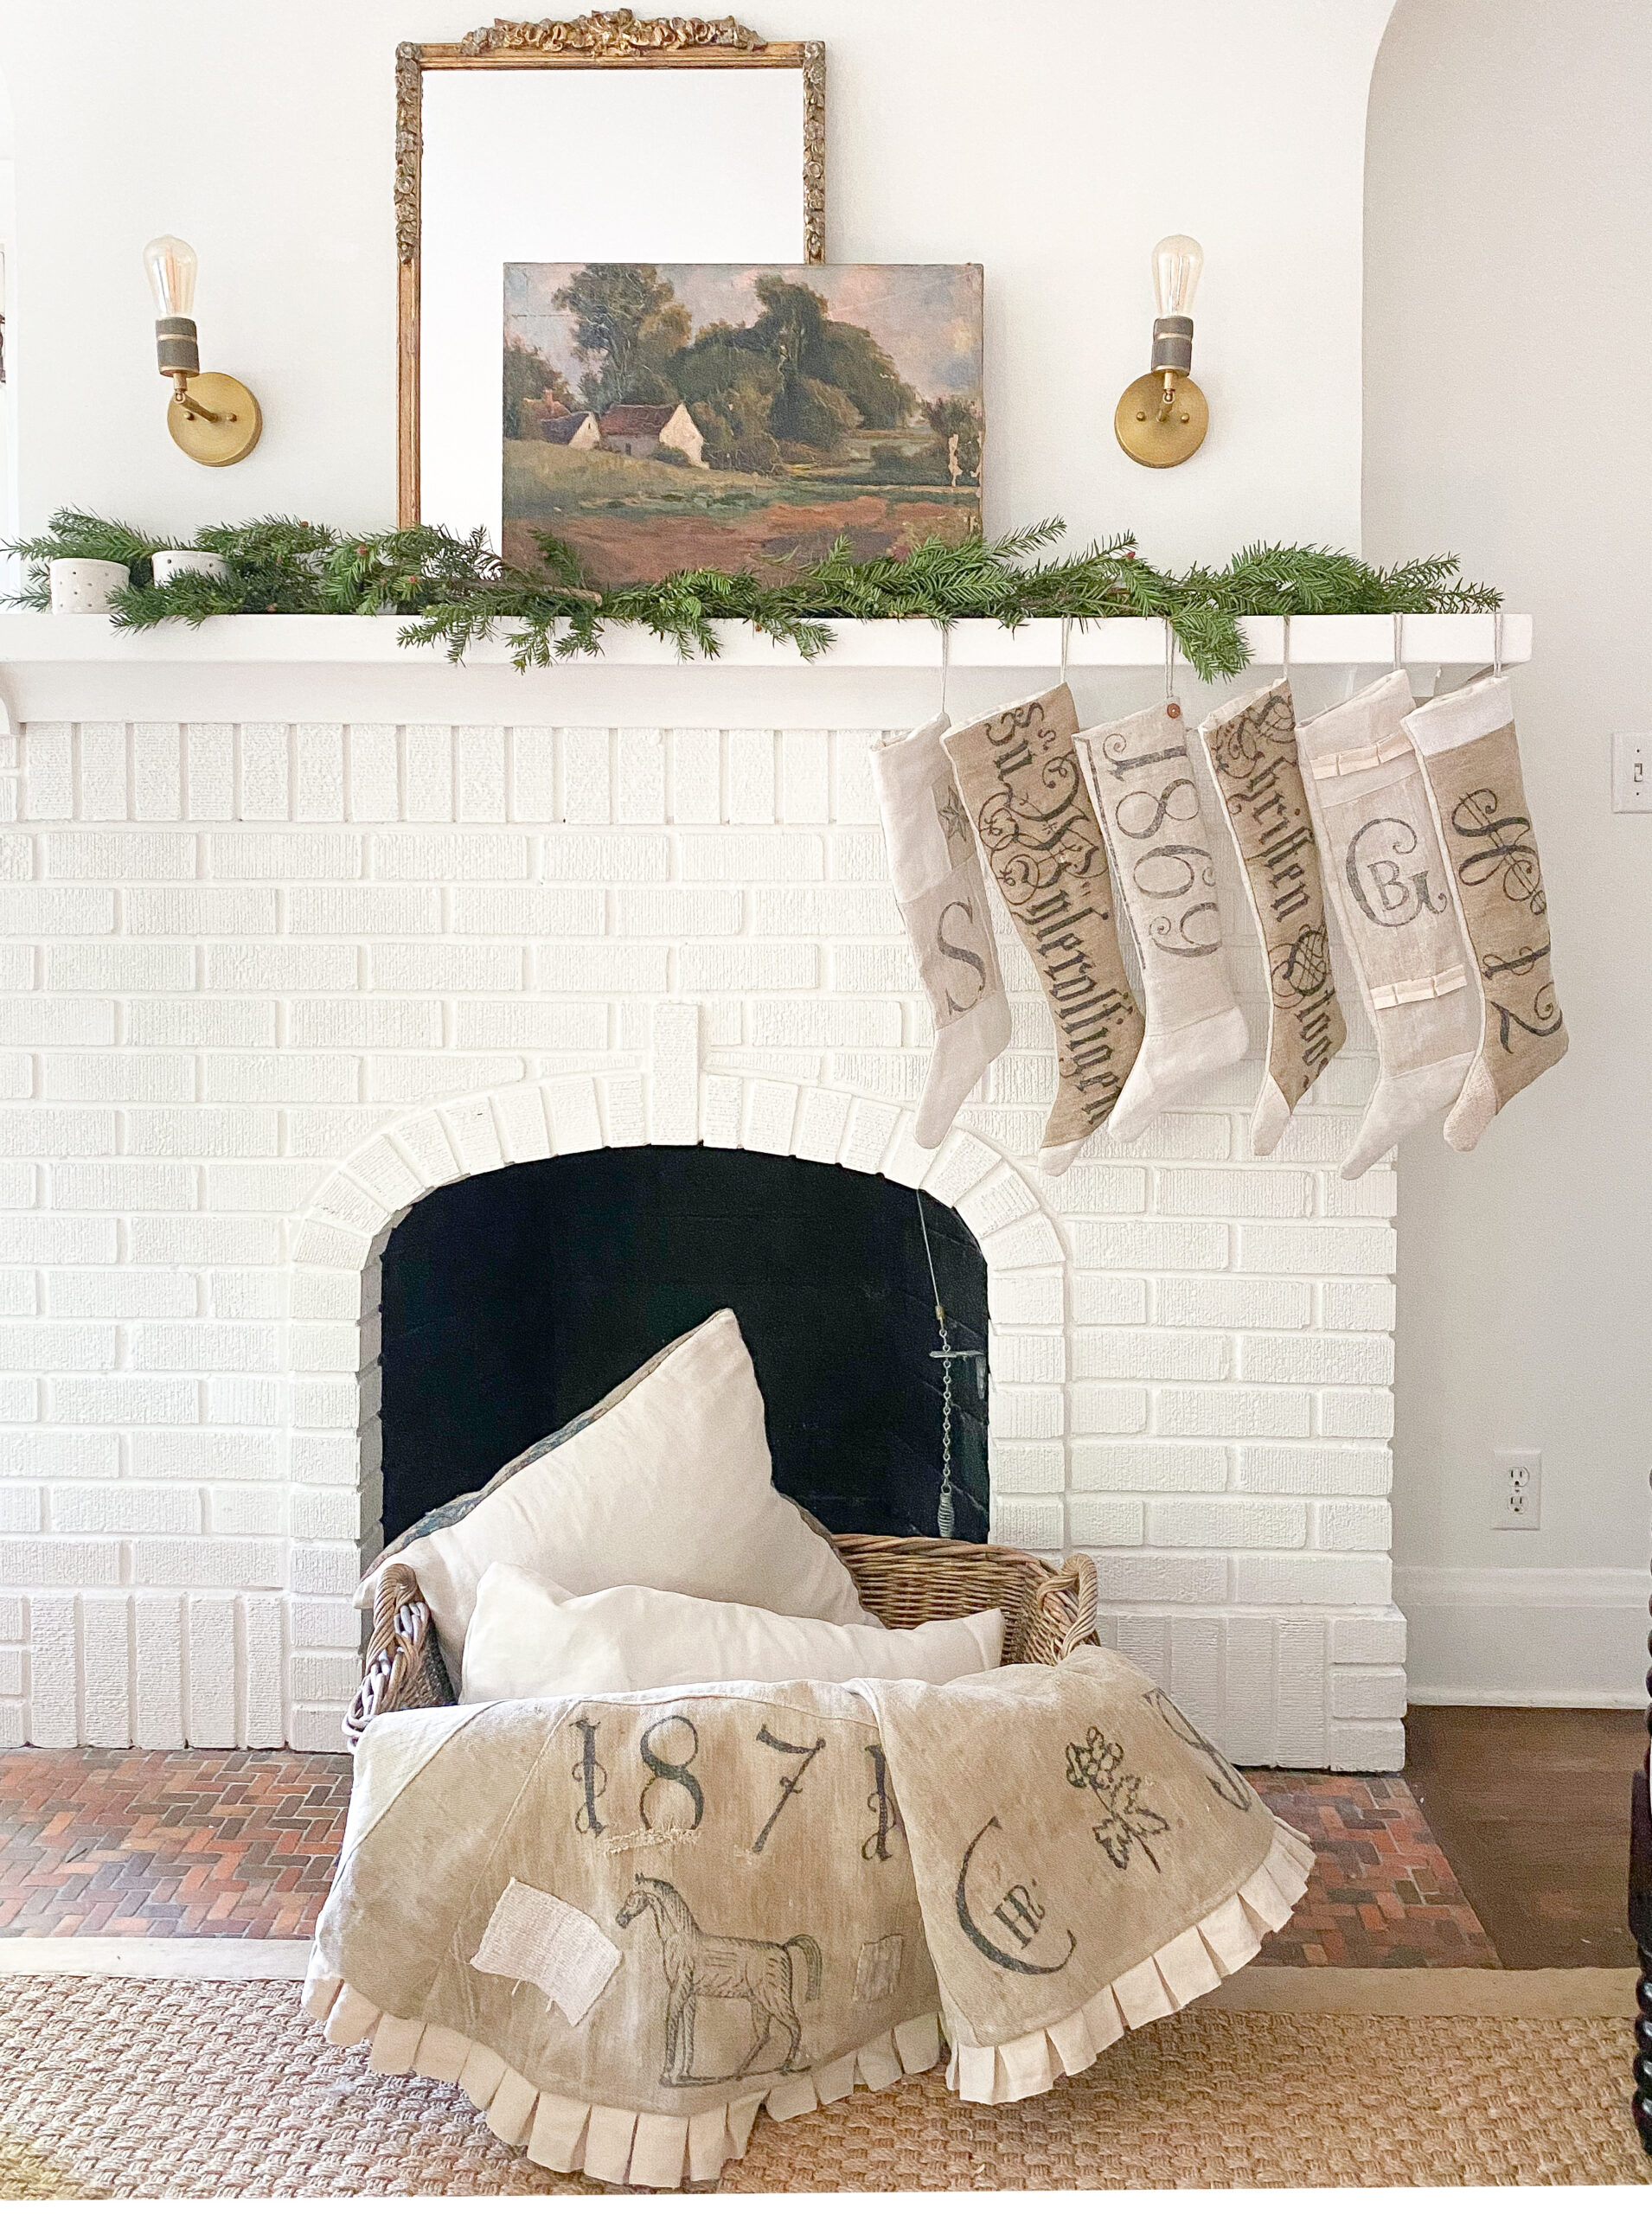
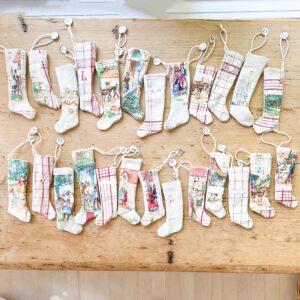
One of my favorite sets, is this large one that was made with vintage French fabric that had a variety of countryside images. This one has 25 tiny stockings and can be used as an advent calendar. This is fabric that I no longer have any more of, although I hope to get my hands on something similar soon, I can’t make any promises that I would be able to recreate something similar to this:
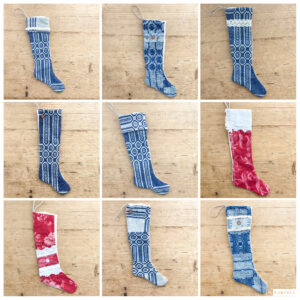
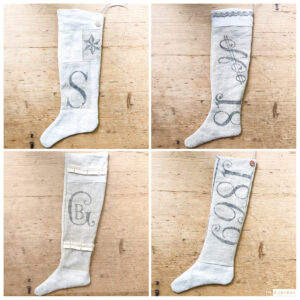
For bigger stockings, I tried using the vintage coverlets again. The patterns and color of the this fabric is very lovely. They are each about 17.5 inches long and $59 a piece. There are couple stockings of the same size thrown into the collage that were made from vintage French fabric that I purchased in Paris. I also love the tones of the red/pink and think they are perfect pop of color for the holiday.
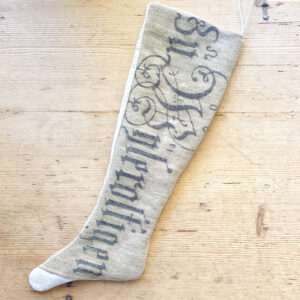
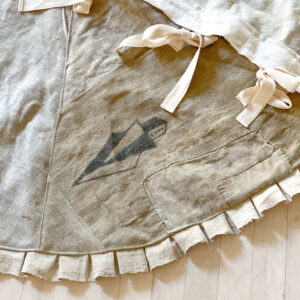
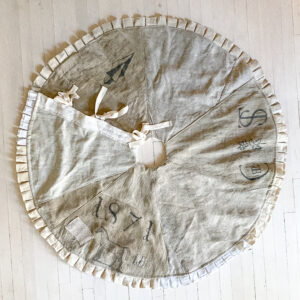
This year, I purchased some grain sacks from a new Etsy shop. The calligraphy is something remarkable. I have been saving them for months to use a large stockings (measuring 20-22 inches long) and a tree skirt. Each stocking is $125.
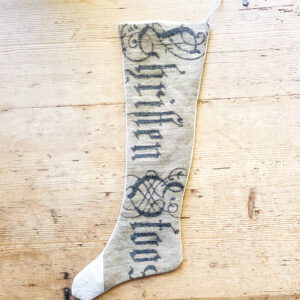
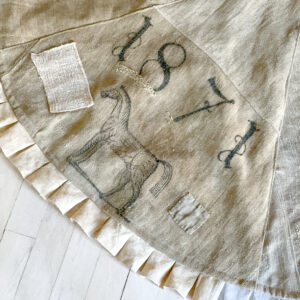
The writing and the depiction of the horse that is used in the tree skirt is very unique. I believe the writing is some form of CHRIST, I loved that. It was a pleasure working with this fabric. I used remnants of other grain sacks to complete this tree skirt that measures approximately 54 inches across. The price for this piece is $425.

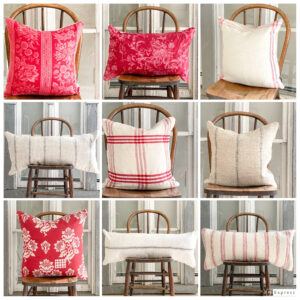
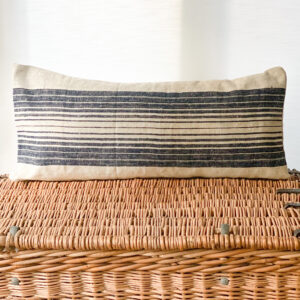
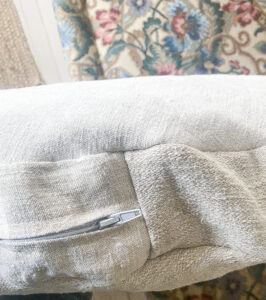
Finally I added a variety of pillow slips to the sale. A couple have a gold zipper closure on the side, a new detail that compliments the fabric. The price for these range from $49-109.
Thank you for stopping by!! Please reach out if you have any questions, pennyandivydecor@gmail.com.
–
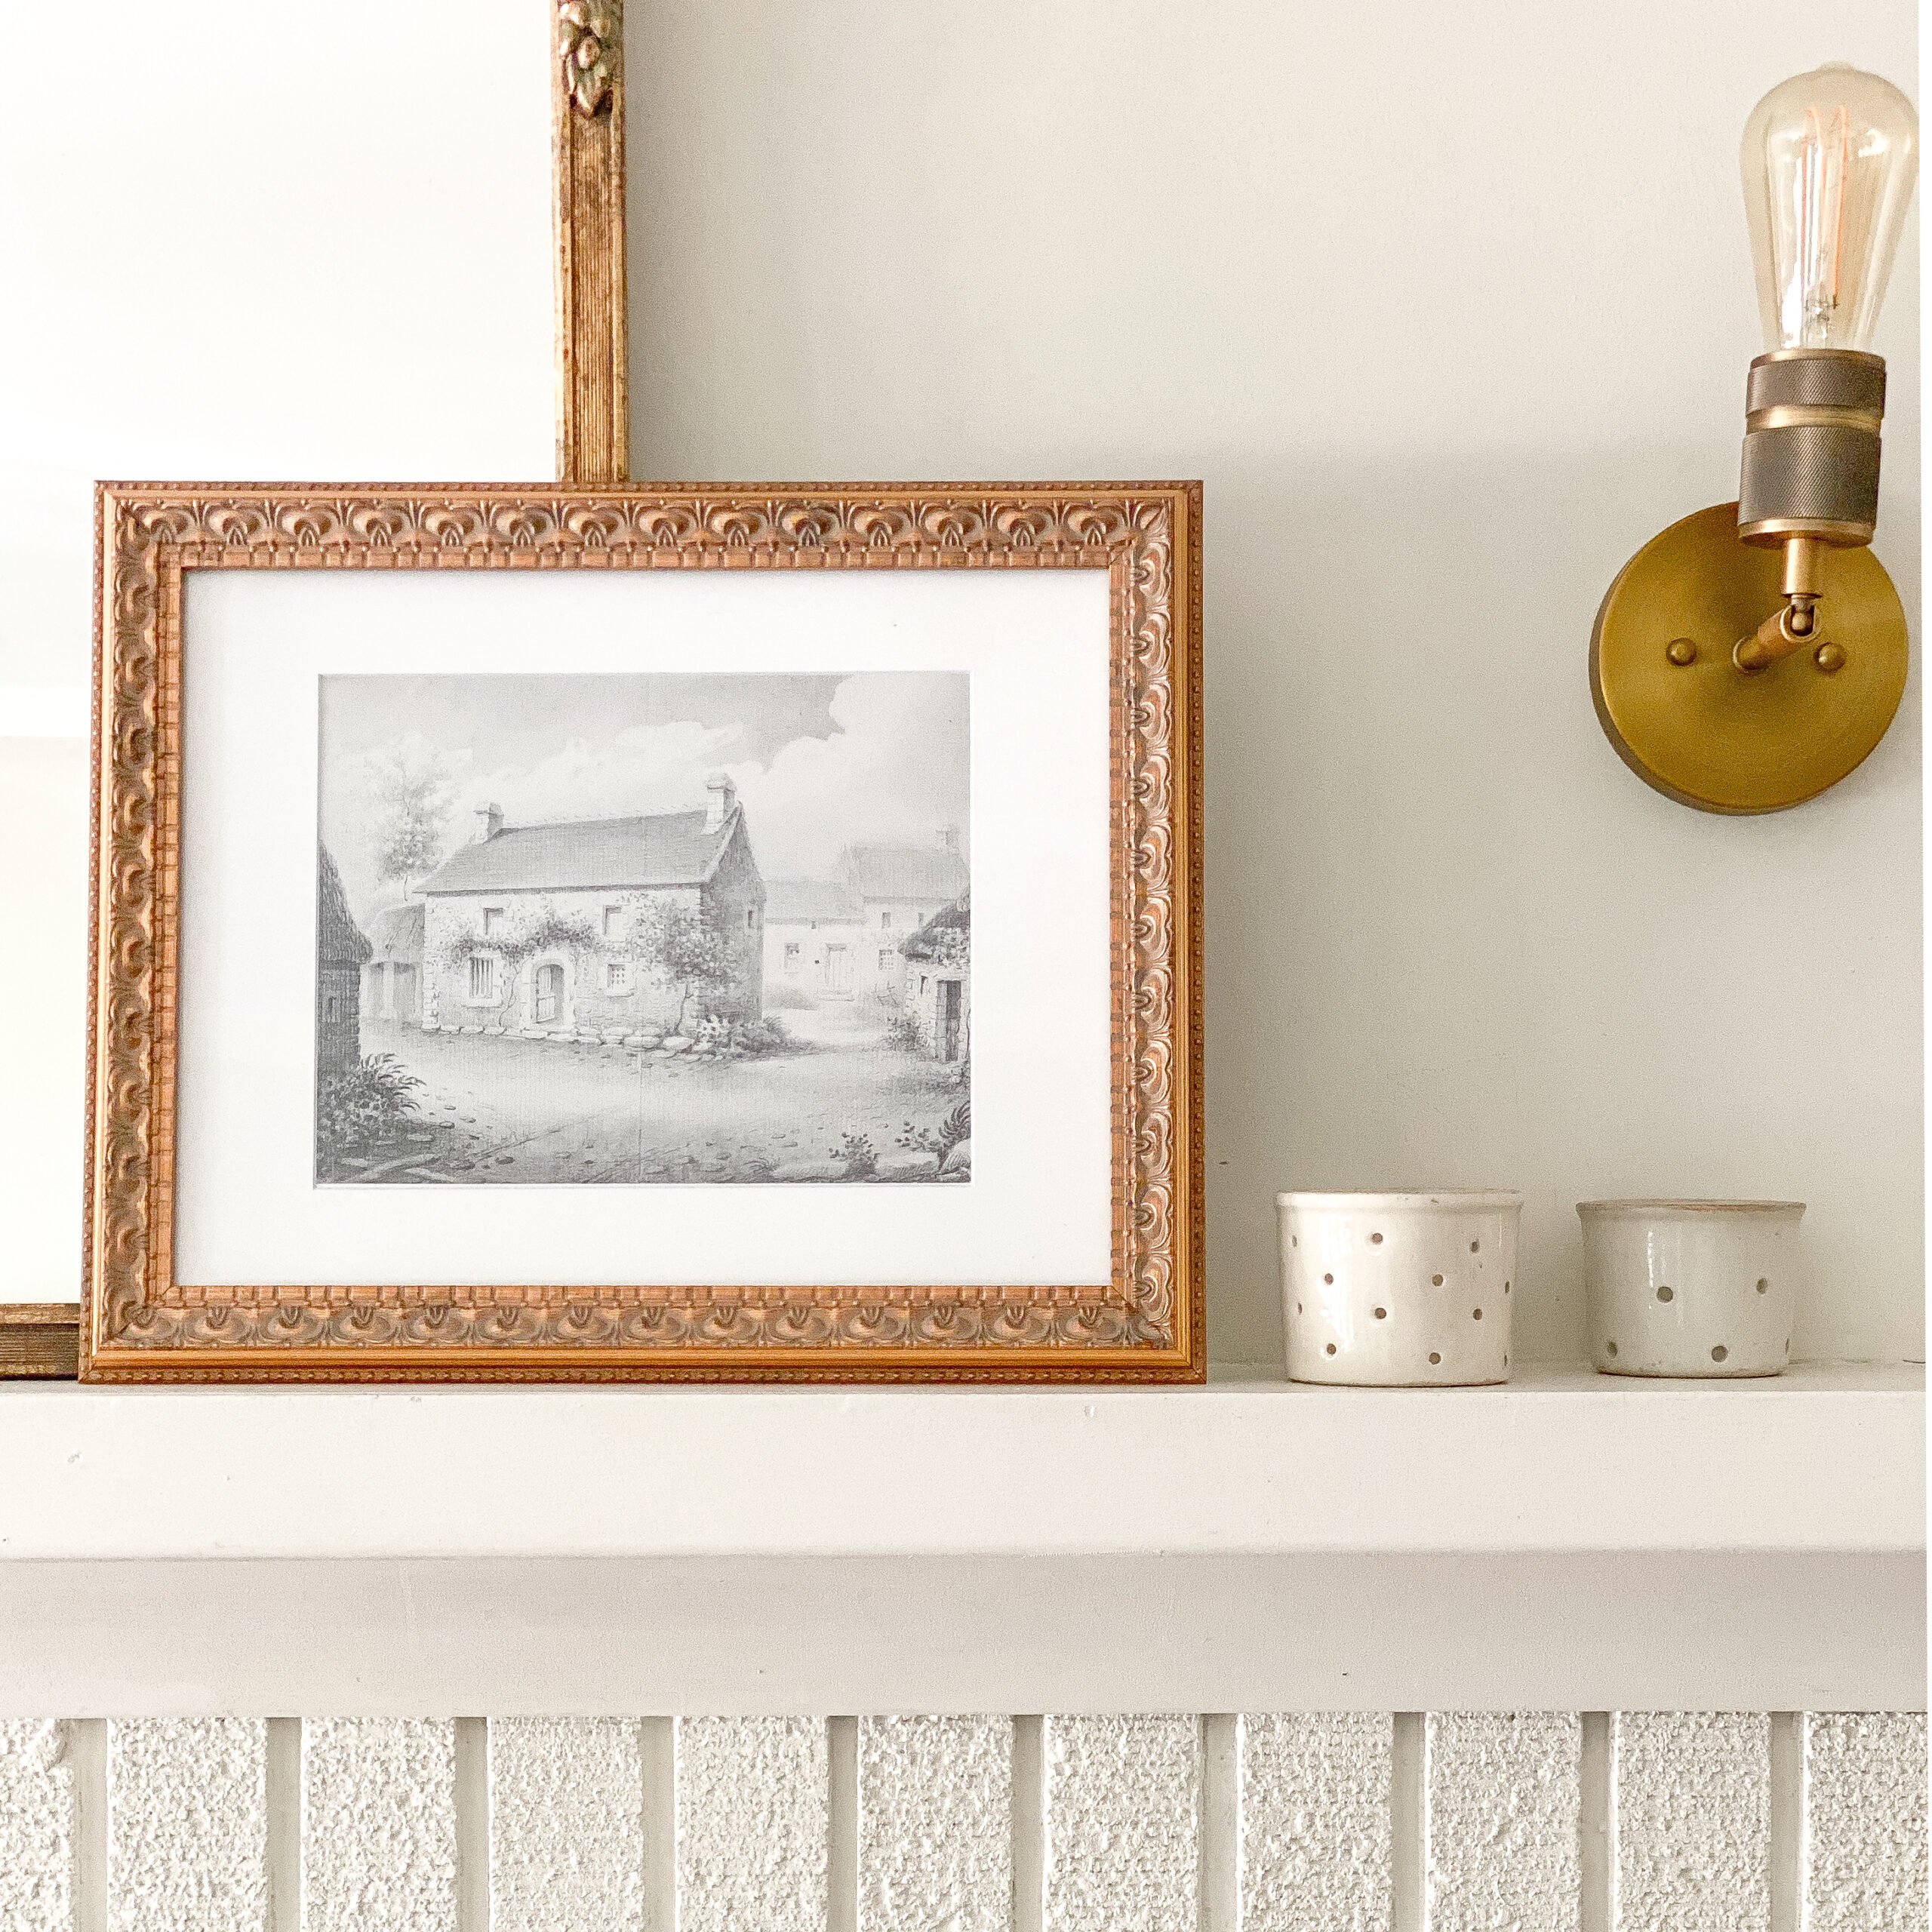
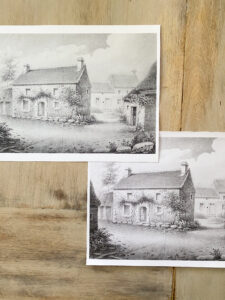
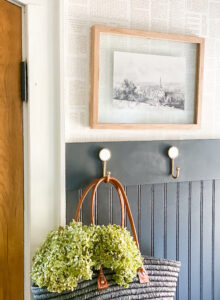
Last time I was in Paris and shopping at the Porte de Vanves Flea market I found a set beautifully detailed antique sketches. And the detail in them, did I mention the detail yet?? I love the charming country scenes depicted.
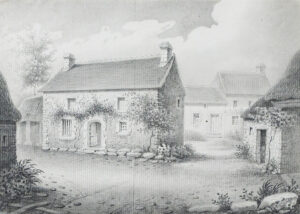
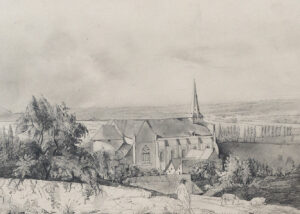
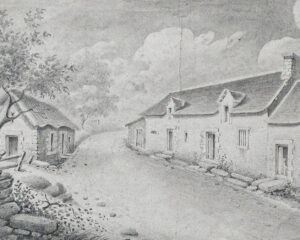
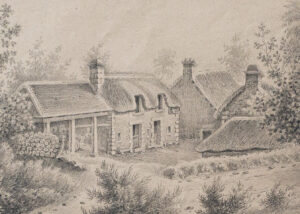
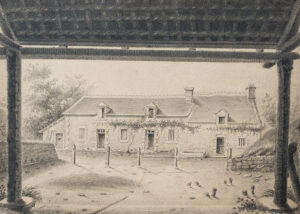
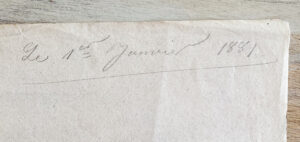
They date back to the late 1800s
I would love to learn more about the artist. If anyone has any leads let me know.
In order to offer them to more customers than just selling them individually, I worked on setting them up on shop to offer them as downloadable art. I learned a lot about how to print out and display a print of a download. I took some advice from a blog post written by Kikiandnim. I printed my downloads on a 8.5 by 11 inch at the following places, using the following processes:
-Choose Copies and Custom Documents in the Print & Design section
-Upload JPEG file
-Print out using Card Stock Paper, Ultra Bright White (Card, 80 lb).
-Choose Copies under DOCUMENT PRINTING
-Upload JPEG file
-Choose CARDSTOCK MATTE COVER for paper, and also make sure to pick Fit to Paper on the FIT PAPER section, otherwise I used all other settings.
-Choose Gilcee Prints in the Print section.
-Upload JPEG file
-Chose 8 by 10 with autocrop and the Deep Matte Photographic paper.
My opinion of these, is that they all work. MPIX is slightly higher quality, it did cost $10 with shipping to get my print. I think my order was processed and delivered within a week. For Office Depot and Fedex I picked them up with the same day service and each print cost no more than $1 each.
Here is some comparison:
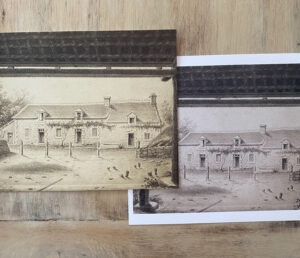
MPIX VERSUS FEDEX
FEDEX VERSUS OFFICE DEPOT
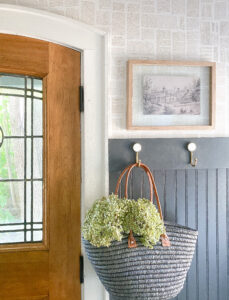
As far as framing goes it was a little tricky due to the size of some of the actual prints. I did find this frame on Amazon that worked for the following prints because they had size to accommodate the 7.5 by 9.5 (actual size) opening of the mat.
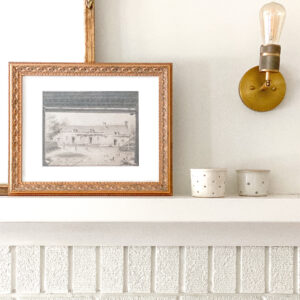

Then for the prints that did not have quite as much height, I used this floating frame from Target. I love how they looked in it.
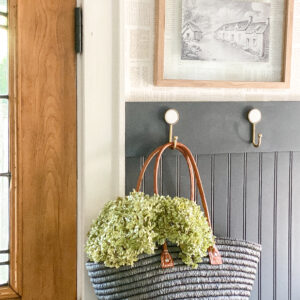
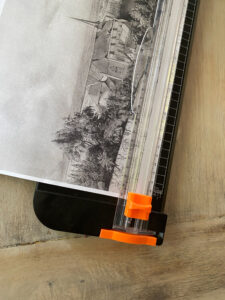
I just used a paper cutter that I had on hand to cut the edges off the prints to prepare for the floating frame.
Happy decorating!! Please reach out to me with any questions, pennyandivydecor@gmail.com.
Hello!! It has been a while since I have restocked my online shop. I took some time off for my family and then I was dealing with a broken sewing machine. Such is life. Anyway, the day is TODAY. Purchasing can begin at 7 pm CENTRAL STANDARD TIME (time zone are confusing). It is absolutely not my favorite to offer one of kind goods in a panic shopping setting, I hate when customers miss out. I have been there before as a customer, the thrill can be exciting, but it is disappointing if you don’t get what you had your eye on. But a timed release is the best I can do to offer everyone a fair shot. I ALWAYS, ALWAYS extend to offer to make something similar just for you if you miss out. Without further adieu…the products:
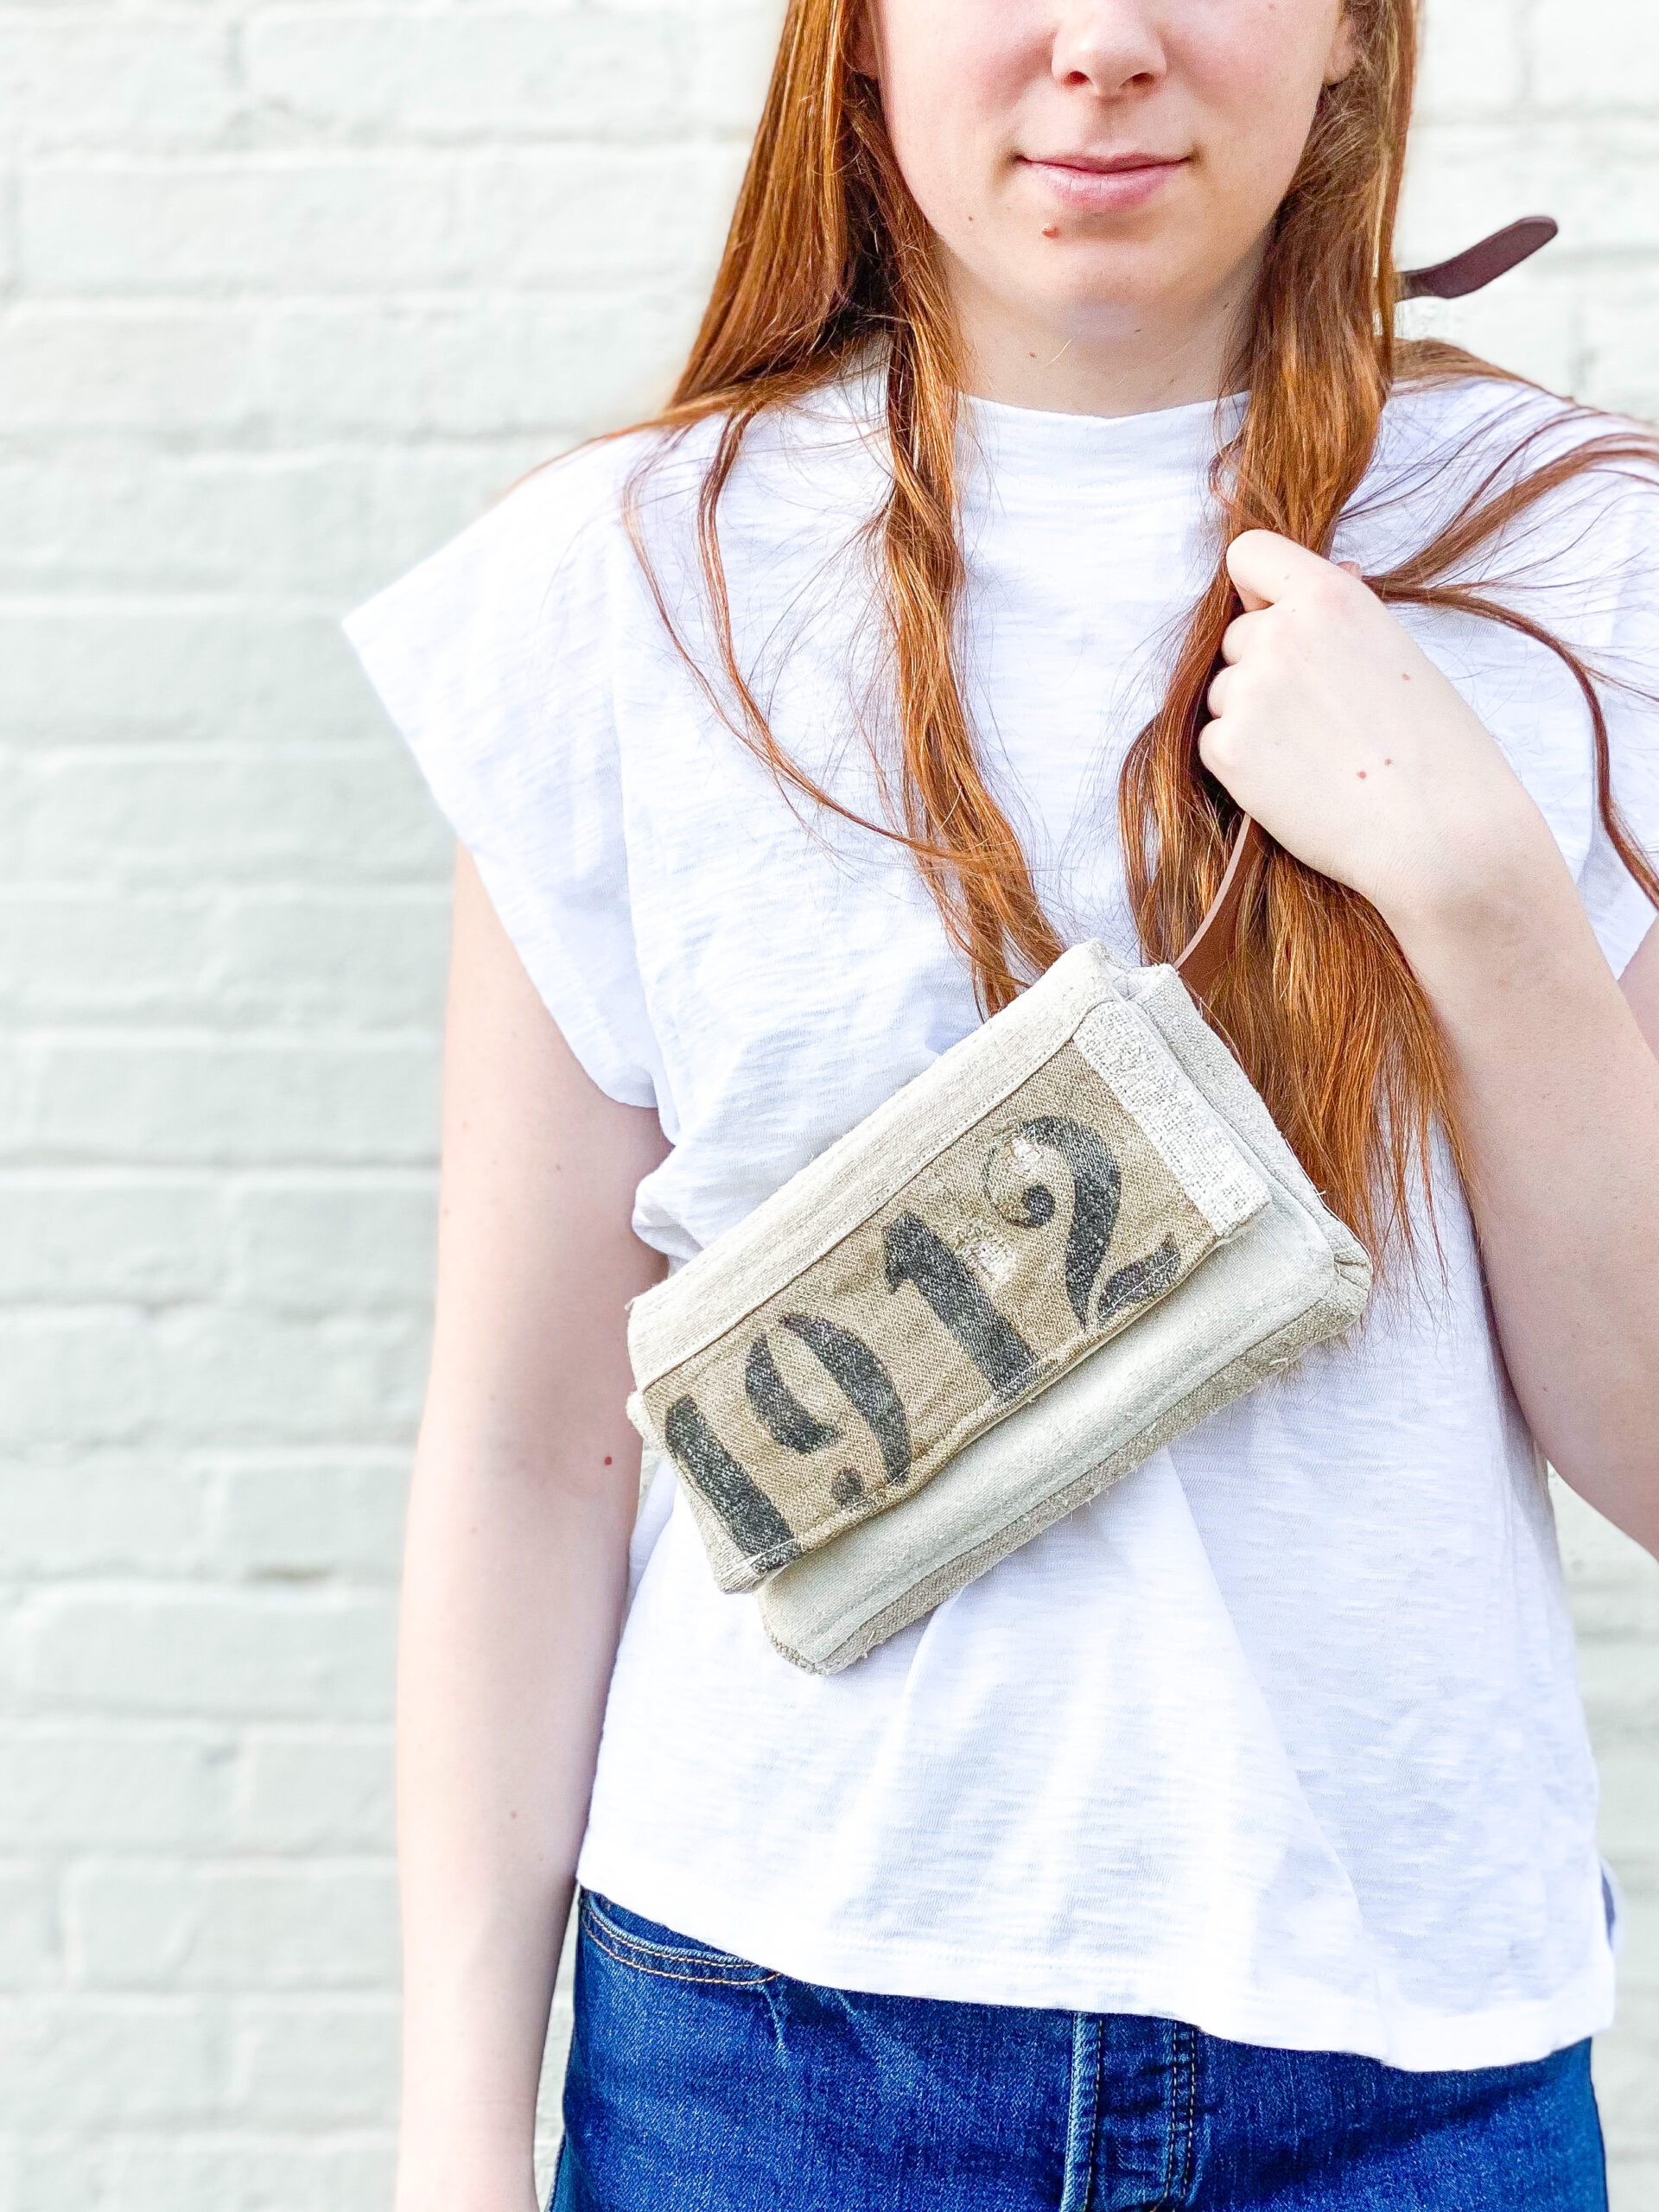
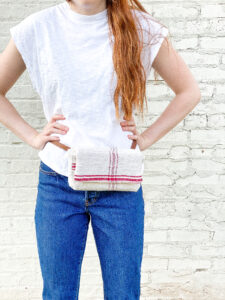
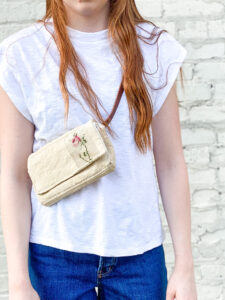
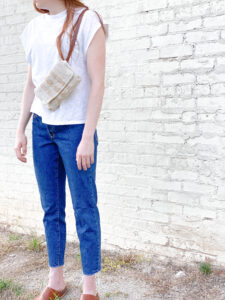
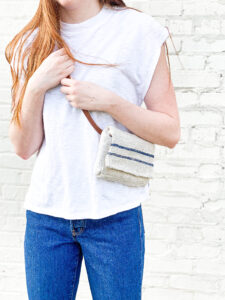
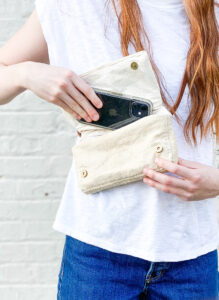
BELT BAGS
I have been noticing these cute belt bags that are quite popular nowadays. I found one online from one of my favorite retailers and was about to buy it when I realized it didn’t have a pocket that had a zipper on it. I really wanted that to hold important things tight. It got my wheels turning and I thought I would give it go at making them. It took some trial and error. But I am quite pleased with the end result. I will be offering these 5 belt bags during the sale, each comes with an extra belt just in case its needed. They can be worn around the waist or slung over the shoulder. They are perfectly imperfect handmade items that are practical.
$129
$129
$129
$119

$135
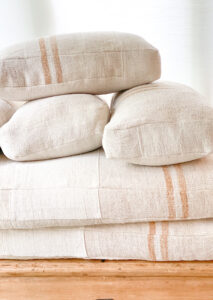
REVERSIBLE FRENCH GRAIN SACK PILLOW SLIP
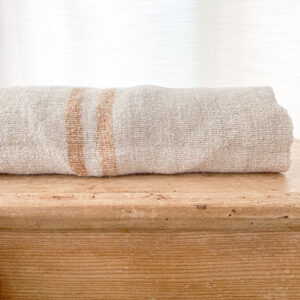
I purchased a French grain sack from one of my favorite Etsy shops, French Vintage Retro. I love a long lumbar pillow with writing, so that was always my plan with the sack. When I opened it up I found that there was writing on both sides. I didn’t want to waste an opportunity to use both sides so I made the pillow slips reversible. And I was able to get two pillows out of the sack. They have an envelope closure in the back. The fabric of the grain sack is a bit coarser, the texture is somewhere between linen and burlap. But it is not burlap, just coarser linen. I wouldn’t want to take a nap on it, but it is great for decor. This pillow slip is sold without the insert to offer affordable shipping. For the insert I just a king size pillow and smash it in there. It does take a bit of elbow grease and maneuvering, but in the end you have a lovely plump pillow. The slips measures approximately 35 by 16 inches.
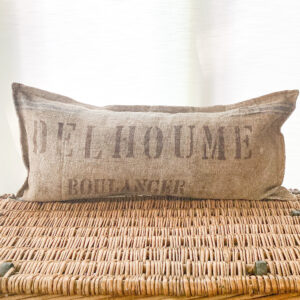
$129
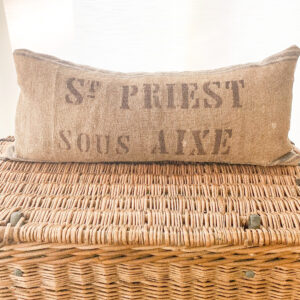
LONG GRAIN SACK LUMBAR PILLOW SLIPS
I am loving a long lumbar pillow. My talented friend, Jenni Yolo, of I spy diy has used several of my lumbar pillows for her room makeovers, and if she likes them, then I must make more…these grain sack lumbar pillow slips are approximately 16 by 35 inches. Again, I use a king size pillow insert with a little bit of a workout I stuff it into the slip. These are offered without the insert to save on shipping costs.
$109
$109
$109
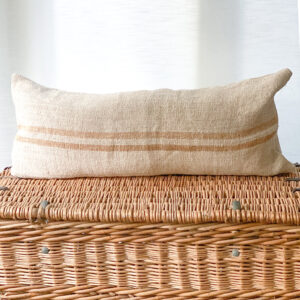
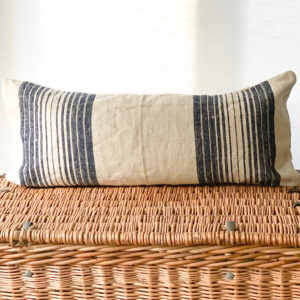
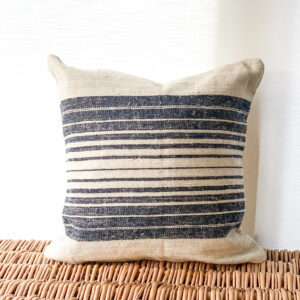
SQUARE GRAIN SACK PILLOW SLIPS
I loved that I got to work with these beautiful grain sack fabrics. The caramel colored grain sack is the same fabric I used for the recent sofa redo. It makes me happy. And the navy striped grain sack is so unique with the varying thickness of stripes. The backs are modern linen with a button closure. There are two of each offered and they are all approximately 17 inches square. I recommend a 18 inch pillow insert for them.
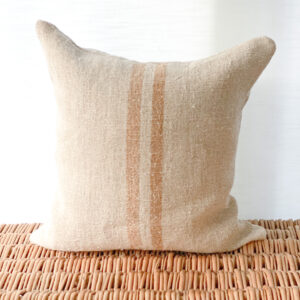
$79
$79
FRENCH TOILE PILLOW SLIPS
I love charming French toile. I especially love the toile that has country scenes of average people. The detail is incredible and tells a story. It makes me happy to see these pictures of families depicted in ways in which I interact with my family and these were created decades and decades ago. I love the normalcy of it, but it is also fairytale like too. Anyway…I got my hands enough toile to make 3 pillow slips for this sale. Some I purchased in France at the flea market and some off Etsy.
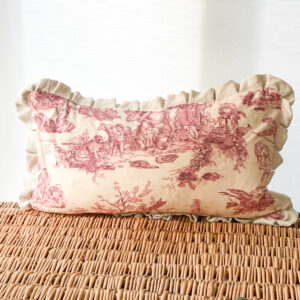
$95
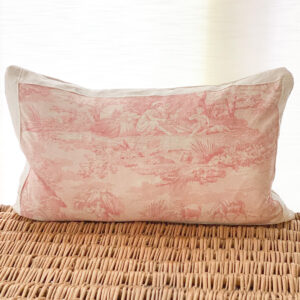
$95
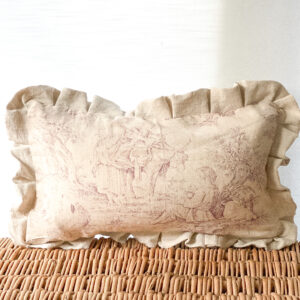
$89, this included the insert because it is a small pillow, 10 by 18 and shipping is affordable with it.
VINTAGE RUG PILLOW SLIPS
I purchased a beautiful vintage rug from a local seller. I love the tones of the color and designs of it. I thought using the rug to make pillow slips out it would create a special design element that could be used in more ways than just as a rug on the floor. I believe this a wool rug so its not cuddly, but it definitely works for a throw pillow. These square pillow slips measure about 19 inches and the back is modern day linen with a button closure.
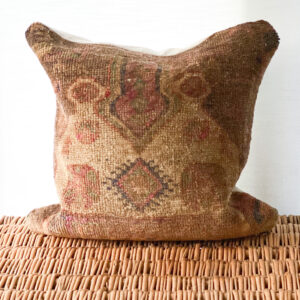
$79
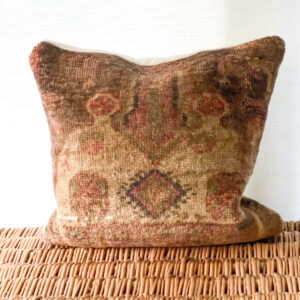
$79
FRENCH VALANCE PILLOW SLIPS
I found this buffalo check fabric that was a remnant of a vintage French valance while I was perusing Etsy. I love a scalloped edge. I think these pillow slip turned out cute with a bottom of handwoven hemp linen and back of coordinating modern day linen. They measure approximately 16 inches square.
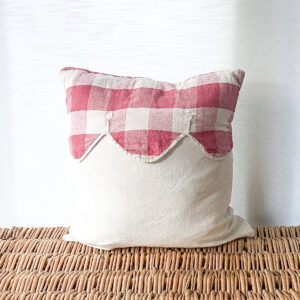
$89
VINTAGE COVERLET PILLOW SLIPS
These blue vintage coverlets have always caught my attention. When I found one while shopping a flea market, it was a quick sale. This coverlet has lived a life. It has some imperfections from wear, I reinforced these and patched some spots. But it still is so lovely. I love the deep navy blue. I also love repaired fabric, it’s a sign it was worth the effort. The slips measure about 19 inches square.
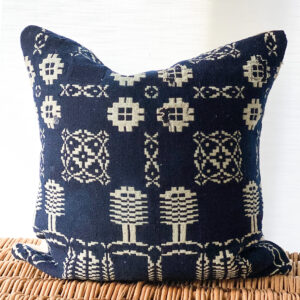
$45
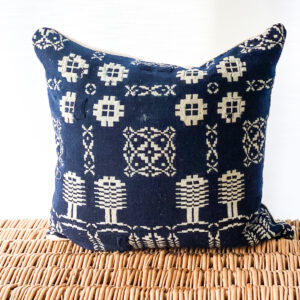
$45
NEEDLE POINT TOTE BAGS
Needlepoint is so charming and the amount of work that goes into is something to celebrate. These two pieces really caught my eye. The detail of the woman in the needlepoint is incredible and I love the feeling that the lake cottage scene gives me. The lady tote was finished off with vintage European hemp linen, while the cottage scene is complimented with vintage striped French linen. The interior of both is hand-woven hemp linen.

$99
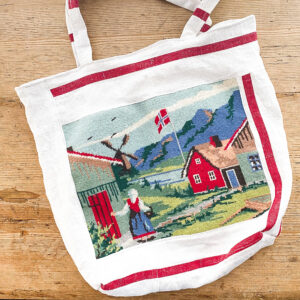
$99
GERMAN GRAIN SACK TOTES
Tote bags are useful and I like it when they are cute. I used a well loved, rustic German grain sack to create two tote bags. This fabric is really soft and I love the movement of it. It does have patches, repairs, and some stains, all signs that the fabric been loved and appreciated. It also takes the pressure off of keeping it super clean :).
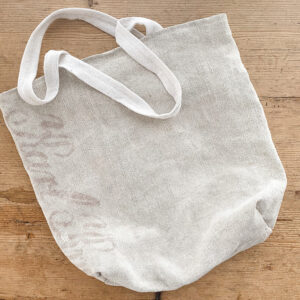
$89
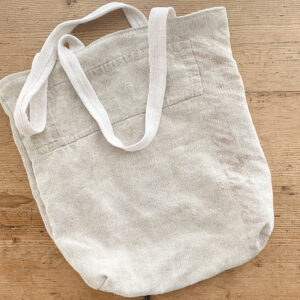
$89
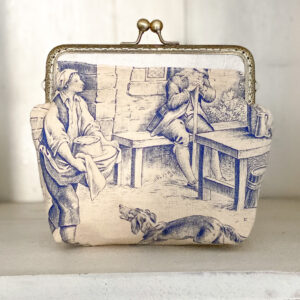
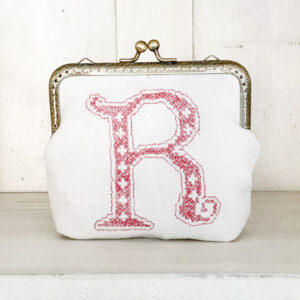
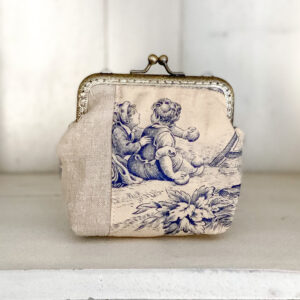
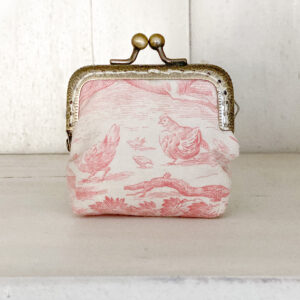
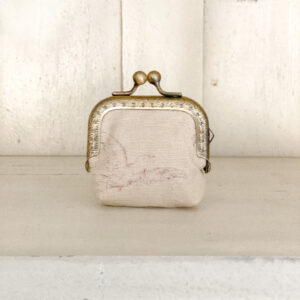
HAND PURSES
Here is the latest round of small hand purses that will be listed. I love them all. I especially love the scene of the Shepard with a church in the back ground.
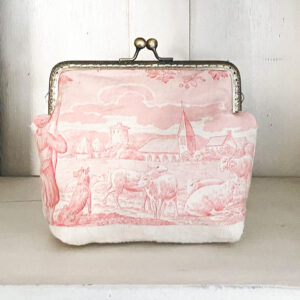
$79
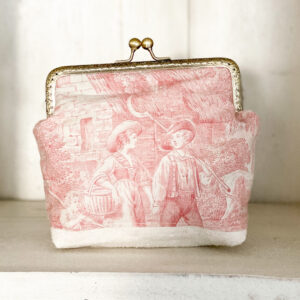
$79
$79
$59
$49

$35
$39
$29

Just a small reminder that, unfortunately none of the prices include shipping. Thank you for stopping by!!
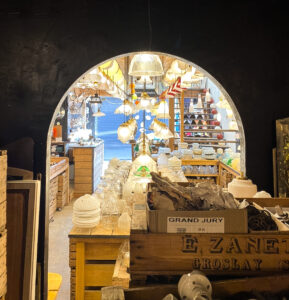
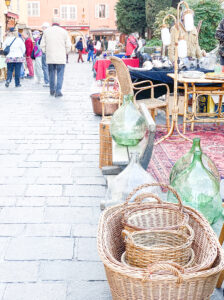
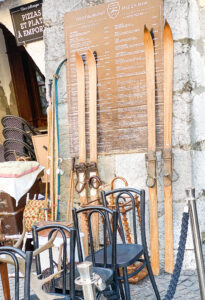
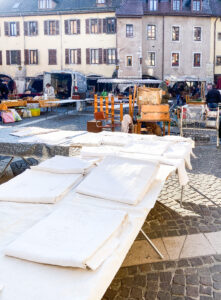
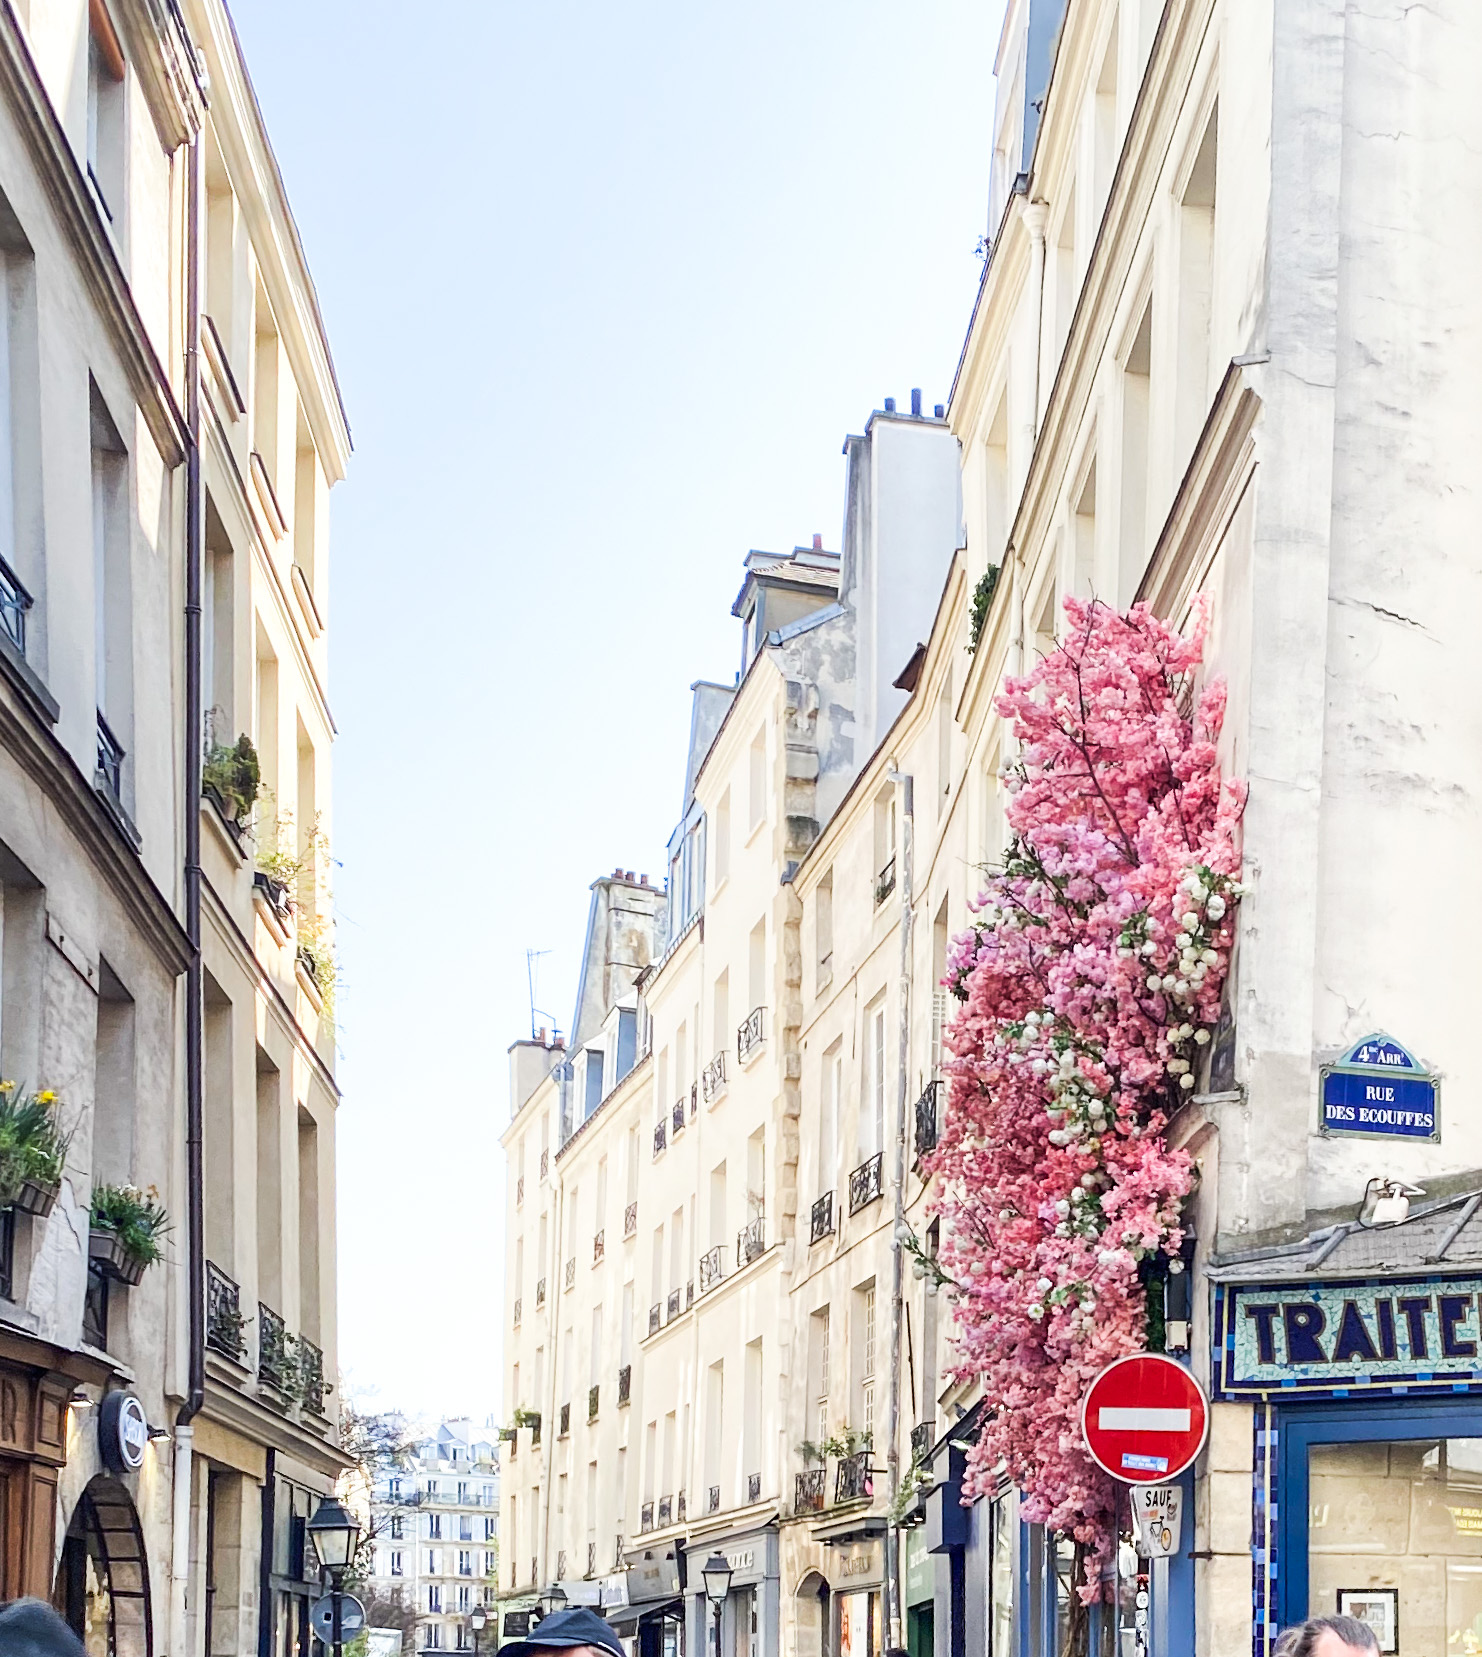
This last trip to Paris was the first time that I had ever visited the world famous Paris Flea Market, Marche aux Puces de Saint-Oven. I have been to the Porte de Vanves Flea Market four times before, but had never made the St. Ouen a priority. From what I had read it sounded like this flea market was more expensive and possibly a bit stuffy. But now I regret holding onto that information, that is not what I found at all. It was lovely. And I also found many great deals.
I went on a Monday morning. It is open Saturday-Monday. I took the metro line 4 to the Porte de Clingnancourt station. When I exited I had about a 10 minute walk to the flea market. I followed the signs and used my phone as guide. It wasn’t the most scenic neighborhood to walk through and there were a lot of vendors with random stuff on the way to the flea market. But it was worth it. If you have seen Lupin (I recommend) on Netflix, his longtime friend owns a shop in this flea market. I can see where they found the charm to include the setting in the series.
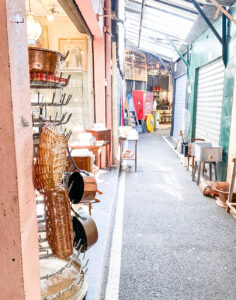
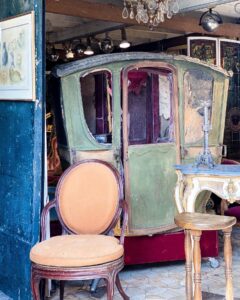
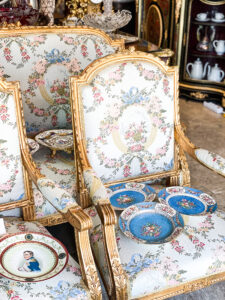
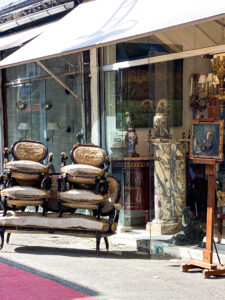
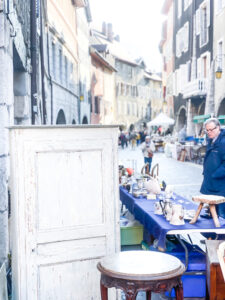
When I arrived at the market I was pleasantly surprised. This market has a permanent set up of stalls that just like little shops. This is much different than the Porte de Vanves market, where it is just temporary tables with goods set up on the street. The benefit of permanent stalls is that some were beautifully curated, it was a real treat to walk through the spaces and get inspiration. There was a large variety of styles and prices. Some were filled with fancy furnishings that looked like they could belong in a museum, and some were more casual and some were not curated at all and there were just piles of treasures to sift through. I appreciated all of the above.
As for the prices. Yes, there were some expensive price tags, and I respected that. Some of those pieces history filled pieces were so unique and so beautiful it must have taken a lot of time and money for the vendor to find. They should get paid a fair amount. But I also found a lot of things that were in my price range, which is more the bargain range versus museum range. I am not sure if going on a Monday, the last day of the week, that it helped that people were more open to a discount. But I was thrilled. I found several beautiful paintings. One in which I thought was my least favorite of all the paintings I purchased, but it found its way onto my mantel at home and has never left.
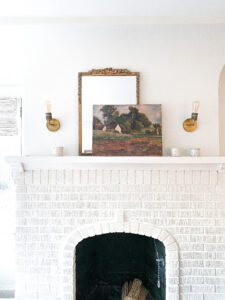
Flea market painting in my home 🙂
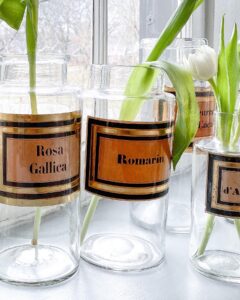
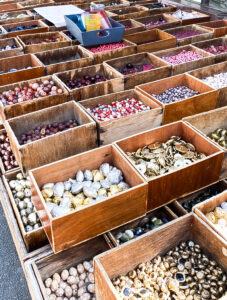
I loved this set of apothecary jars that I found. The vendor had them set out in front of his booth offering a discount if you bought multiple. I picked out 4 of them and paid him for them. He let me leave them in his booth while I shopped, this is a pretty standard thing I have found most vendors will do to make shopping easier. But make sure you make note of where your purchases are waiting for you, this market is big with tiny squiggly streets that all look very similar. When I circled back around he offered me the complete set at a further discount. I am so glad I took him up on it. I was able to get them home by packing them in hard shell suitcases wrapped in linen, some I checked and some I carried on and they all made it perfectly.
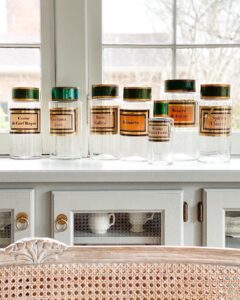
Apothecary jars pictured in my home.
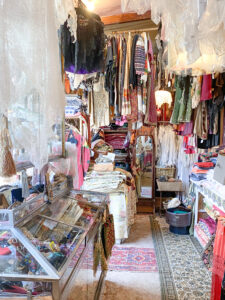
I found linens and I found some reasonable prices on a couple sheets. But I think the prices and selection for these is a bit better in Porte de Vanves, I definitely understand it can vary from day to day at both places, but that was my experience. However the area that this market really shined with linen is the unique toiles. There was one linen shop that had piles, and piles of remnant antique fabrics. I found so many unique pieces. The owner of this shop was not offering very discounted prices, but it was worth it for me to make a pile and she offered me a price for it all. I suppose I should tell you that I am not an aggressive bargainer. It’s just not me. I know first hand the amount of work that goes into the job of selling antiques, so if the price seems fair and works for my business then I usually just pay it. There are times when it feels right to offer a better a price, and I will take advantage of that, and really the worst thing that can happen is they say no. Also I found that if its something I am waffling on, if I set it down and start to walk away, the vendor might offer a better price. I tell you all this so you know what kind of shopper you are receiving advice from, but you do what is best for you in the bargaining department, there is no shame in any of it.
Because the market was more of permeant set up, there were some vendors who took credit cards which was a nice surprise. However cash is king if you want a deal and some vendors only took cash. I didn’t have trouble locating a nearby ATM when I needed it, although it was a bit of a quick walk off the flea market property.
Also this market felt similar to Porte de Vanves in the amount of English that was spoken. Most people spoke enough English to carry on a bit of conversation, however I always try my very basic French first. I feel like I get a warmer response when I do this, and we were in France after all. Some of the vendors didn’t speak any English, but we wiggled our way through our transactions with very broken French and hand gestures and it worked out. I had very kind and positive interactions with all vendors.
I finished up seeing all I could see after about 3-4 hours. From what I understand there is a lot more, it would take days and multiple visits to see every stall. And there were many stalls closed, I am not sure if that is because Monday is a less busy day, or what the reason was, whatever the case there was PLENTY. I don’t regret not staying longer, that was good, successful trip for and I was totally loaded down by the end. There was no way that I could walk to the metro and take the train. I took an Uber back the airbnb and it was perfect. This will be my routine going forward, as much as I enjoy the metro, I don’t need to do it carry 5 bags of a mix of fragile antiques and heavy linens. Non merci.
I wrote about the Porte de Vanves Market here in case you need more Paris Flea Market information.
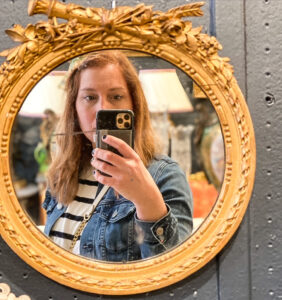
c’est moi
Au revoir,
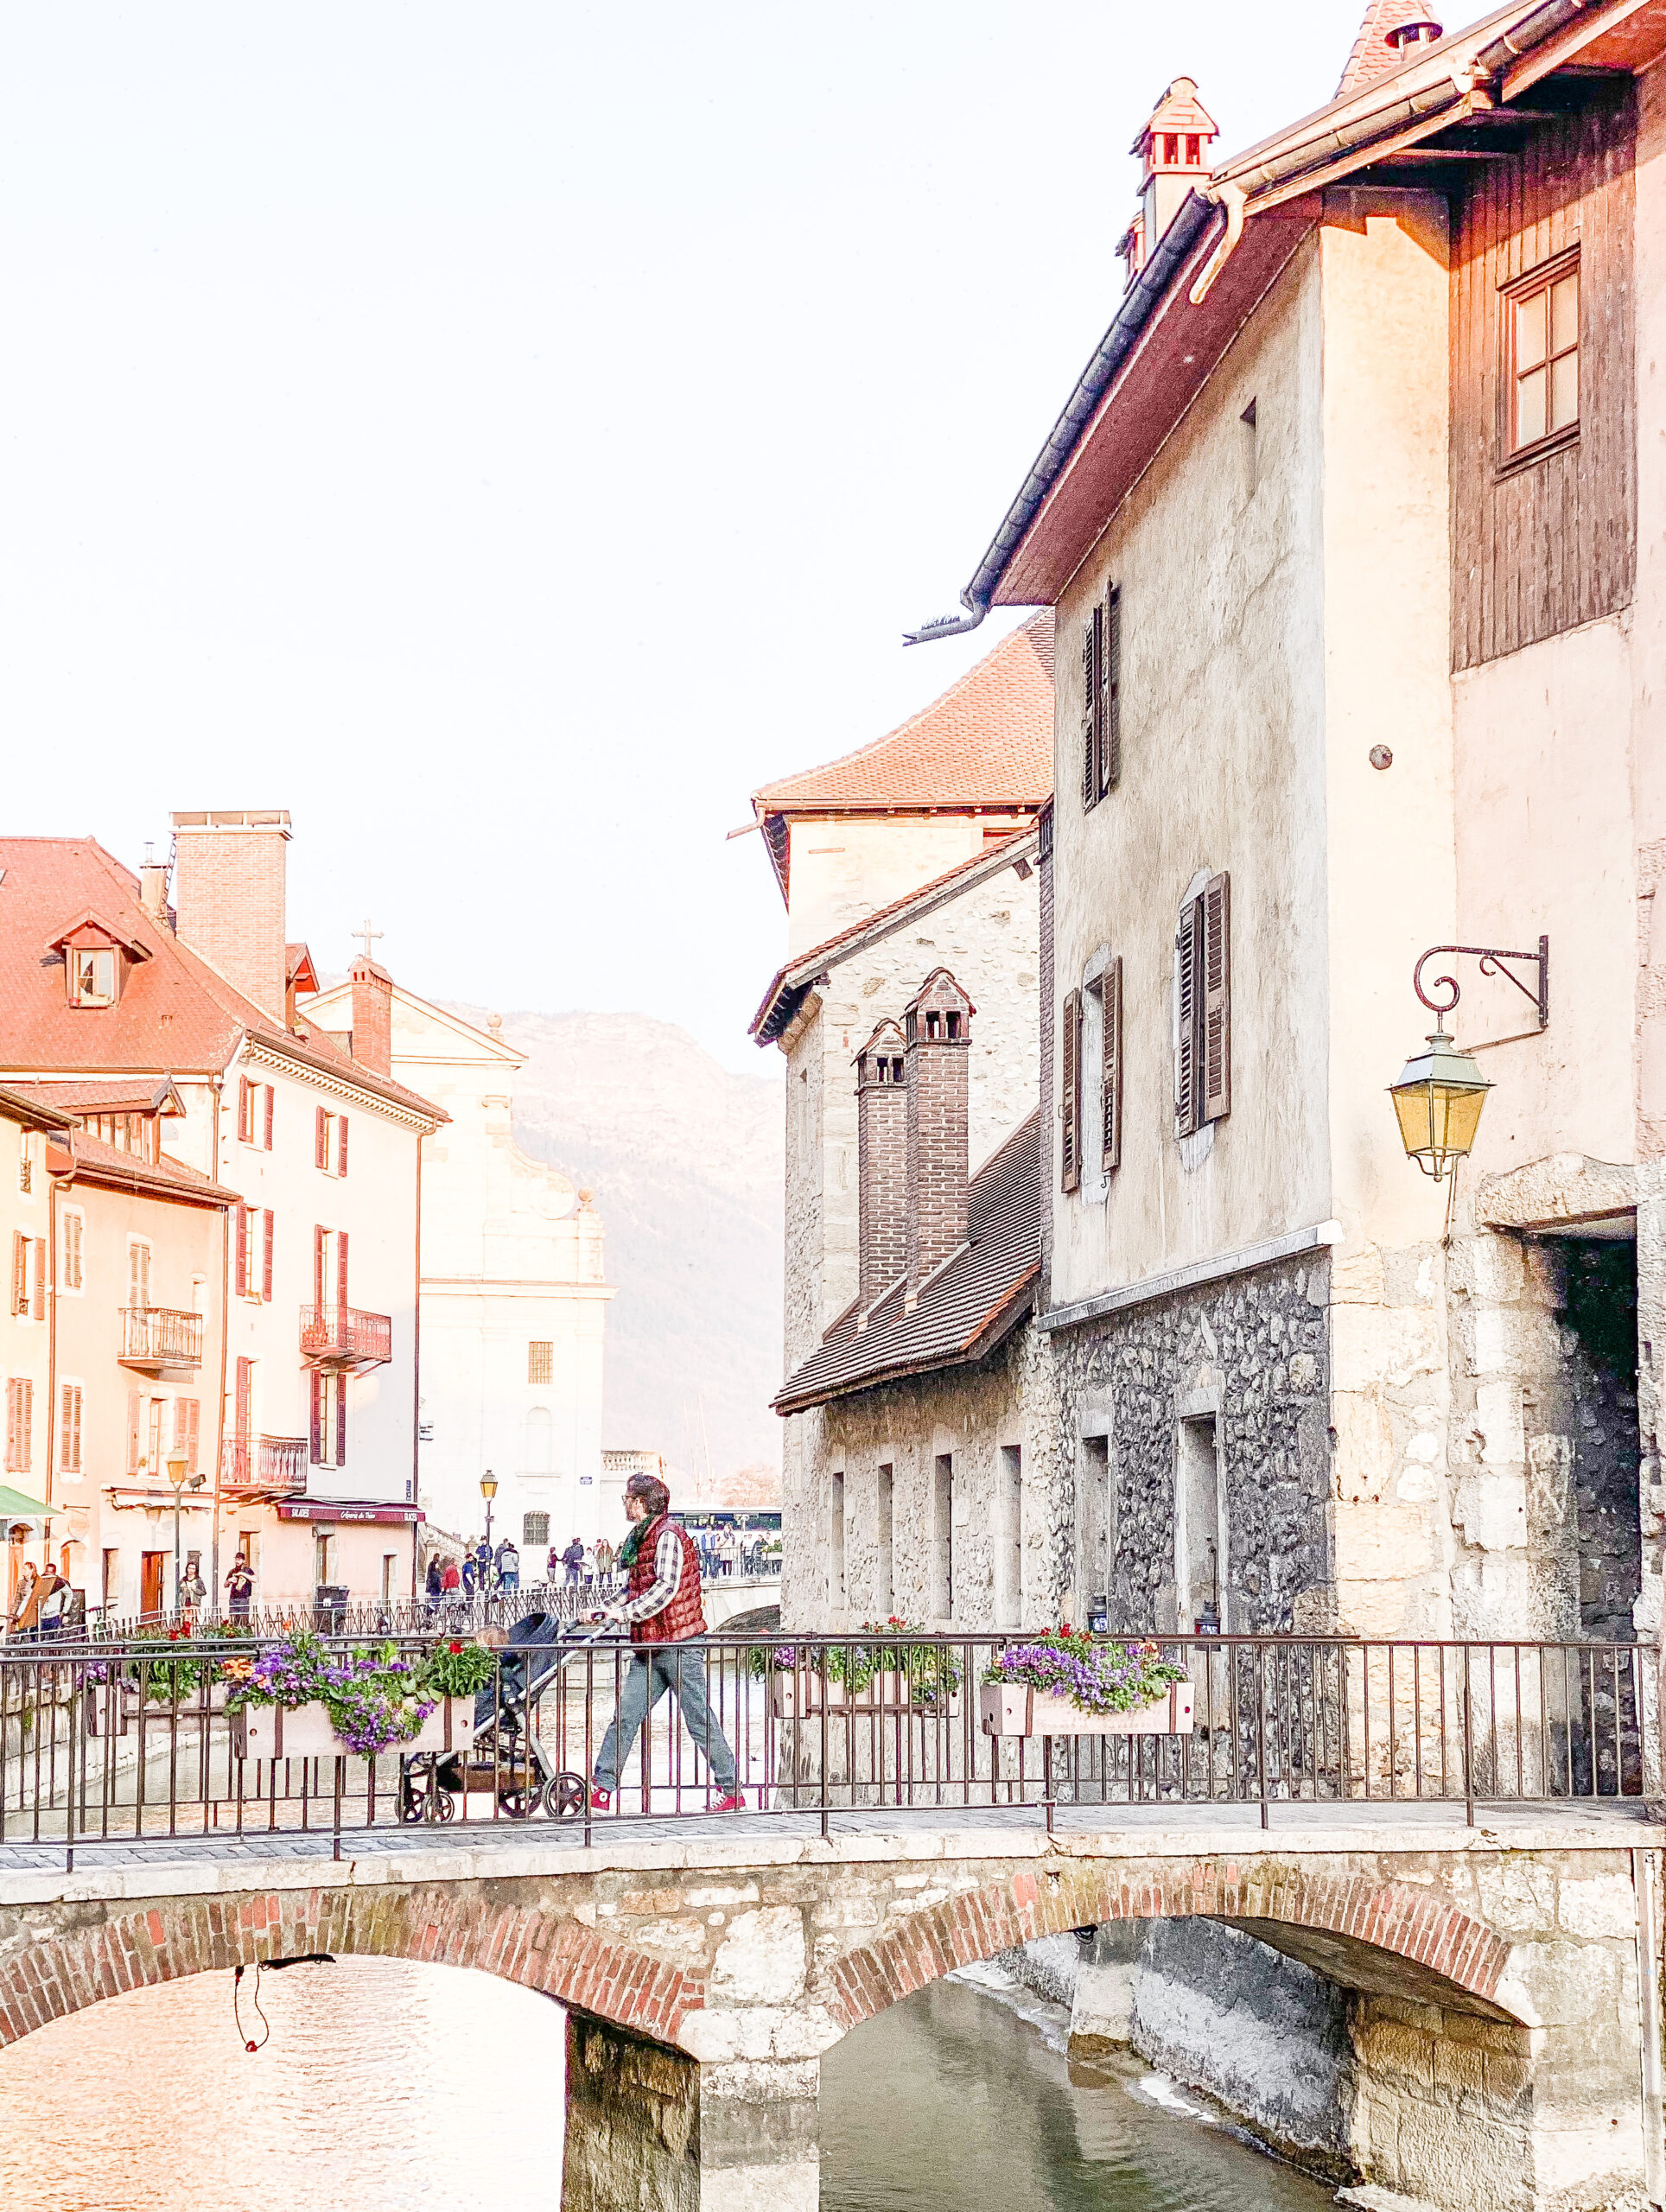

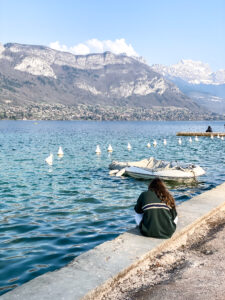
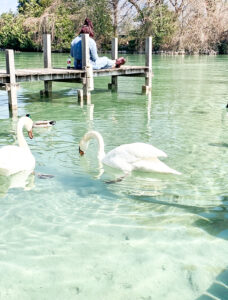
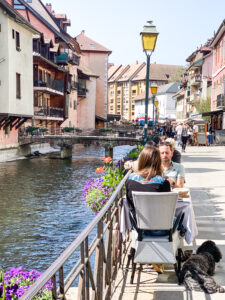
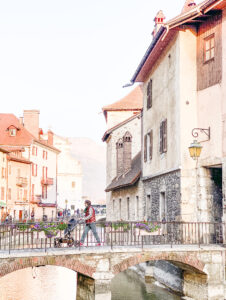
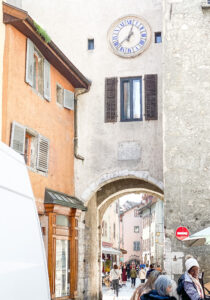
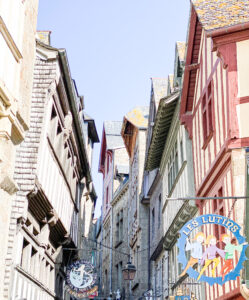
During my big trip to France with my kids, I wanted to add a small town experience. A friend of mine who always offers the best advice whether it is about dry shampoo, restaurants, where to travel to, or parenting recommended this town. Through experience she has earned no questions asked when following her recommendations. Even my husband knows it will be good if Toni recommends it. So when she raved about the French town Annecy, it immediately went on our trip itinerary. I am so glad I listened. It is so incredibly WONDERFUL. It is a town very close to the Swiss border and is a picturesque on a lake surrounded by mountains. I was told this is area is considered the Pre-Alps. As soon as we left the train station I was hit with the feeling that the quality of life here is what I would imagine it would be if I lived in a snow globe. A charming snow globe. The air was so clean and the lake was crystal blue. People seemed to be leisurely enjoying their lives. I saw families picking up their kids from school, then walking onto the playground on the Lake to meet friends. And people slowly enjoying cafe meal. The pace seemed much slower and more enjoyable. It somehow felt so magical that I couldn’t believe any worldly problems could exist here, just like living in a snow globe. It felt so happy.

We spent 2 nights in Annecy and enjoyed every minute. We just did a lot of wandering, eating, and inspired by the locals took it slow during our two days here. We sat by the lake a lot and the younger kids played at the park. I would have liked to bike around the lake, but it didn’t happen, hopefully there will be a next time.
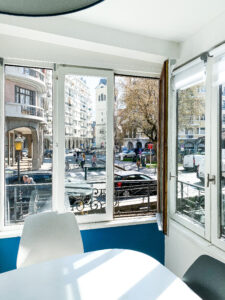
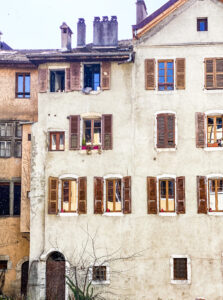
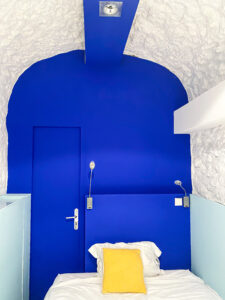
In Annecy we stayed in the center of the old town in a lovely, clean airbnb, with just the right amount of room. It was just a couple minute walk from the lake and right in the center of all the shops, and only about a 10 minute walk to the train station. I really enjoyed the windows and the views out onto the street, canal, and a restaurant next door. Not that I spent time starring at people while they ate at the restaurant, but there was something very happy catching glimpses of people enjoying a meal through the kitchen window. My kids loved the layout with one bedroom with bunk beds, another bedroom with double bed, and then the living room had a fold out sofa that folded out into two twin beds.
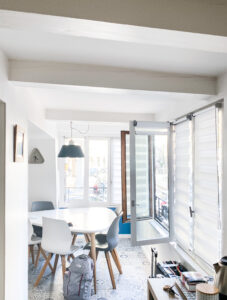
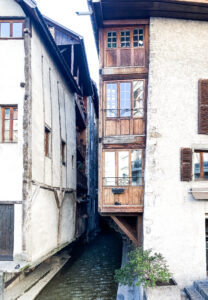
Our apartment was on the middle floor of the wood structure attached to the building.
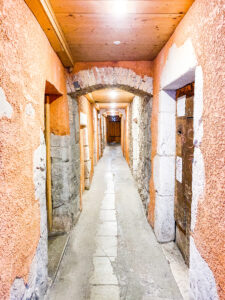
This is the hallway to our apartment entrance.
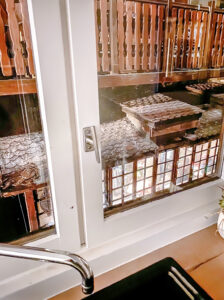
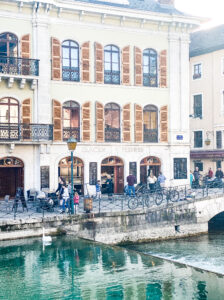
Peeking in on the restaurant across the way from the kitchen sink.
Underneath our apartment there was a Falafel Restaurant, Ali baba. It was yummy, affordable, and fast. It was perfect for big lunch to keep everyone happy. We went three times :). We also had a couple lovely meals along the canal, where the setting was a perfect compliment to a fresh margherita pizza (a staple for us). And gelato, they had that too, in so many flavors, SO MANY. No one ever got a bad flavor.
Getting to Annecy from Paris was my most brave endeavor on the trip. I strongly encourage everyone to try the train, I just think you might need to have a bit of a sense of humor about it. I found that buying 2 day Eurail passes for us was hundreds of dollars cheaper than just buying train tickets for our trip. However, figuring out how to get all the QR codes that I needed was a challenge I hadn’t anticipated. We ended up needing to transfer trains once each way, so we took a total of 4 trains. Some trains needed reservations, some didn’t. Some trains had assigned seating, some did not. It was a lot. We sat in someone else’s seats once. We also sat in First class instead of Second like our purchased tickets. And I never had ALL the right QR codes, one for our Eurail pass and one for reservation. But everyone and every conductor was so kind to me, especially when they saw that I was traveling with 4 kids. No one was really helpful, because it just didn’t seem like anyone really knew how to use the Eurail app. I was able to present enough information to show that I was fully paid, but it was never exactly what the conductor was looking for. However they made us feel welcome and we didn’t get kicked out of first class. I would do it again and again, but know was not going to be perfect. And also it should be noted the time between connecting trains is not very generous, we made it both times but its quick. Make sure you are prepared for a mad dash. Everything in France seemed to operate at a leisurely pace, EXCEPT catching a train, then it turns to pandemonium. But again, totally worth it!! Embrace the pandemonium and you will likely have an exciting story to share.
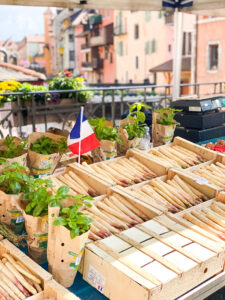
I had really good for me fortune that our stay in Annecy overlapped with the monthly flea market. As far as I can remember it was purely a coincidence, but who knows maybe I subconsciously lined up our dates to make shopping in the flea market possible, that is highly likely.
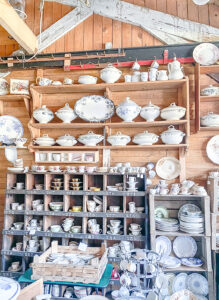
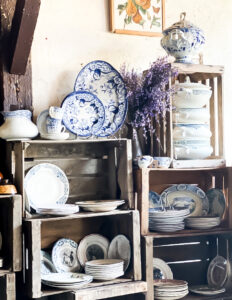
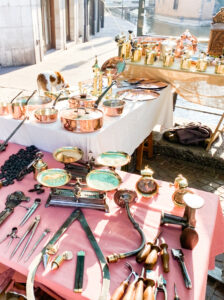
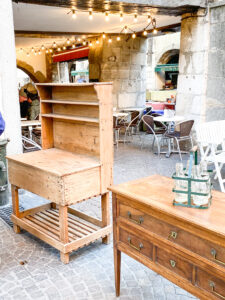
Whatever the case, I sure was happy I was able to shop the flea market. It was an experience to treasure. I don’t think I will ever get over the charm of the setting AND then to add my favorite pastime of flea market shopping. It was the best. I found a lot of good things, and in my opinion the prices were the best that I have shopped in France in comparison to Paris and Provence. I found a couple paintings and dishes. There was an incredible booth with copper pieces, I had to bring something home from there. I ended up purchasing a stunning large pitcher, the copper with its large scale got me.
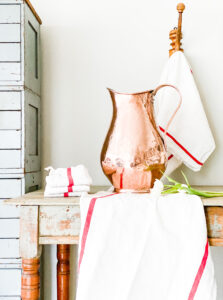
Here is the pitcher styled at home with some of my other finds from Annecy.
I felt like I hit the jackpot with linens. There was one booth that was fully stocked with beautiful, clean sheets, tea towels, and handkerchiefs. I was in heaven. And I admired all the antique furniture pieces and dreamt about having an apartment there to furnish. I highly recommend this market.
Annecy is very special and I am so glad I got to experience it. I hope to be back. My kids loved it too. This is a spot that I think any and all ages would enjoy.

If you would like to know more about our travels to Paris you can find it in this post.
Merci beaucoup,
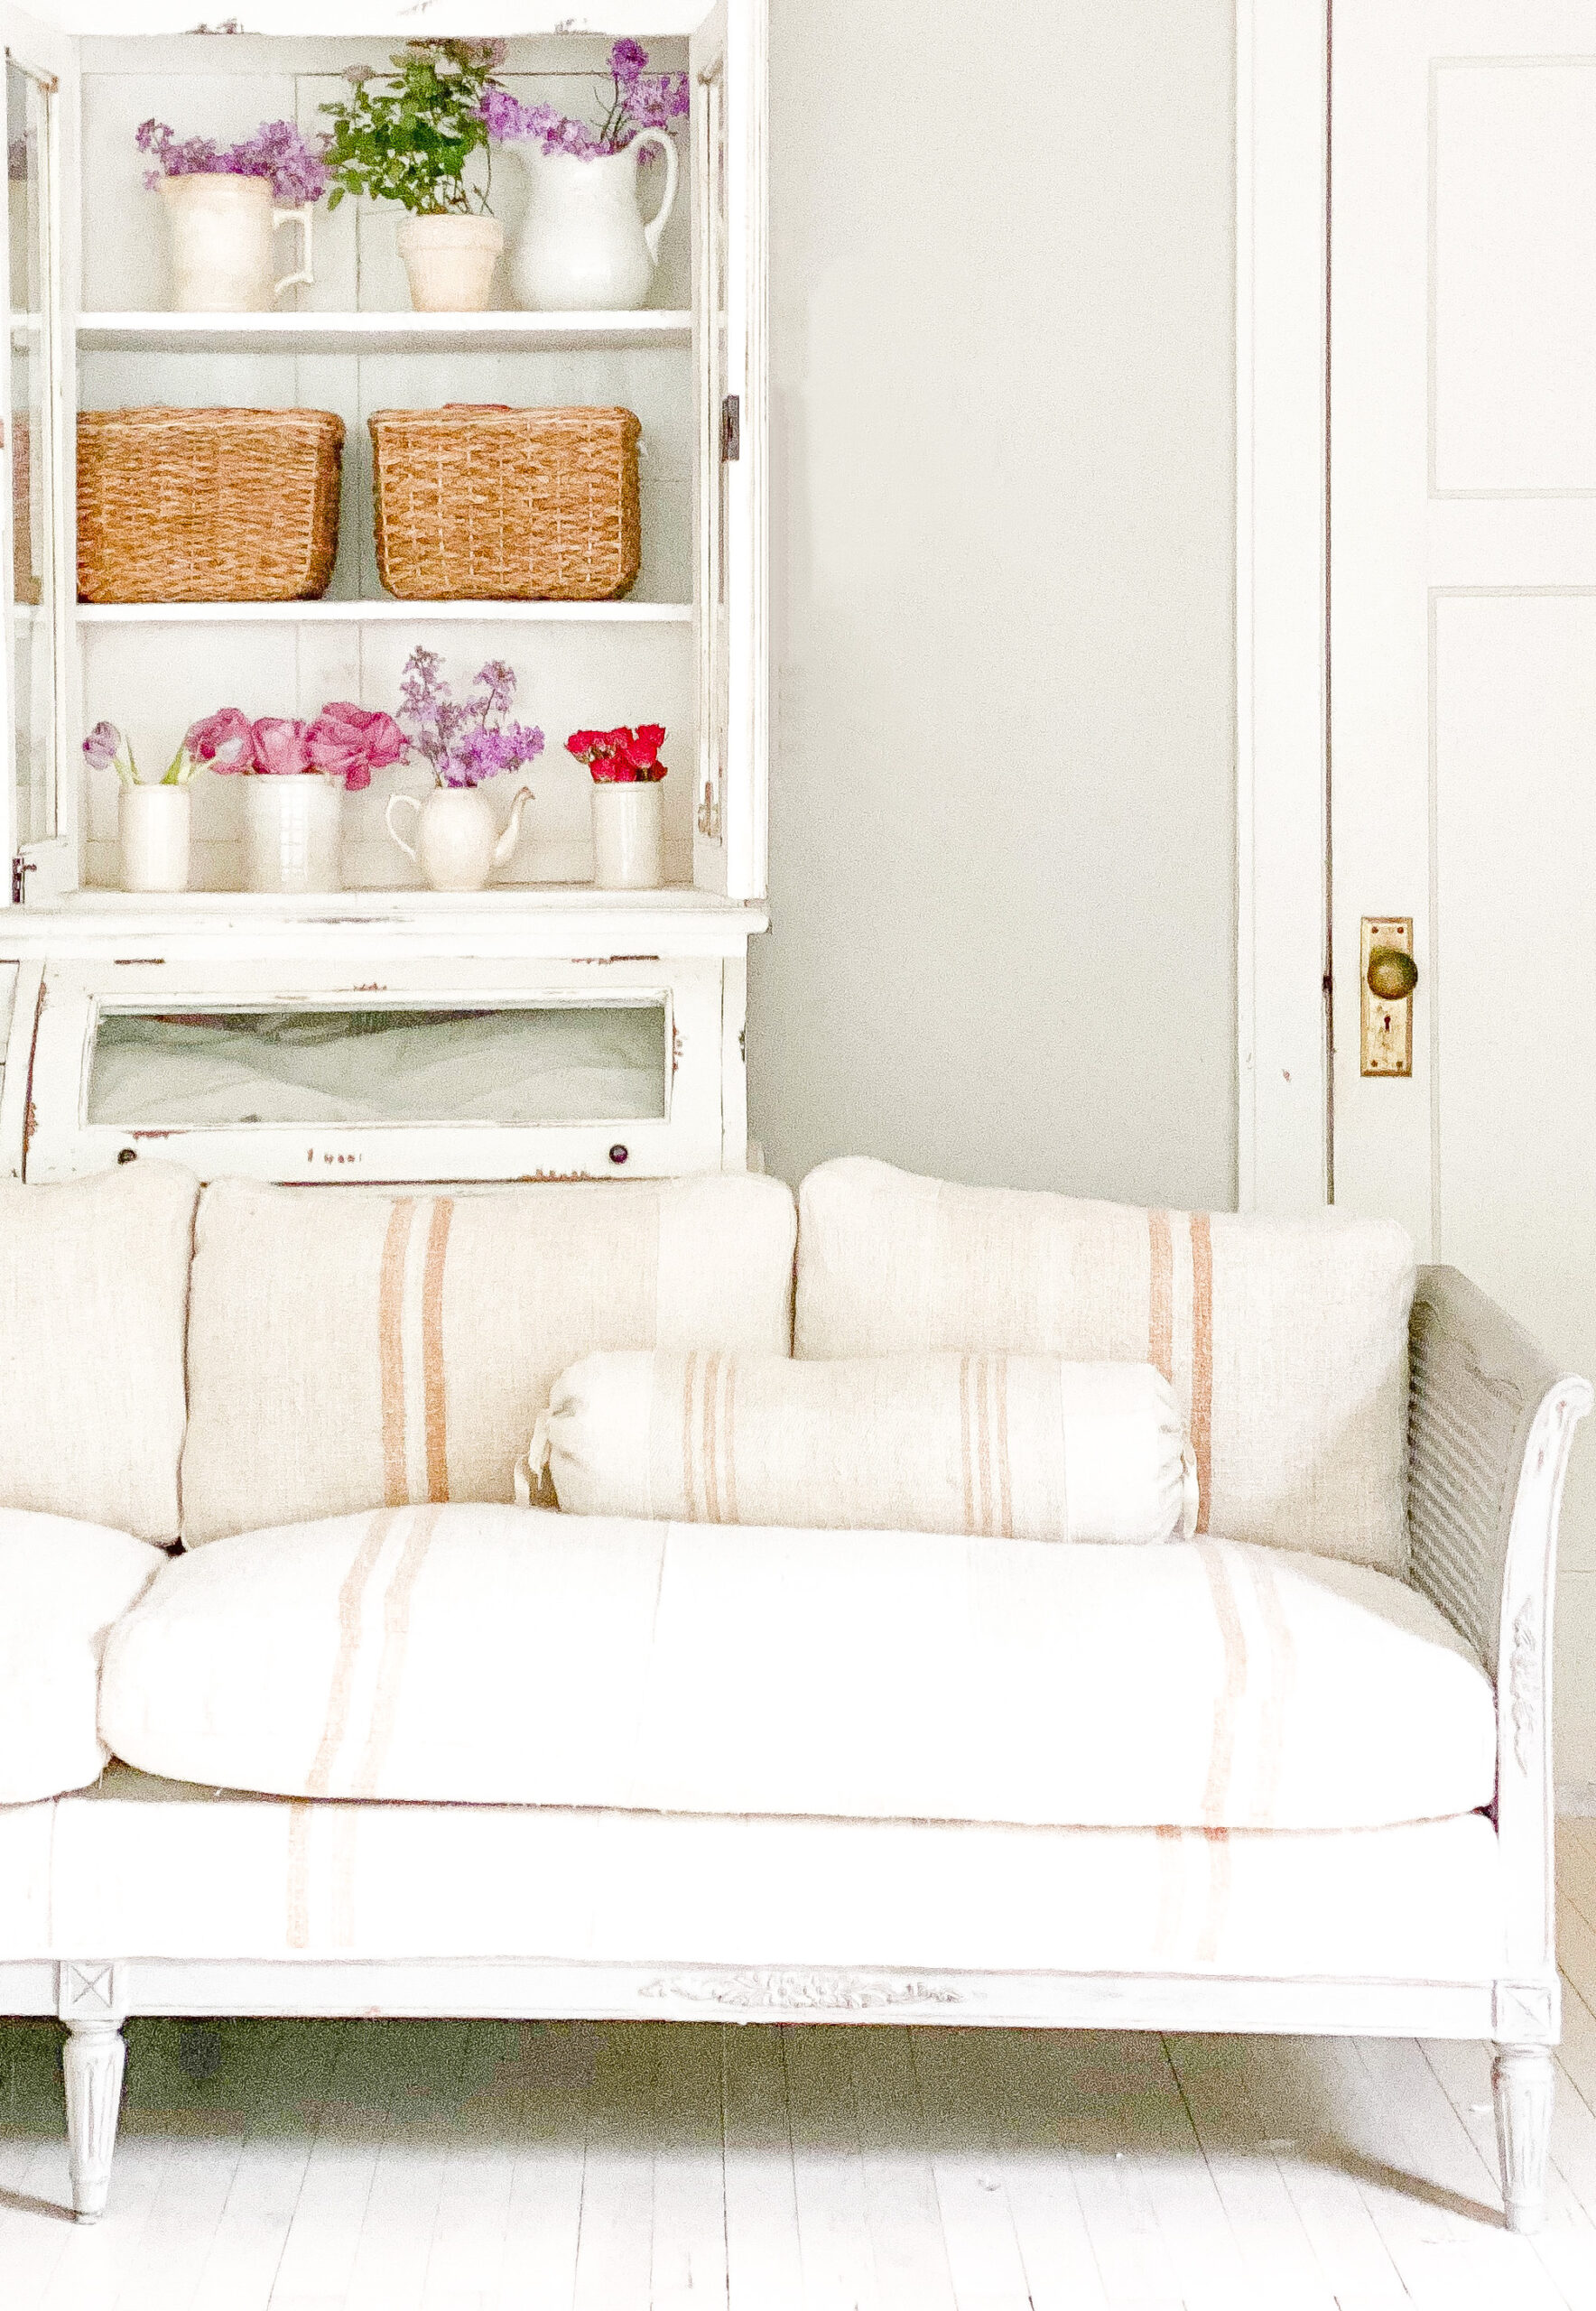
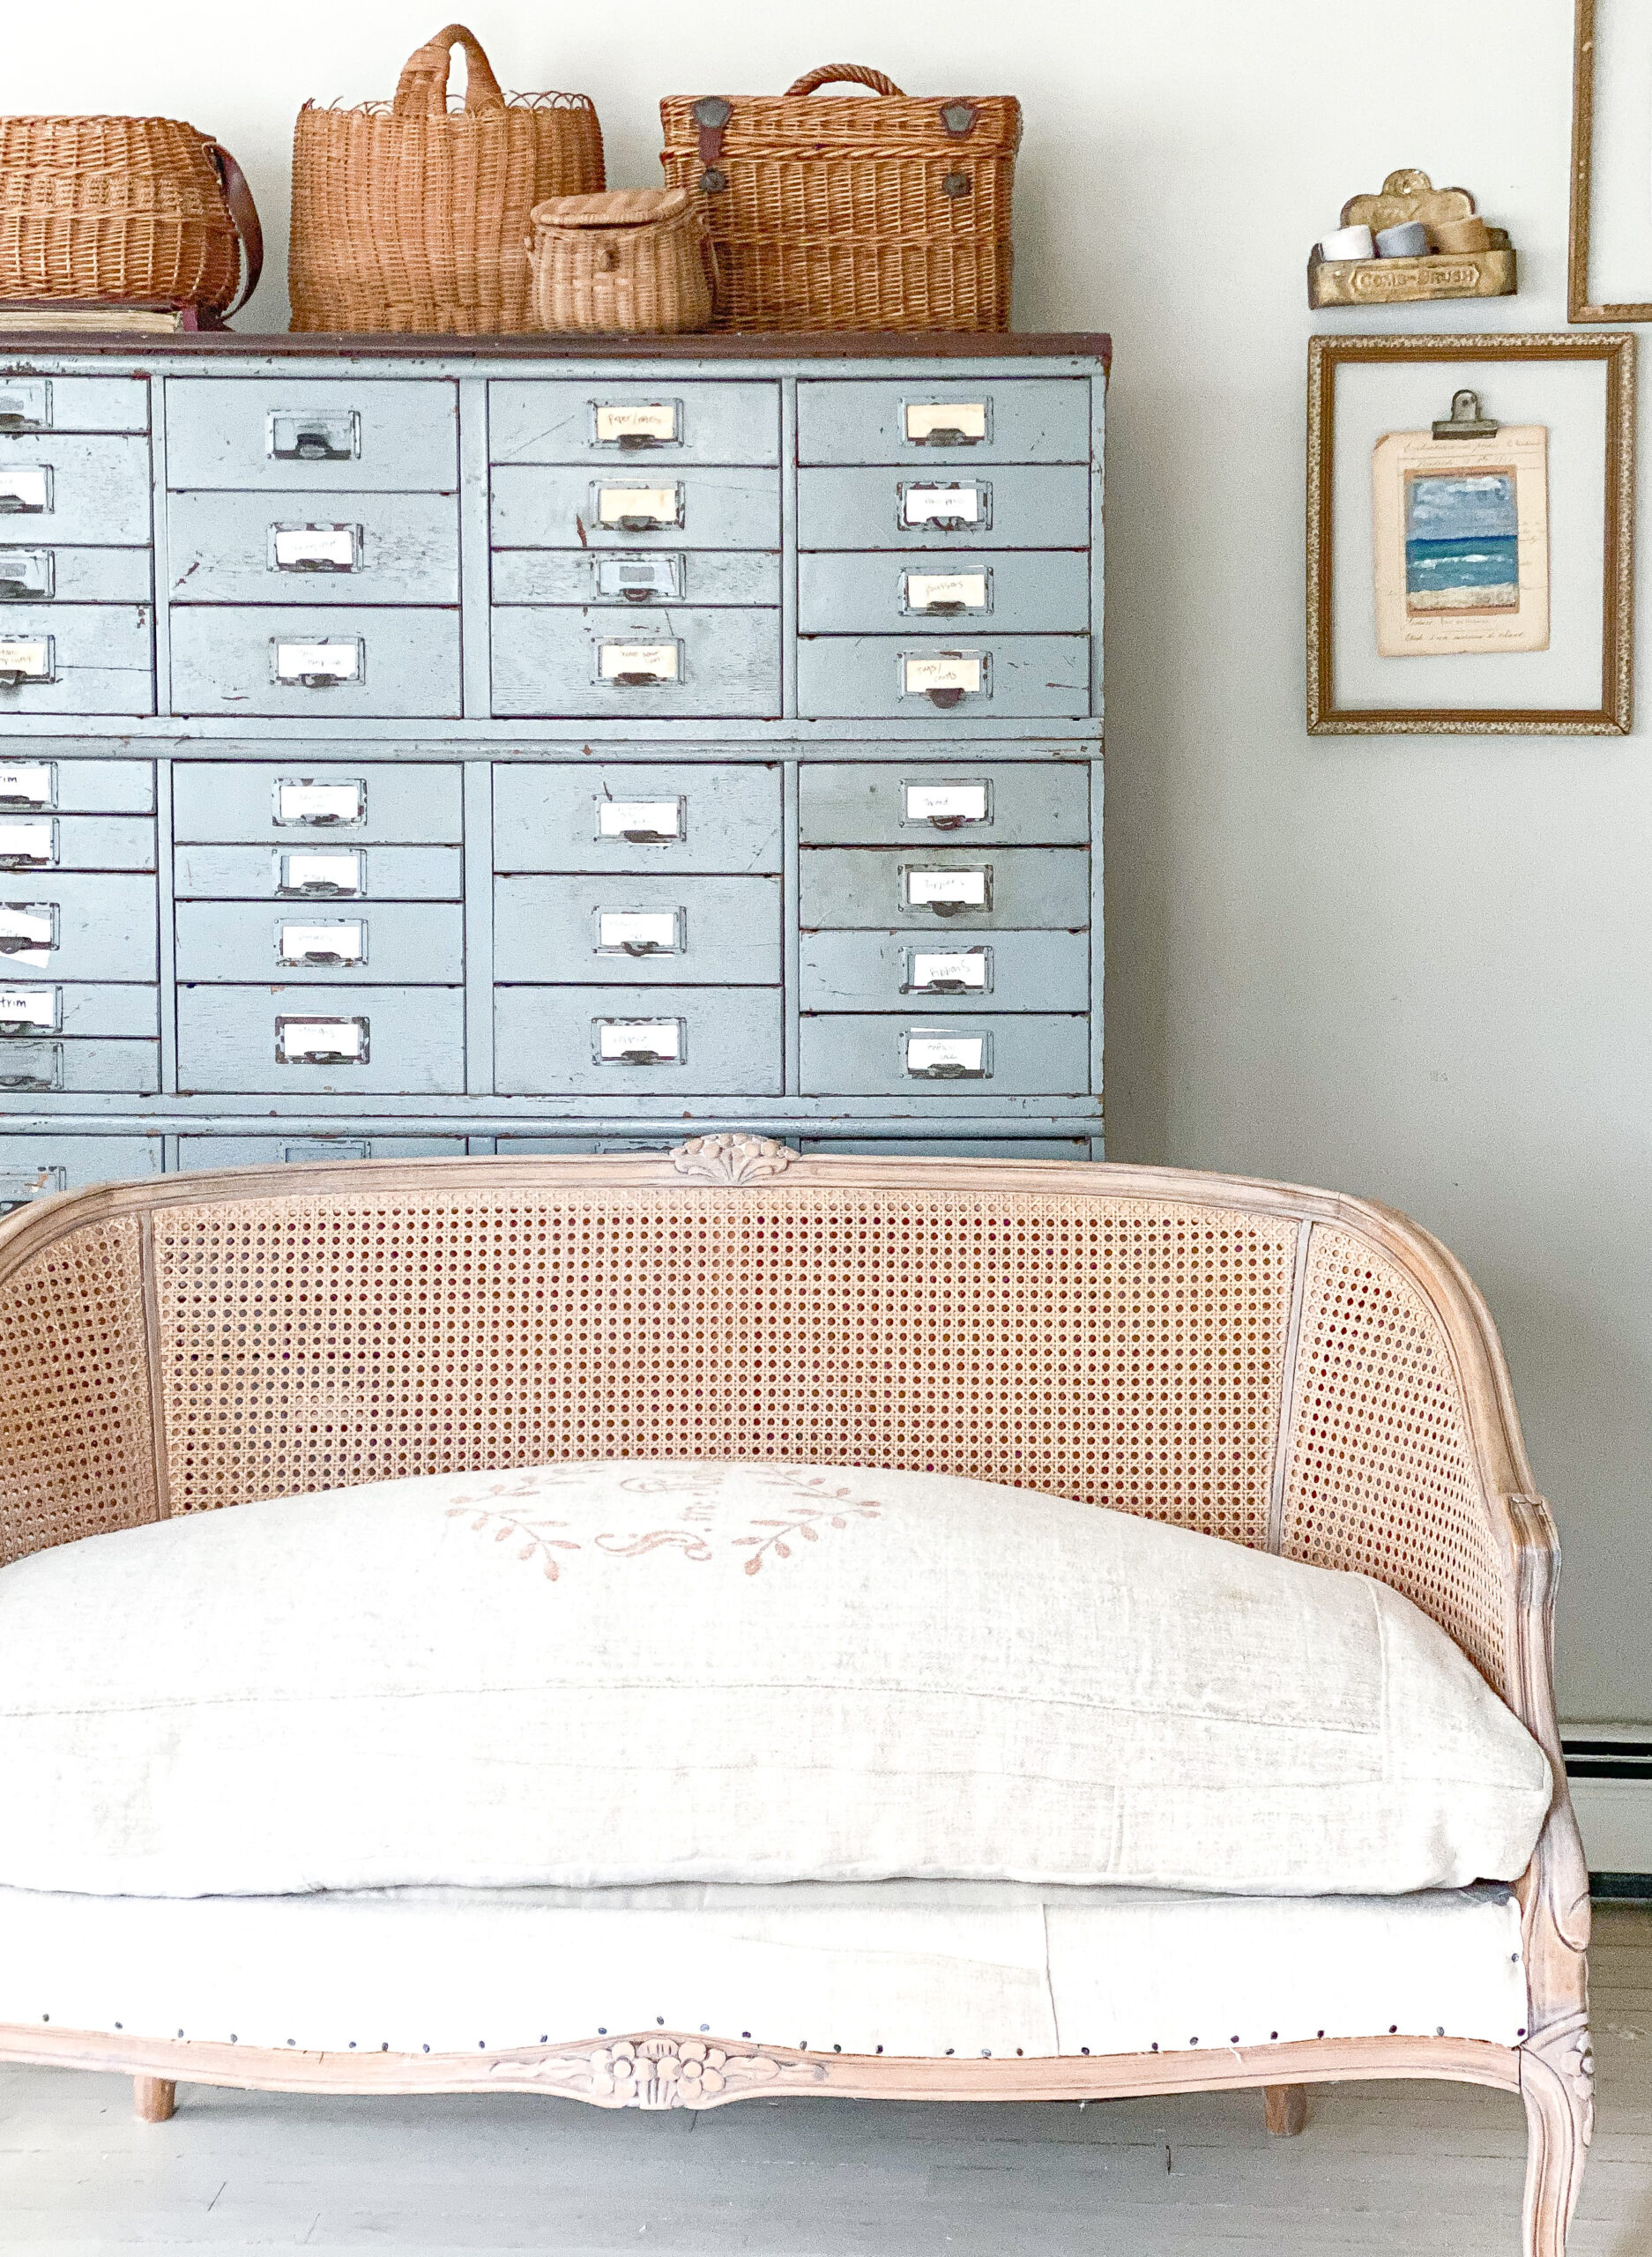
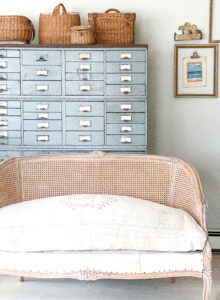
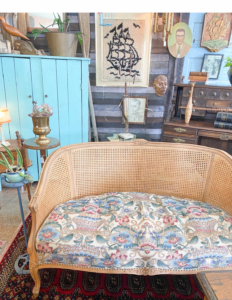
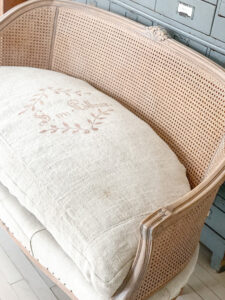
My most recent and one of my favorite makeovers (I should look back, do I say this about every project? But every project does have a bit of my heart, but I really, really love this one), was of this vintage sofa. I spotted this sofa at an estate sale in my neighborhood. I wouldn’t say that it was love at first sight, but I saw its potential, and thought it would be a reasonably strait forward makeover. I liked the idea that there wasn’t a lot of reupholstering that needed to be done to the structure other than the base, although there would be a lot of sewing to replace the fabric on the cushions. Anyway, it was good option, I just thought I would let fate decide. This estate sale allowed for bids to be placed, so I placed an offer for a 50% price if it didn’t sell by the end of the first day of the sale. I got it, obviously :).
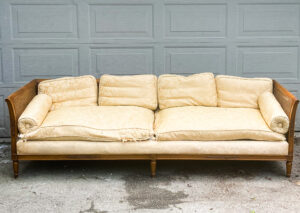
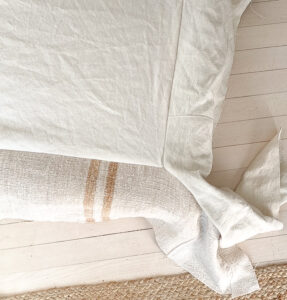
At first I thought I would redo the sofa with German grain sacks with writing, but somewhere along the way, I fell in love with the idea of using grain sack fabric with caramel colored stripes. This is not a color that I have worked with often or at all except for making a couple pillows for a client. And now I am hooked. I bought two 4 1/2 yard rolls of this grain sack fabric for one of my go to shops, Grain Sack. This lovely shop gave me a coupon code for 10 percent off for my readers, it is good through 7/1/2022. The code is: PENNYANDIVY10. I have bought from this shop since 2016, they have hundreds of high quality options of vintage handwoven hemp linen fabrics. I have loved every order and they always arrive clean and nicely packaged.
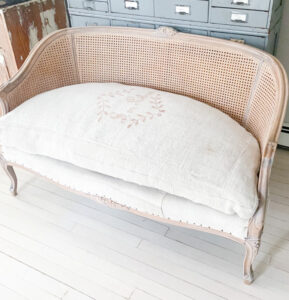
This fabric made me so excited about the project. I loved the tone of the caramel color, and the nubby weave of the fabric. Even with the 9 yards of it, there was not enough for the sofa, so I had to find enough of similar toned hemp linen to piece together to get this project started. Piecing together fabric is usually the only option when using vintage fabrics due to the finite supply. Fortunately I love the look, it feels cozy and homey to me.
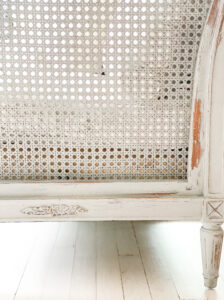
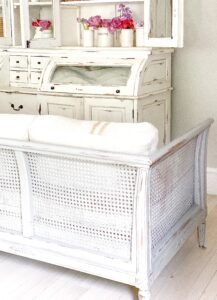
Before I got into the sewing part, I knew I wanted to redo the dated look of the wood. It did cross my mind that maybe I could strip the wood, there are lots of beautiful projects lately of stripped wood circulating around the internet. But I recently tried stripping the finish off a pair of dressers and let me tell you it is not for the faint of heart, it is really messy and takes A LOT of time. I did develop a system and am not totally scared off of trying to strip furniture again, however I wanted a break. I was also worried about damaging the caning on the sofa during the stripping process, so painting it was THE decision.
I chose one of my favorite paints, Miss Mustard Seed Milk Paint, Schloss. It is the perfect warm griege that compliments the oatmeal color of the linen. Before painting I cleaned the wood, and lightly sanded it. The finish on the sofa was very shiny, milk paint has trouble adhering to a nonporous surface, so I added its milk grip bonding agent. It worked like a charm, there was still some chipping, but just the right amount. If you want a lot of chipping, you can apply the milk paint without the bonding agent to a nonporous finish, and that is likely what you will get, although there are no promises. This paint has a bit of a mind of its own, but I am almost always happy with the end product and love what it does. I did two coats of milk paint and lightly sanded it. To seal the paint I used the General Finishes Flat Out Topcoat. This is an easy to use water based top coat that doesn’t add any sheen. I did 3 coats of the this just make sure the durability was strong and present, and that is what the instructions on the can advised :).
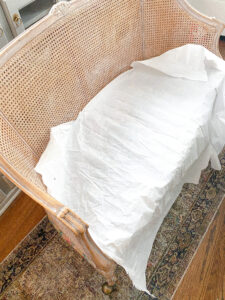
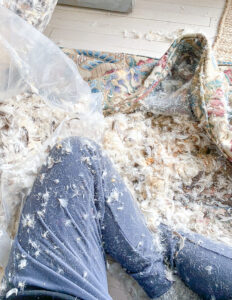
My next part to attack was getting the cushions in working order. These were something. This sofa was incredibly sturdy and made with super high quality everything, except the seat cushions. The seat cushions were a thin down envelope with springs in them. It was a terrible choice of ingredients to make a cushion in my opinion. There was a thin foam layer that was used to either hold the springs in place or add cushion. Either way, the foam was disintegrating and the springs were a mess. And there was burlap mixed in too.
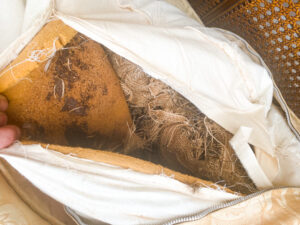
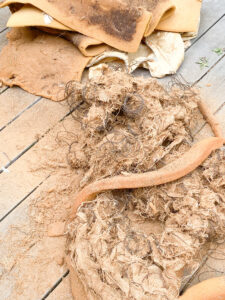
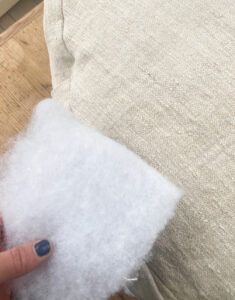
I removed that train wreck and was left with a thin envelope of down. This was in great condition, and all the feathers were IN the fabric, which is huge. Chasing feathers is not my favorite.
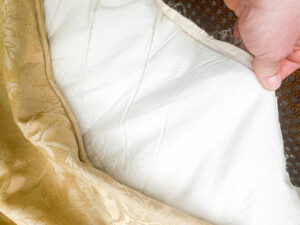
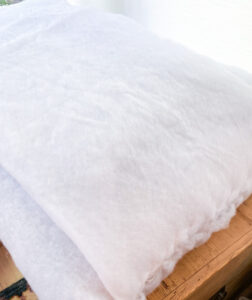
I used this technique that I described in this post to replace the springs with 3 inch foam and still using the down envelope. I finished up by wrapping the cushion in two-three layers of dacron to make a full cushion. I was very pleased with these cushions and the quality of the felt very comfortable. Thankfully the back smaller cushions for the back were in great condition and were all down filled. No springs. I did wrap these with dacron to make them full also.
Now the cushions needed new covers. I made them using this technique in this post. Although I did not need to make a pattern for the cushions, I just measure the fabric from the original cushion and since they were rectangles I followed those measurements. I did not measure the original cushions because they were not full and not in good condition. But the fabric was and gave me accurate measurements. I made six cushion covers. It took awhile. But it was worth it.
All that was left was reupholstering the seat base. At this point I realized I unscrew the base and remove it to reupholster it. I wished I had realized this when I had painted it. I need to do a little painting to cover the missed spots.
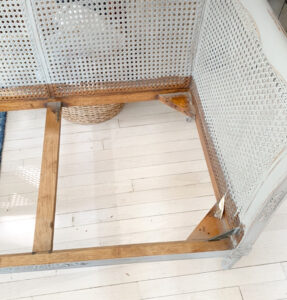
Anyway, having it removed I was able to wrap the base almost like a present. But first in ordered to get a piece of fabric that size, I used some natural duck canvas pieced together with the hemp linen. The canvas is not seen because the cushions will cover it, and if someone does get a peek of it then its somewhat similar color to the hemp linen, and it is durable fabric. I whipped stitched the under side of the seams of the new fabric to the old fabric (the old fabric was in good condition, so no need to remove since I would be covering it entirely). You can see how I did this during this makeover post. Then I wrapped the fabric around the corners like you would wrap a present and stapled the fabric in place in the underside.
I replaced this bottom and screwed it into place. I did notice about an 1/8 inch gap under this bottom and the wood. I corrected it by adding a 1/4 inch piece of cording wrapped in hemp linen and sewn in place using a zipper foot. Taking this cording I glued in place with a hot glue gun with the seam in the back.
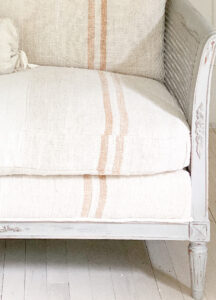
I love how this sofa turned out. I love how comfortable and sturdy it is.
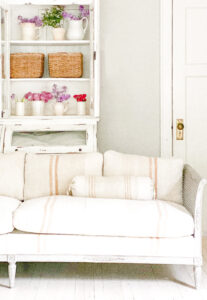
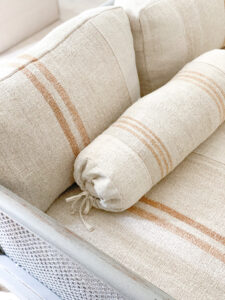
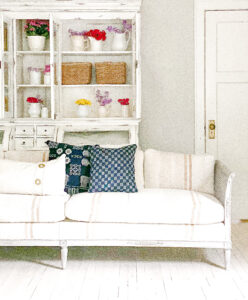
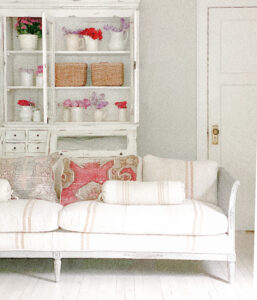
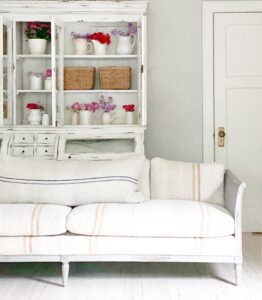
I love that it is 94 inches looong. I love that it is unique but somewhat versatile in its style. I went through my stash of fabrics and tried out a variety of different styles of pillows and I think that they all work.
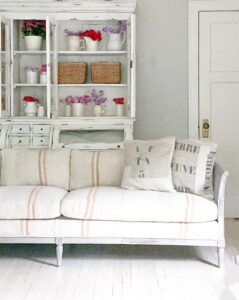
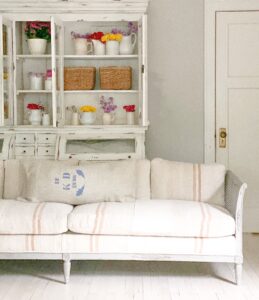
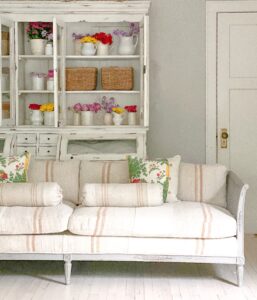
This sofa is currently for sale the charming shop, Anthology Home, in Waukesha. It is such a sweet reward to see the end result in this beautiful space after a couple of weeks of working on it.

Bonjour mon amie!!! After the trip I took alone with my kids in March to France, I have been asked by a couple people if it was worth it to bring my kids to France at their ages. My interpretation of this question is if they are wondering if the kids got enough out of the experience and memories to make it worth the investment of both time and money on the parents part. And stress. Let’s face it, there is always stress involved traveling with a family and internationally can add another element of uneasiness. My quick answer is in applying this to my kids is ABSOLUTELY for my 15 and 17 year-old daughters. My 12 year-old son is more of sure, I think so. And my 10 yer-old daughter is maybe. I know every child is different, your 12 year-old could like much different things than mine does. Believe me, I know, each one of my kids is extremely different from the other and they all have the same parents, have lived in the same homes, and ate the same food. Your kids could be totally different. So my experience is just that, my experience, but for what its worth maybe it offers some insight or encourages you to have an adventure with your kids.
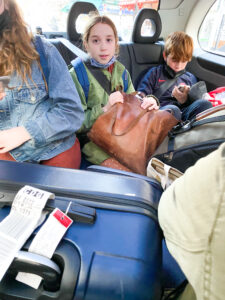
This trip was a dream of mine. When I was 11 years-old I was able to travel with my dad to Paris while he had a business trip. This is one of my most treasured childhood memories and it completely opened up my world. I wanted have this experience with my own kids. I know its a bit strange that we ended up going without my husband, but I am sure as anyone who has multiple kids knows, schedules are complicated. And I was feeling a sense of urgency since we have a daughter that will be a senior in high school next year. Our options were to travel during spring break or in August. Well, traveling in August to Europe everything was twice as expense, and with our multiplier of six travelers, that is significant. We might as well just go on two trips. For our spring break my husband ended up having a huge work presentation two days after we would return, we had hoped he could make some of the trip work, but in the end he knew he would be too stressed worrying about his work it to enjoy his time. So we ended up going without him, but sharing as much of it as we could through pictures and FaceTime. Fortunately my kids are at ages where I could travel alone with them just fine. No one ever wander off, they were very loyal little ducklings following behind me every step of the way. If I had toddlers that would have been a totally different story.
17 Year-Old
The impact that this trip had on my 17 year-old was enough to make up all the investment. She is very easy to travel with and extremely helpful. She is better with technology than I am, which I do not believe is unique for a parent-child relationship these days. There were a couple moments when she stepped in to help me and saved the day. I also stood back a couple times and let her do some navigating. Mostly to give her the experience so she had confidence to travel in the future, but also there were times when I needed it. One was when we were switching trains. We had 12 minutes exit our first train, find our next train in an unknown train station, and board the second. She was able to lead the way through the train station while I kept track of everyone and our bags. We made our train connection because of her.
This trip seemed to have an influence on her future plans. She will be applying for college next year and she realized that going to school in Europe is an option. We did a bike tour in Paris and our guide was a college student, he mentioned how much more affordable it is to attend school in the EU than the US. I can’t remember the exact number but it was something similar to our monthly cell phone bill for his tuition for a semester. Of course this got our attention, because we are trying to figure out how to work out the massive expense of college. She also found herself very happy visiting France. She was motivated her to come home and meet with her counselor to see what she needs to do to attend school in Europe. She has had a couple very positive phone calls with schools and it is in fact MUCH more affordable. Time will tell as to where she lands. And yes, my heart will hurt when she leaves for school, but I will be comforted as long as she happy and progressing, and I get to visit lots.
15 Year-old
This was a great trip for us to experience together. We are bit in the middle of that fun teenage stage, where she thinks I am WORST most of the time. We made some memories together that I treasure. She was easy to travel with and up for almost anything. She loves shopping and would love to have a career in fashion. Paris is the place for her. She had a dream of one day living in Paris, and this trip completely reinforced that. Per her request we spent an afternoon shopping on the Champs-Elysees. We both enjoyed going into the high end fashion stores, our favorite being Dior, which is as much like a beautiful museum as store. There is something pretty special about finding common ground and doing an activity with your child that you both really enjoy. Shopping is it for us. One afternoon when the other kids needed down time, she and I headed out to the vintage clothing shops. I highly recommend this. We both got some great pieces from the Kilo shop.
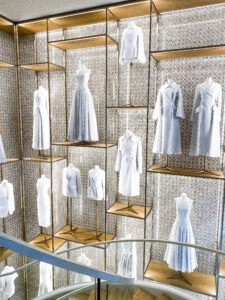 DIOR, Champs-Elysees
12 Year-old
Okay, so 12. This is when it gets a little more questionable about the worth of the trip. My answer is still yes for my son. But traveling with him was not stress free. I think in nutshell a trip to Paris involves A LOT, A LOT of walking. There really is no way around it. We did take the metro often, but even still this all involved a lot walking to the stations and up and down the station stairs. I added in an occasional Uber when it made sense time wise and it didn’t completely break the bank. This coupled with jet lag, left him exhausted at times, one time in particular there was a bit of a meltdown at the Eiffel Tower. I doubt he will ever see a picture of the Eiffel Tower without thinking of that special moment :). But he did it, and he is always so happy and excited to show off his pictures of our trip. He was the one that surprised me the most with speaking French. This is a kid that has been in speech therapy since he was 3 years-old, and he made the most effort to speak French while we were there. As we were flying to Paris he turned to me and said “The French speak very romantic, I guess you would say.” He asked me to teach him a couple very basic statements, like “please,” “thank you,” and “can I have?.” He had no fear, he would walk into a bakery and order what he could using his minimal French, at one point he turned to me and said “I really need to work on my accent.” It was true, he did, the accent is hard. But the storekeepers loved him, they were very patient and seemed so happy he was trying. This made the meltdown worth it. One thing he lost his mind over was seeing the fancy cars throughout town. We had the most luck when walking through the Place Vendome and the Champs-Elysees, in case you have a car lover too.
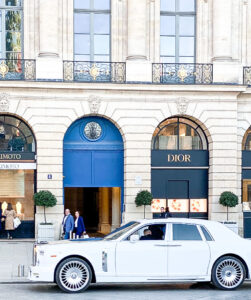 Place Vendome
10 Year-old
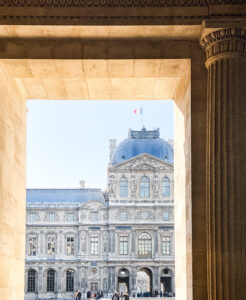
I am so glad she came. It makes me so happy to look back at our pictures and see her big smiles. But I think it was much more exhausting than she had planned for, as mentioned above there was A LOT of walking. She is up for just about anything except walking :). She was a trooper and then of course not a trooper at times. She seemed to enjoy herself most of the time but added in her fair share of complaining. To be fair, maybe the trip would have been better for her if she weren’t having to keep up with her older siblings. Her absolute favorite thing we did was the trampoline park in the Tuileries. I think we went there 3 times. Both she and her brother loved it. It isn’t anything fancy, just a set up with six very bouncy individual trampolines. The men that run it are very kind and everyone is happy. And they do let your kid stay on the trampolines for two turns if you ask. I enjoyed my time sitting watching them in the idyllic park. It can be as little as a 15 minute jump if there isn’t a line or you can take as many turns as you would like to pay for. It could be definitely used as a good bargaining chip to keep a child going through a museum. It costs maybe around 3 euros for a turn jumping. I also recommend getting a lunch of croque monsieur and a crepe at the take away restaurant in the Tuileries that is about a 5 minute walk from the trampolines.
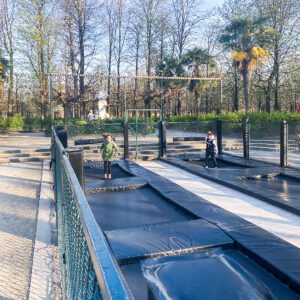
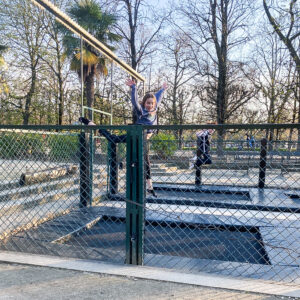
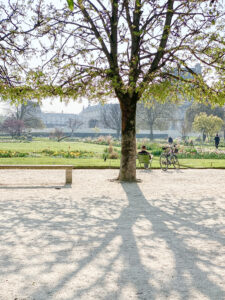
This was our lunch spot in the Tuileries, insert yourself and your family here 🙂
Our highlights:
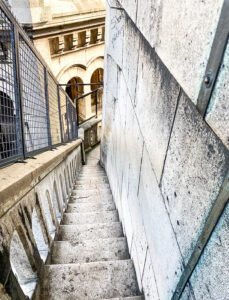
SACRE-COUER
3/4 my kids loved climbing to the top of Sacre-Couer. This was amazing. My child and I who are nervous about heights struggled a bit, but I think it was still worth it for all of us to go. Its an incredible view and climbing the tiny narrow steps was a cool experience. Also I don’t believe it was very expensive or that we waited in line longer than 20 minutes. I was surprised that the line was so short because the area around the church was completely and utterly packed with tourists.

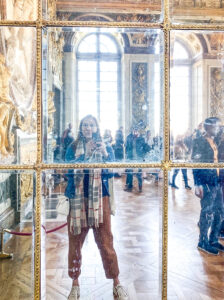
VERSAILLES
Versailles holds up to its reputation most definitely. This is not technically inside Paris, but it is easy strait forward train ride from the city center. Due to a series of events we ended up taking an Uber. My daughter wasn’t feeling great that morning, so I hired an Uber to drive us to the train station. That morning many roads in Paris were blocked and the driver was unable to deliver us to the train station. He offered us a discounted rate to drive us all the way to Versailles. It worked out great for us. But I don’t believe the train is bad, so Uber or train works. If you are going, I recommend allowing the entire day. We did not have enough time. We were there for about 5 hours. We had to wait for about an hour for tickets (I bought mine online, and the kids were free but I could not for the life of me figure out how to get a ticket for them on the website, you might have better luck).
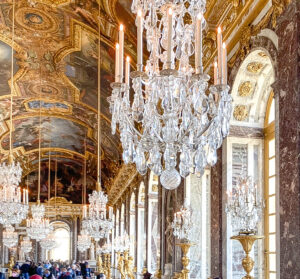
After walking through the palace, we needed food and that led to another 45 minute wait for takeaway. We just saw the grounds briefly, and they are the most spectular part.

I scheduled for us to see the equestrian show. I loved it, the arena that it was in was stunning and made me feel like we had gone back in time. My 10 year-old also loved it. But the other three, not so much. Its a bit of a slow moving show that is very artistic. And I forgot horses aren’t as entertaining for my teenagers as when they were 6 years-old. I had thought that the kids would be free, they were not and I believe it ended up being 70 euros for their four tickets. I totally recommend it if my description sounds like something you would enjoy and its in your budget. But hindsight, I probably should have just rented bikes on the grounds with my crew and all would have enjoyed that. I did that once with friends and it was magical.

HIDDEN SECRETS BIKE TOUR
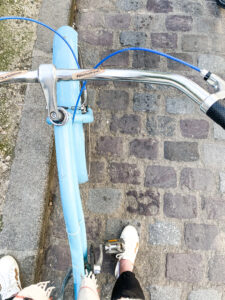
Hidden Secrets Bike Tour through The Latin Quarter and Le Marais. This 4 hour tour was a great time. Our legs needed a break from walking and it is pretty special to ride a bike through the cobblestone streets of Paris. When I booked this, I thought surely we will be on bike paths. Traffic in Paris terrifies me. Not only were we not exclusively on bike paths, meaning we were riding with traffic through the streets of Paris, our guide recommended I ride a tandem bike with my daughter on the back. Okay…
But, it was really wonderful, and the flow of traffic started to make sense to me. I think I only made one other driver mad once, well at least that they communicated to me their frustration to me, I felt pretty good about that. Our stops were very interesting and our guide offered a lot history.
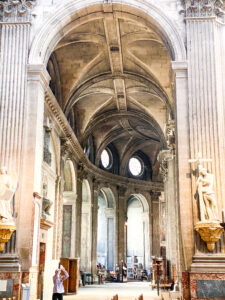

One of our stops was the Church of Saint Sulplice, anyone remember this from The Davinci Code?
We had one of our favorite meals in the middle of the ride in the Latin Quarter. There was a square with several takeaway restaurants that cater to college students and that was right up our alley, quick, delicious, affordable food. We chose the pizza at a cafe, Amore E Gusto and enjoyed every bite.
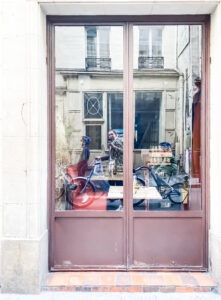
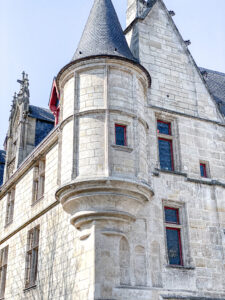
We traveled through the Le Marias and saw sights like this:

and this:
Part of the tour focused on the Jewish quarter of Le Marais, our tour guide offered a lot of history of what took place there during World War II. It was sobering to be reminded of this history while standing where it took place. But also a valuable reminder of the importance of respecting and cherishing all.
A less important, but still a lesson that should be noted, I learned from our tour guide about using the bathroom. Public bathrooms are hard to come by in Paris. You can order a takeaway coffee at a bar and they will let you use their bathroom. The coffee is just 1-2 euros and is totally worth even though I don’t drink coffee.
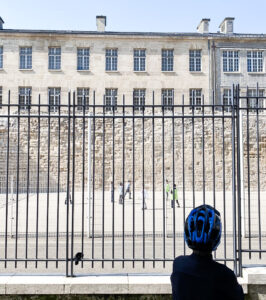
My son was checking out a local school soccer game.
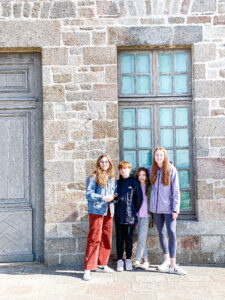
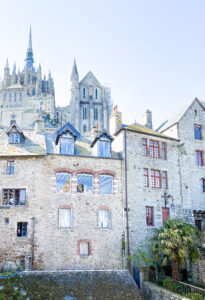
DAY TRIP TO MONT-SAINT-MICHEL

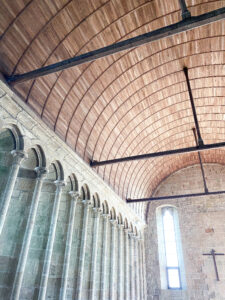
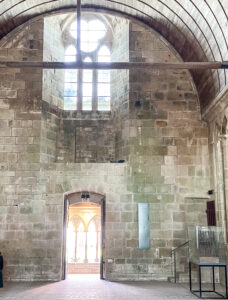
Seeing Mont-Saint-Michel was enchanting. This is a unique place rich with history and is located in Normandy. It is a tidal island, so depending on the time it could be surrounded by water or by land. It currently has an active monastery surrounded by a small town. I love, loved this day. The visuals made my eyes and heart happy.
I waffled on how to make this experience happen. In the end I just signed us up for a day tour. I believe I got 10% off because I had booked my bike tour with the site Viator, and then they offered me 10% my next tour booking. So that saved a bit. I would definitely recommend the tour. It isn’t a strait shot on the train from Paris. I am so glad I turned the navigating over to someone else. Instead of figuring out connecting trains and buses, I just had to make sure we met the tour bus at the right time and my work was done. They provided a very comfortable hired bus to drive us the four-hour trip to the island. I was worried this would feel like wasted time or the kids would get impatient, but it actually turned into nice down time.
We stopped in the middle at the world’s cleanest gas station and got some snacks. We are not above gas station snacks and most definitely not above them in the world’s cleanest gas station in France. The scenery was nice along the way. But then you hit this area close to the island and its rolling hills, with stone farms, and sheep throughout. IT IS MAJESTIC.
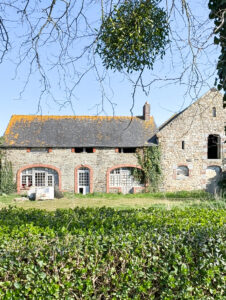
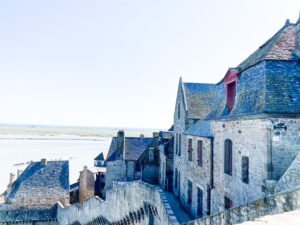
Towards the end of our ride there, our bus driver gave us an overview of the history of the area. My oldest daughter was so excited, like visibly excited, she said how much she loved sitting there listening to the history. She is our reader. The others weren’t jumping up and down about how exciting the information, but they didn’t complain. Sometimes that is all the affirmation I need that they are having a good time. They liked the experience. The island was full of charm, cobblestone streets, and stone homes.
I loved the exquisitely simple architecture inside the abbey.
And the views…

We enjoyed a nice lunch and a candy shop for those who weren’t so motivated by the historical aspects, and I left knowing my life is a little better with this memory.
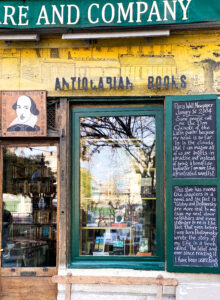
SHAKESPEARE AND COMPANY BOOKSTORE
If you need a quick and fun activity, I recommend a pop into this historic bookshop. It is located in the Latin Quarter on the Left Bank. This is such a charming store with history and books!!! They don’t allow photographs inside, but believe me its worth a peek. They have a lovely children’s section along with books for every other age, so we all loved it. And any situation that encourages reading over electronics makes me feel better about my parenting. A win all around.
Where we stayed:
In Paris we stayed in a lovely apartment in the Le Marais through Airbnb. It was charming and clean, plenty of room for all 5 of us. There were two bedrooms, and fold out sofa. Just one toilet, but two showers. Which is pretty standard in France and is still a bit of a mystery to me. I picked this place because it had great reviews (which ended up being accurate), it had a very generous cancellation rule, and it allowed us to drop off our bags early. I found the host, Vincent very kind and easy to work with. It was in a very central location that made getting around very easy. There was a nice grocery around the corner, along with a gelato shop that made the stay easy and sweet. This little courtyard to the entrance of our apartment made me smile every time we got home:

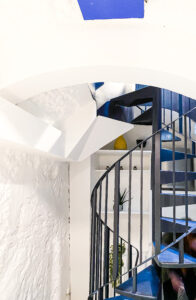
We all loved the interior. My oldest girls got to stay in this unique bedroom that was tucked down a spiral staircase:
It had a great kitchen and a washer and dryer. I always plan on doing a couple loads of laundry to allow for more space to bring treasures home.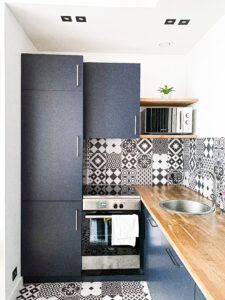
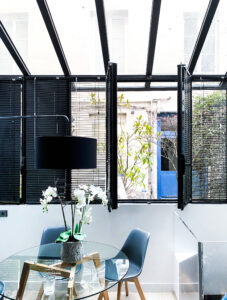
I loved the living space with big windows that opened out onto the courtyard. It was the perfect place to rest during the trip.
Recommendations:
Don’t try to see everything. It won’t happen. Don’t make this your goal. If you have a sense of urgency to hop from one landmark to another I believe you will miss the beauty that is found in the in between. Also schedules are weird in France. Things are closed, transportation can be unpredictable, I am not sure it is possible to stick to a schedule especially traveling with kids in Paris. It is true I am not the best planner in the world, but even my oldest daughter who is a tedious planner realized really quick that there is a lot of unpredictable factors involved that a loose schedule was the only option. My goal was to have one big sight or item on the agenda for the day, this was about right, and it even felt a bit aggressive sometimes. But we did see something new each day, we didn’t feel pressured to move onto to something else and it allowed time for us to stop in unexpected places or revisit the ones we really enjoyed. It also let us be present and soak up the experience.
Map out good, solid takeaway restaurants. This is of course depends on how your family eats. I have pretty picky eaters. I did enjoy some of our long sit down meals, but there were a lot of times when I just wanted to fill everyone’s bellies and get onto some activities. Also the sit down meals can add up really quickly and with picky eaters often they would just end up getting really expensive chicken nuggets and fries. I do love experiencing good food while traveling, but it also needed to balance that with keeping everyone happy. I don’t feel like I mastered feeding my kids when we were staying in the Le Marais in Paris. Surely everyone got fed, it just cost me more money than I thought it would. We bought cereal at the grocery for breakfast and tried to buy takeaway from local restaurants for dinner when everyone was tired, which sometimes worked and sometimes didn’t. Pizza worked for takeaway from a sit down restaurant. But in my experience many of the French Cafes aren’t equipped to package up a takeaway meal, so that I wouldn’t recommend. We of course loved a pop into a bakery for treat or grab a fresh crepe from a street vendor, but weirdly there were times when I couldn’t find them just when we needed them. As mentioned above we loved this takeaway pizza we had at Amore e Gusto in the Latin Quarter. We also got some dinner one night from L’As du Fallafel, it was delicious and they had fries and chicken nuggets which is great for three of my kids. If I were to do this trip again, I would have taken the time to research the restaurants better for my crew in accordance with where we were spending our day. It would have been even better if we had stayed close to a good takeaway restaurant. However, I did love our airbnb with or without a good takeaway restaurant, so I am torn on that one.
If you are traveling with a bigger family like ours and you find a good Uber driver get his/her card. You can request a XL uber on the app that will seat upto 6 people. I used the Ubers for rides when we had our luggage with us. We had great luck with all except one ride picked us up from the train station and the car did have 6 seats in the back, but no trunk. We had to pile our bags on our laps. Earlier in the trip, we had a great driver that gave us a bit of tour while we were in his van, and his van had plenty of room for us and our luggage. He gave me his card and it made it easy to schedule a ride with him to the airport.
I hope this helps you to take an adventure and thank you for taking the time to let me share this special trip with you!!
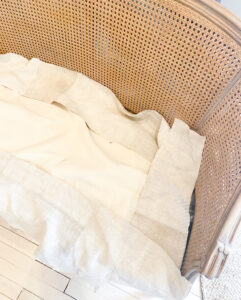
We have arrived at the final part of this series of DIY reupholstering these two settees, which is replacing the decking or the bottom part of the settee fabric. I recommend reading all the directions before beginning.
REPLACING DECKING/BOTTOM FABRIC
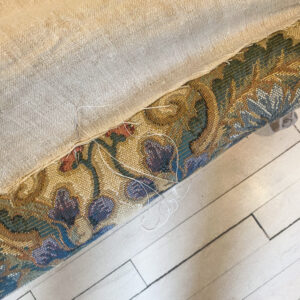
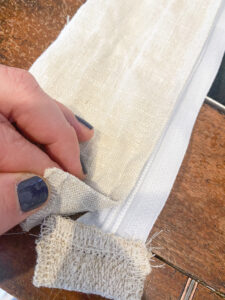
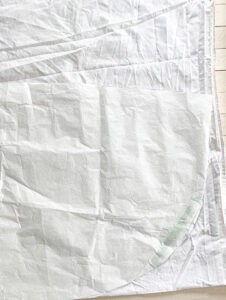
1.I began this project by cutting out a piece of natural colored duck canvas that covered all but approximately 3 inches on the outside of the seat, as pictured:
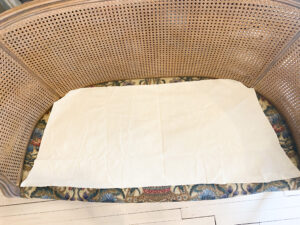
I found no need to remove the previous fabric on the bottom because it was in good condition and I could cover it up.
By using the duck canvas, I was able to use less of the vintage hemp linen. If you notice most upholstered pieced with removable cushions have plain fabric on the bottom pieced together with the fabric that is showing on the outside (and likely the more costly fabric).
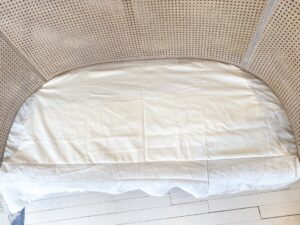
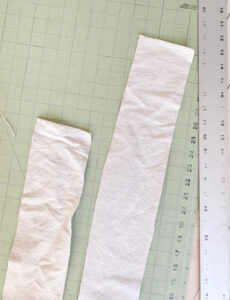
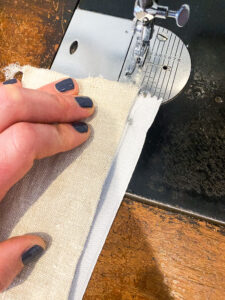
2. I then added at least 8 inches of the hemp linen fabric to all the sides, it needed to be enough fabric to cover a couple inches on the seat and to pull through onto to the sides and nail in place with a fold.
I did a lot of estimating and piecing fabric together for this process. Because of the look I was going for, I was able to piece fabrics together, which made the process much less exact.
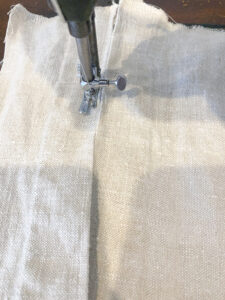
3. I sewed the strips of hemp to the canvas with a double seam and created this fabric piece to cover the entire bottom of the seat:
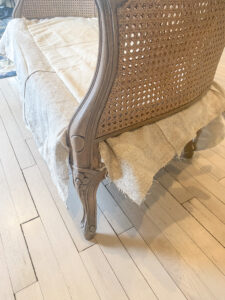
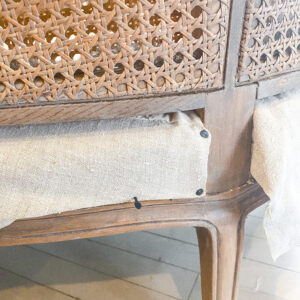
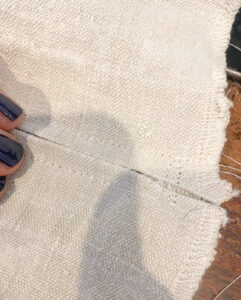
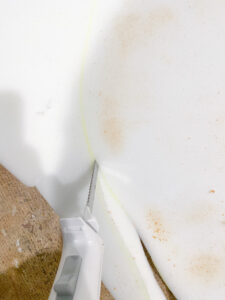
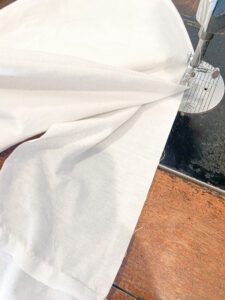
4. Next up is tucking the fabric around the legs and arms of the settee. This is the trickiest part in my opinion. Proceed carefully. I love using these scissors for the process of slowly cutting into the fabric so that the fabric lies flat, but not too much that any cuts in the fabric are visible. I always try to over estimate on the fabric needed and then make more cuts where in order to get the placement right.
5. Once I am pleased with the way the fabric is placed and tucked under, I flip up the front strip, and do a quick whip stitch at the seam on the bottom to the fabric on the seat. I use a curved needle and upholstery thread to do this.
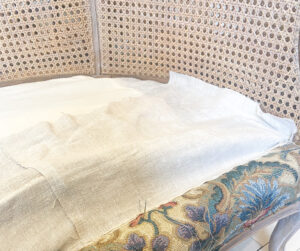
6. Now that is secure, it is time to tack the outside bottom to the frame. I like using carpet tacks for this and I also like my lightweight upholstery hammer to minimize damage to the wood frame. I fold the fabric under so no raw edges are exposed and hammer into place.
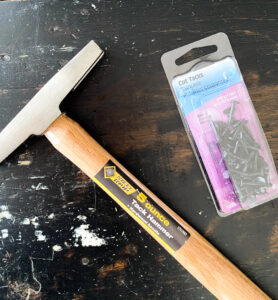
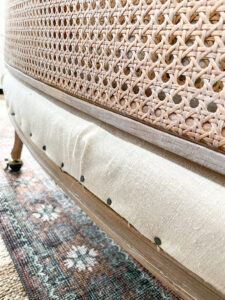
This is another case where I did not mind everything not being quite exact due to the slightly rustic look I was going for. There were times I need to add a fold to the fabric to get it to lie flat and I was just fine with that.
AND WE ARE DONE
Remember where we started from?
Thank you for checking out this post. Feel free to contact me with any questions at pennyandivydecor@gmail.com.

To make a cushion cover(s), I started with my pattern that I created for the seat of the settee. I mentioned this process in the last post, but it would be helpful to have it here too:
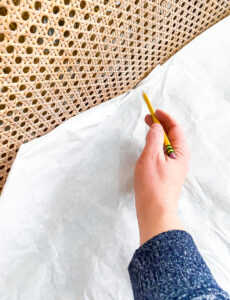
CREATING A PATTERN FOR A CUSHION
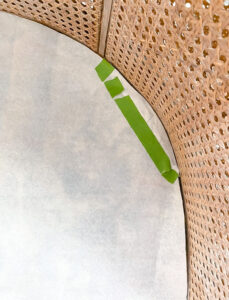
2. I traced around the seat to and cut out the paper:
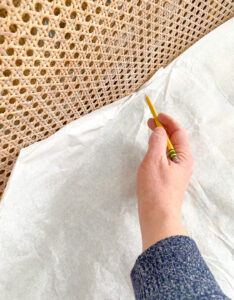

I cut the paper a bit too short in the corner here so, I corrected with with a bit more paper and tape.
CUTTING OUT FABRIC PIECES FOR THE CUSHION
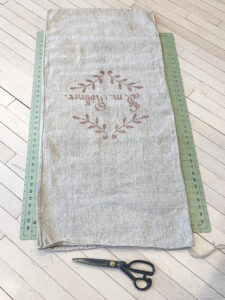
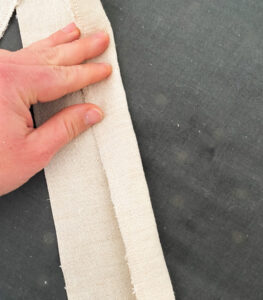
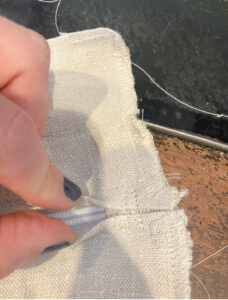
 Since I was using a grain sack in which one side was not wide enough to cover the top, I made cuts on the bottom side, so I could create a piece large enough for the top of the cushion. If you are here, you are likely to know that vintage hemp linen is my thing. The quality and history of the fabric is very special to work with. Here is a list of some of my favorite shops to buy this kind of fabric: Brocante und Antikes, Objekts1, Grain Sack, Linens by Sabine, Antique Monkeys, The Textile Trunk
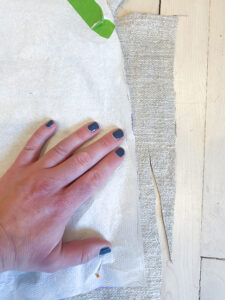
DO NOT FORGET TO ADD 1/2 INCH ON ALL SIDES FOR SEAM ALLOWANCE
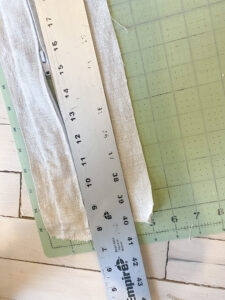
2. Next up is cutting out the sides of the cushion. My cushion was 3 inches tall so I cut one strip that was 4 inches that was long enough to wrap around both sides and front.
3. Then I cut two 4 inch wide strips long enough to cover the back. These are used for the zipper that will go in the back of the cushion.
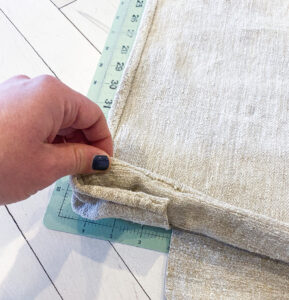
FINISHING EDGES OF FABRIC
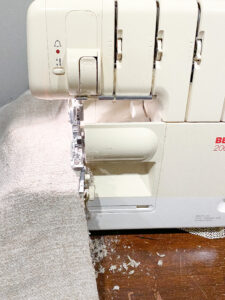
With all the pieces I used my serger to finish off all the edges. If you don’t have a serger you can do a zigzag stitch around all the sides with a sewing machine. This is important if this is a cushion that will be washed in the future. If the edges are not finished there will be a lot of fraying. I did wait to serge one long edge of the strips of fabric used for the zipper because I will likely need to cut it down after the zipper is sewn in.
SEWING IN THE ZIPPER
 You can see on one side of the piece of the fabric the serged edge.
2. Then I sew a small piece of fabric in place on both ends of the zipper to stop the pull from sliding off, unless there is a metal stopper on the zipper already.
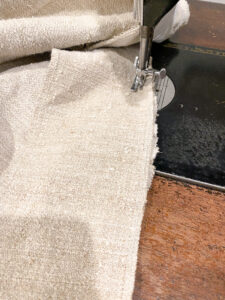
3. Then I pinned the zipper in place on one strip of fabric, allowing at least an inch of overlap before and after zipper handle lengthwise and enough fabric to cover one half of the zipper keeping it hidden. Using a zipper foot on my sewing machine I sew it in place.
4. Repeat with the second strip of fabric.
6. Before and after the zipper I place a couple stitches to sew the fabric together:
7. I cut my strips too wide on purpose, just to leave room for error. So now with the zipper in place I cut this finished product down to 4 inches so it is the same size as the front strip.
8. After trimming to the correct size, I serged the raw edges.
SEWING CUSHION PIECES TOGETHER
GOOD LUCK!!!
Please email me with any questions, pennyandivydecor@gmail.com

So as luck would have it, a couple months after I purchased the first settee for our home I was checking IG and I saw a picture of my settee for sale at Goodland Antiques. What? TWO of them exist??? I knew I wanted the second to reupholster for resale. I sent a note to Ann, the shop owner and placed my claim on it.
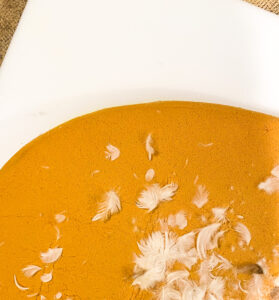
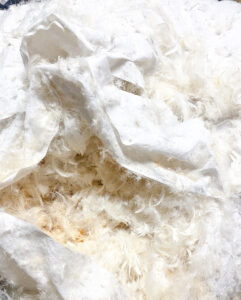
The biggest surprise with these pieces was the state of the cushions. The interior fabric was almost completely disintegrated. So I need to remove the feathers and reconstruct the interior cushions. I suppose if the exterior fabric did not have piping or a zipper you could just leave the exterior fabric on and make a new cover for it. But my cushions had both. In my experience, every single vintage furniture piece has a surprise or two that you find once you get to work changing things up. There really is no way that the Antique shop I purchased them from would have known that if I wanted to redo them, I would have to reconstruct the cushions. They were in perfect working order if I kept the fabric that they had on them on them. That is all you can expect when buying a piece of vintage furniture.
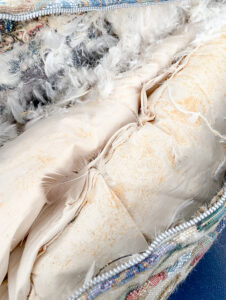
see the feathers are about to take flight
For the purpose of this being a tutorial, for this section I am going to go through the process that I used on the second settee to reconstruct the seat cushion. Because I did in fact learn more the second time around. Although I am pleased with the results of the first settee, the second is better.
Step 1:
I made a pattern of the seat with some paper. I did this by placing a large piece of paper. You can do this with wrapping paper. Then I carefully traced around the seat and cut it out. I double checked my work by replacing the paper on the seat and saw that there were some spots that I cut too short. I taped more paper on those edges and cut true to size.
Step 2:
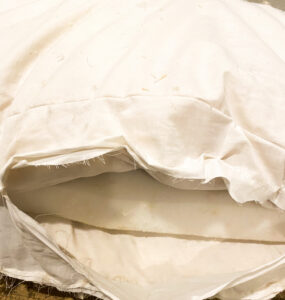
Into the down feathers I went. I did my best to carefully remove the previous cushion. I tried to work on this in a clean, contained space because feathers will get everywhere and I wanted to chase down as many as could. I found the second settee’s cushion to be in slightly more intact condition, not working condition, but it at least provided more clues as how to reconstruct. The cushion was a down envelope around a piece of two inch high foam.
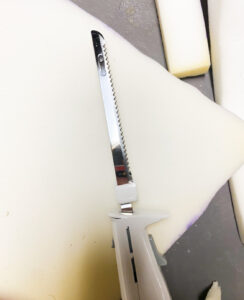
The cushion was a down envelope around a piece of two inch high foam. I carefully removed the foam and tried to keep the feathers contained in the original cushion cover. The foam was not in great condition, but I was able to use it as a pattern for new piece of foam. I traced the old foam piece onto a new foam piece and used an electric carving knife to cut it out.
Step 3:
I set the foam piece to the side, while I worked on redoing the envelope part for the cushion. I found that the original cushion had two thin, top and bottom feather cushions that were held together by strip of 4 inch fabric edges. The back of the cushion allowed space for foam to slide in in-between the two feather cushions. So in order to recreate this I needed 4 pieces of liner fabric (I actually just used an old clean sheet) cut to size, I cut the fabric one each 2 inches larger around the entire pattern. If I were sewing a cushion cover I would cut the pieces 1/2 inch greater than the pattern to allow for 1/2 seam allowance, and then I end up with a snug fit. But since this would be used for stuffing a plump cushion I wanted to add bit more fabric make it easier to stuff and allow room for the feathers. I also cut a strip of 4 inch fabric to go around the edges of the cushion. My cushion was 3 inches high, so 4 inches was right with a 1/2 inch seam allowance. I did not worry about adding extra fabric to this strip like I did for the top and bottom pieces.
Step 4:
These steps are a bit tricky for me to explain, and I am visual so I attempted a diagram. Hopefully it helps, not confuses you more:
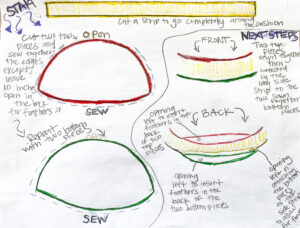
With a 1/2 inch seam allowance, I sewed two of the four of the large pieces together leaving approximately a 10 inch opening in the back to allow for stuffing feathers. Then I repeated this with two the last two pieces. I turned these right side out, which I don’t really think is entirely necessry. This will be completely covered and if you left it wrong side out it would be fine. Then I took the strip of 4 inch fabric and sewed it all the way around the edges of one of the finished larger pieces with a 1/2 seam allowance, careful not to sew the opening for feathers closed. Then I did the same for the second pieces, sewing it onto the other side of the strip. But this time I did not sew it completely around, I left approximately 24 inches open in the back in addition to the opening for the feathers. This allows an opening for the foam. In doing this it left unfinished edges on the 4 inch strip.
Step 5:
I did my best to stuff the down feathers evenly between the top and bottom cushions. I stitched up the openings for the feathers to keep them contained, careful to still allow for the opening of the foam.
Step 6:
I stuffed the foam in place in the envelope of feathers. I actually found that my foam felt a little too substantial for the cushion, if made more of a flat look versus a pillow like cushion. I believe this is because the foam was just in so much better condition and possible quality versus the old one. So I played with the size by trimming the sides to get it the right feel.
Step 7:
I am going to let you decide if this was necessary. Originally I thought that the cushion could just be stuffed into another liner and be good to go, not a complete reconstruction. Since I had it on hand, I thought I would use it. I had already cut fabric to create this:
– I did this using duck canvas, leaving an extra 2 inches on all sides of the pattern and cutting a 4 inch strip for the sides.
-I sewed the 4 inch strip completely around the top.
– I connected the ends of the 4 inch fabric and sewed those together.
-Next is sewing the bottom part to the other side of the 4 inch strip. leaving about 20 inches open to allow for stuffing the cushion in.
-Turn the piece right side out. And stuff the cushion in place. Finally stitch up the back opening.
Step 8:
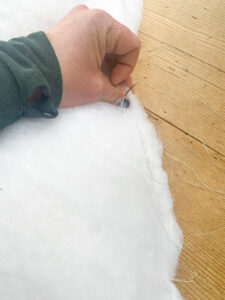
To add a little extra padding and making the cushion have a full look, I added a layer of Dacron. I wrapped the cushion carefully in Dacron as not to change the shape of the cushion. If you prefer more precision you could use the pattern of the seat and cut two pieces allowing an extra 1/2-1 inches on each side for stitching and 4 inch strip for the sides. When the Dacron is in place, I secured it with a loose hand whip stitch. This completed the reconstruction of the cushion, and in the end I had a very high quality cushion that used all the precious down that was still in excellent working condition after decades of use.

Nice and comfy, this one was probably the cushion for my settee, I do my best to keep my dogs away from items I try to sell. But sometimes they do sneak in there.
Next up is making the cushion cover…