Vintage Sofa Redo

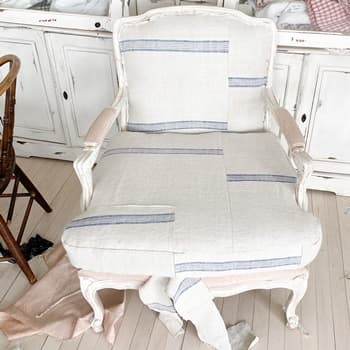
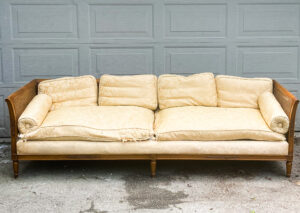
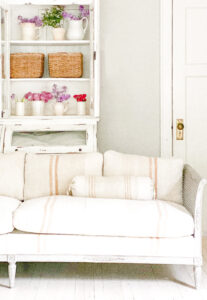
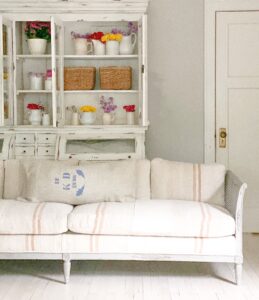
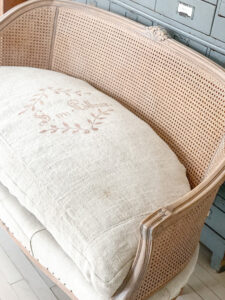
My most recent and one of my favorite makeovers (I should look back, do I say this about every project? But every project does have a bit of my heart, but I really, really love this one), was of this vintage sofa.  I spotted this sofa at an estate sale in my neighborhood.  I wouldn’t say that it was love at first sight, but I saw its potential, and thought it would be a reasonably strait forward makeover.  I liked the idea that there wasn’t a lot of reupholstering that needed to be done to the structure other than the base, although there would be a lot of sewing to replace the fabric on the cushions.  Anyway, it was good option, I just thought I would let fate decide.  This estate sale allowed for bids to be placed, so  I placed an offer for a 50% price if it didn’t sell by the end of the first day of the sale. I got it, obviously  :).

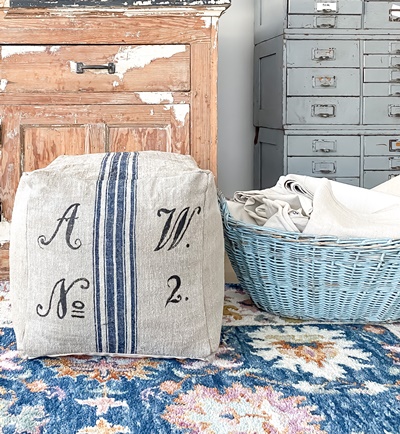
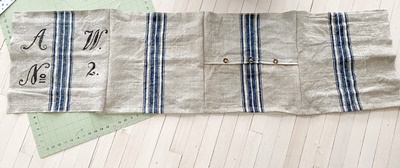
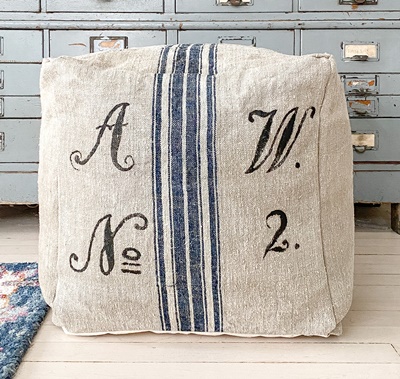
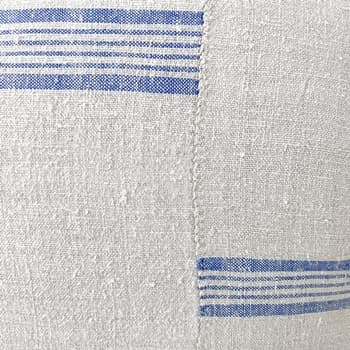
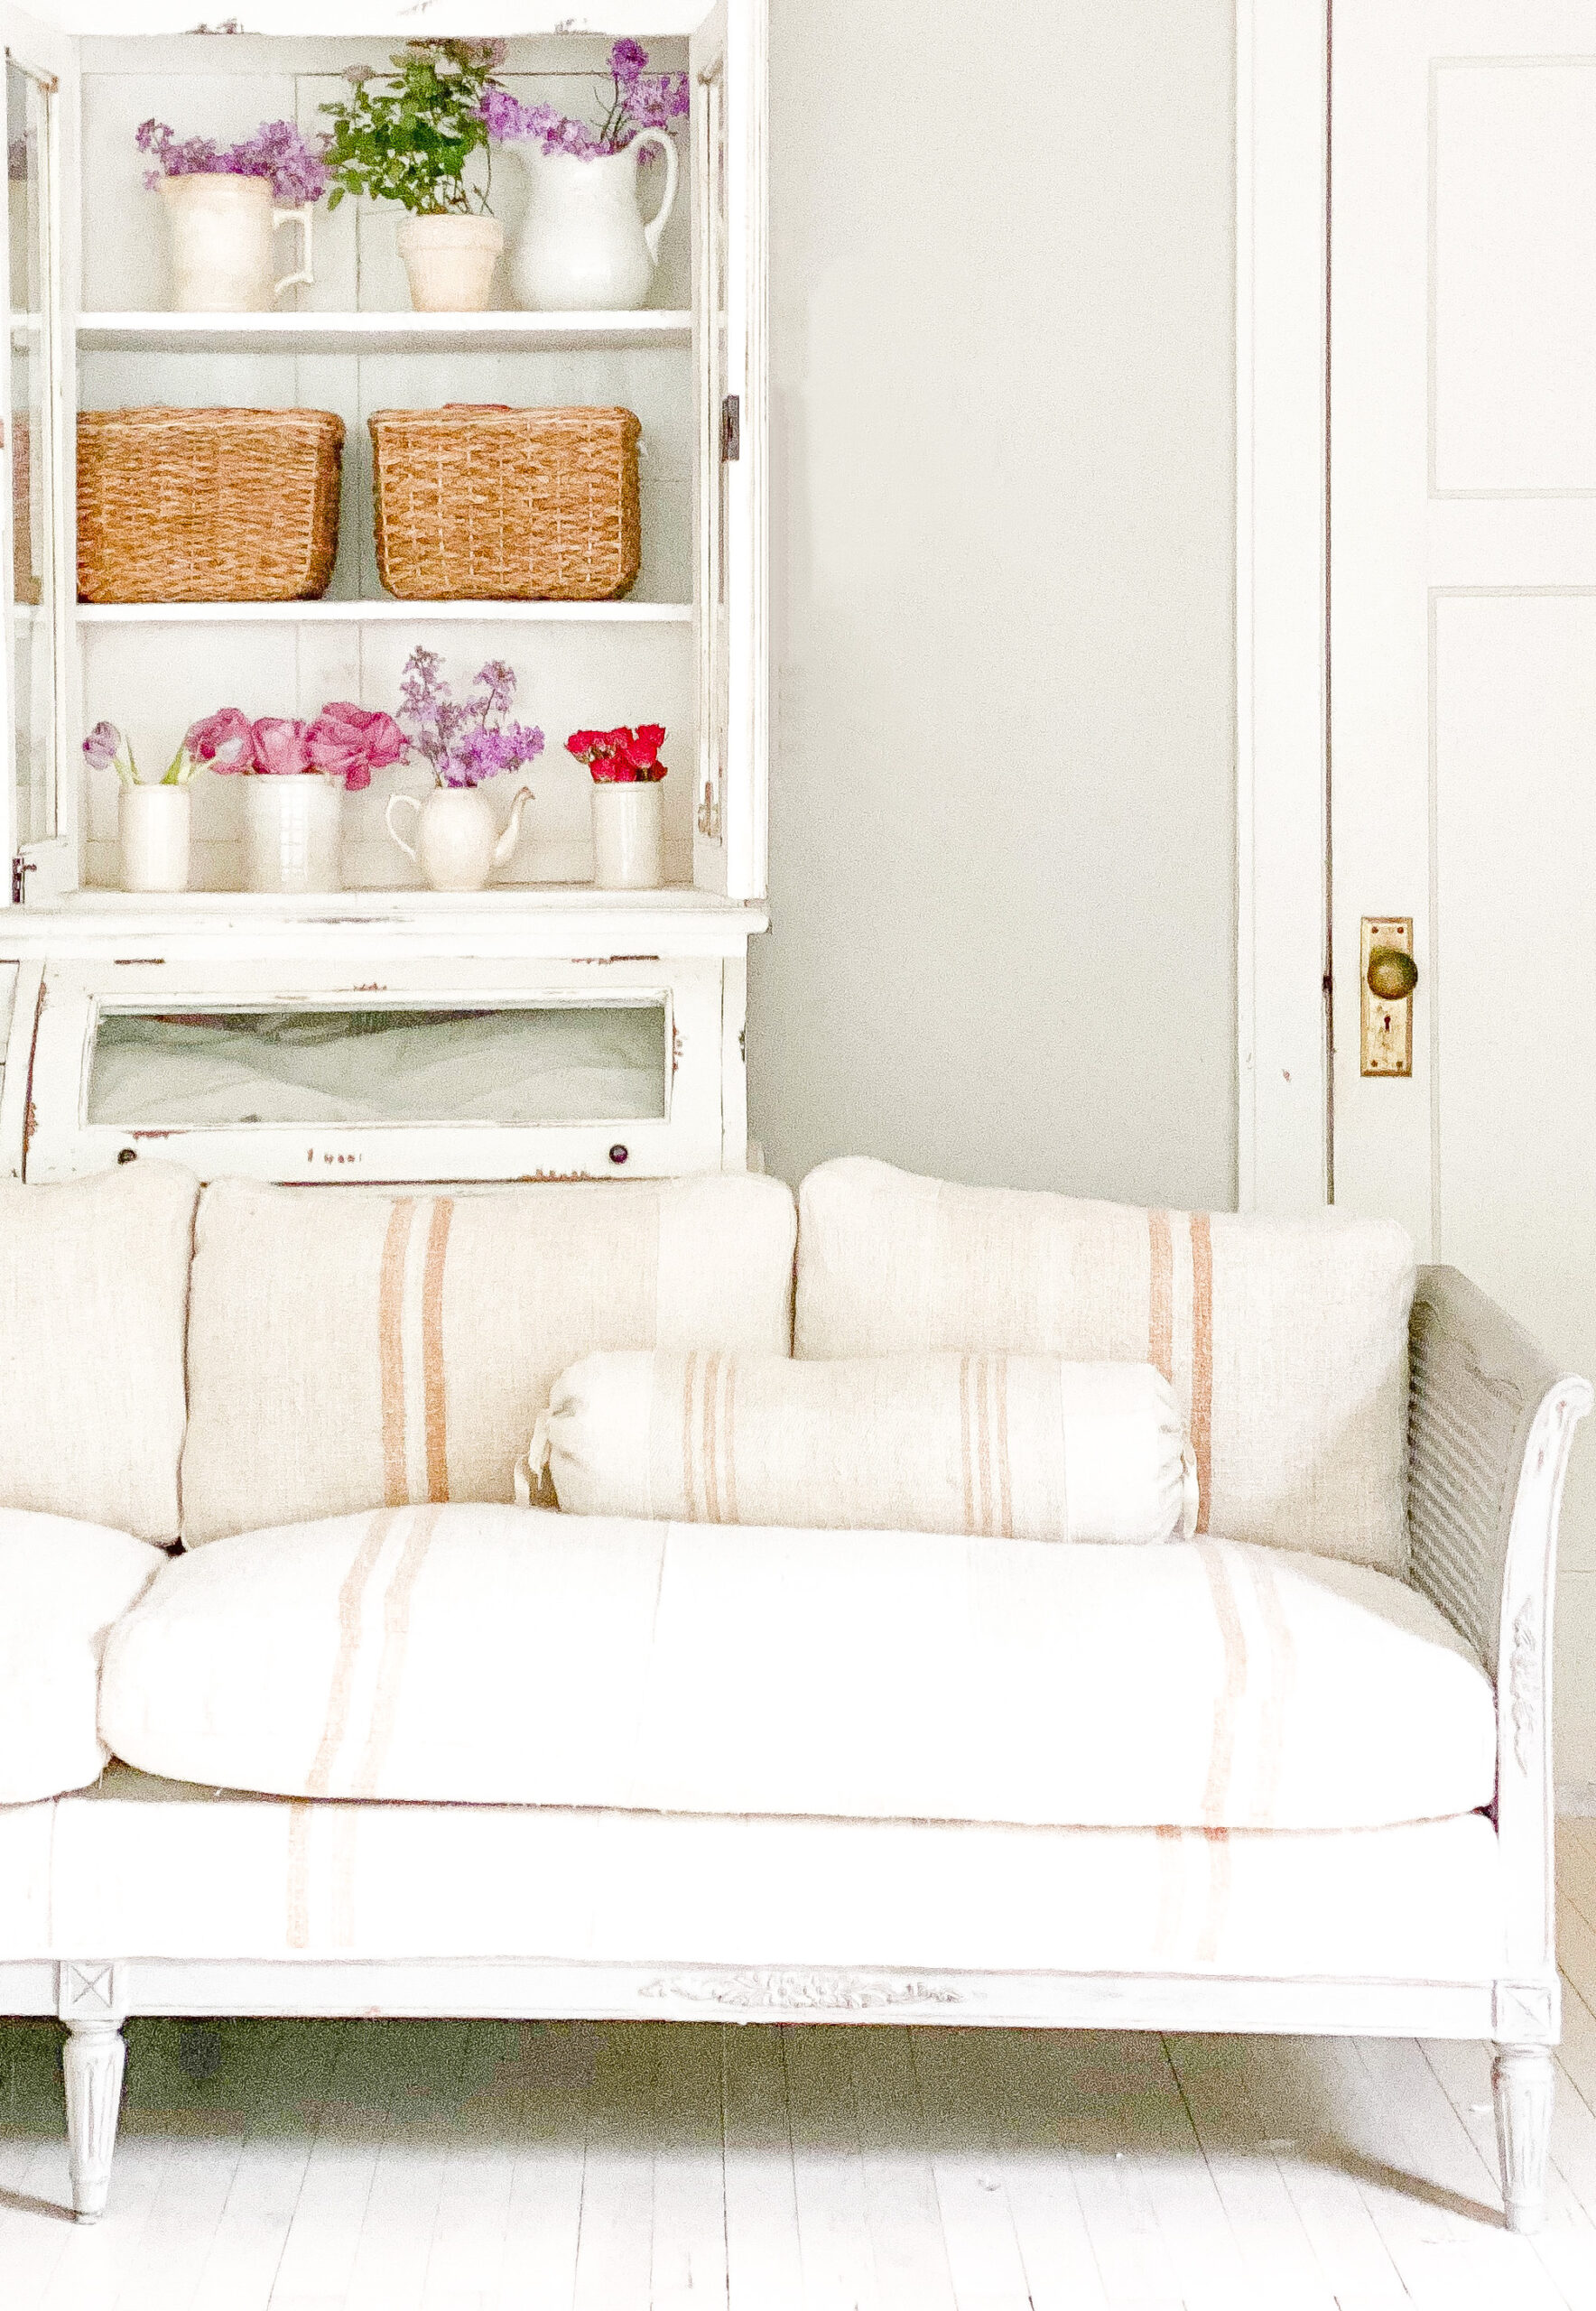
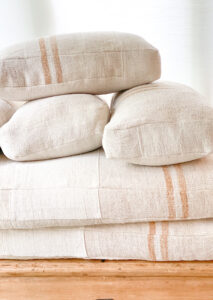
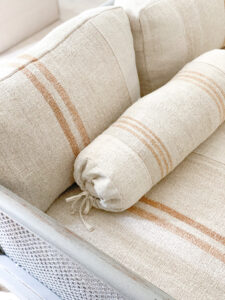
At first I thought I would redo the sofa with German grain sacks with writing, but somewhere along the way, I fell in love with the idea of using grain sack fabric with caramel colored stripes.  This is not a color that I have worked with often or at all except for making a couple pillows for a client.  And now I am hooked. I bought two 4 1/2 yard rolls of this grain sack fabric for one of my go to shops, Grain Sack.   This lovely shop gave me a coupon code for 10 percent off for my readers, it is good through 7/1/2022. The code is: PENNYANDIVY10. I have bought from this shop since 2016, they have hundreds of high quality options of vintage handwoven hemp linen fabrics.  I have loved every order and they always arrive clean and nicely packaged.

carmel colored grain sack

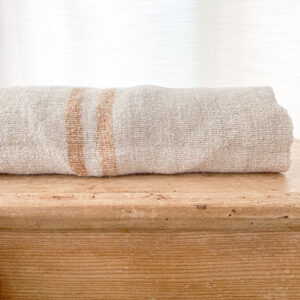
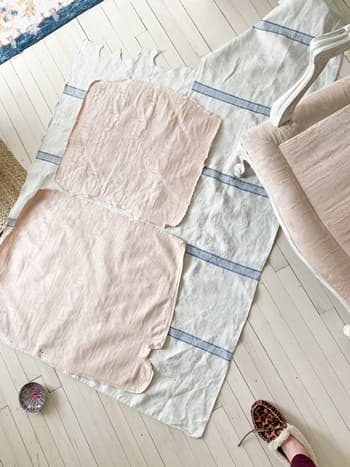
This fabric made me so excited about the project.  I loved the tone of the caramel color, and the nubby weave of the fabric.  Even with the 9 yards of it, there was not enough for the sofa, so I had to find enough of similar toned hemp linen to piece together to get this project started. Piecing together fabric is usually the only option when using vintage fabrics due to the finite supply.  Fortunately I love the look, it feels cozy and homey to me.

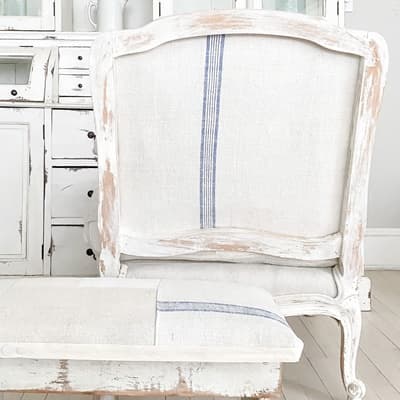
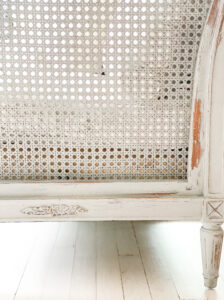
Before I got into the sewing part, I knew I wanted to redo the dated look of the wood.  It did cross my mind that maybe I could strip the wood, there are lots of beautiful projects lately of stripped wood circulating around the internet.  But I recently tried stripping the finish off a pair of dressers and let me tell you it is not for the faint of heart, it is really messy and takes A LOT of time.  I did develop a system and am not totally scared off of trying to strip furniture again, however I wanted a break.  I was also worried about damaging the caning on the sofa during the stripping process, so painting it was THE decision.

I chose one of my favorite paints, Miss Mustard Seed Milk Paint, Schloss.  It is the perfect warm griege that compliments the oatmeal color of the linen. Before painting I cleaned the wood, and lightly sanded it.  The finish on the sofa was very shiny, milk paint has trouble adhering to a nonporous surface, so I added its milk grip bonding agent.  It worked like a charm, there was still some chipping, but just the right amount.  If you want a lot of chipping, you can apply the milk paint without the bonding agent to a nonporous finish, and that is likely what you will get, although there are no promises.  This paint has a bit of  a mind of its own, but I am almost always happy with the end product and love what it does.  I did two coats of milk paint and lightly sanded it.  To seal the paint I used the General Finishes Flat Out Topcoat.  This is an easy to use water based top coat that doesn’t add any sheen. I did 3 coats of the this just make sure the durability was strong and present, and that is what the instructions on the can advised :).

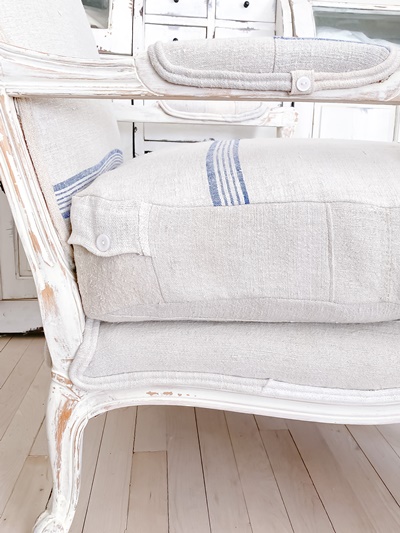
My next part to attack was getting the cushions in working order.  These were something.  This sofa was incredibly sturdy and made with super high quality everything, except the seat cushions.  The seat cushions were a thin down envelope with springs in them.  It was a terrible choice of ingredients to make a cushion in my opinion.  There was a thin foam layer  that was used to either hold the springs in place or add cushion.  Either way, the foam was disintegrating and the springs were a mess.  And there was burlap mixed in too.


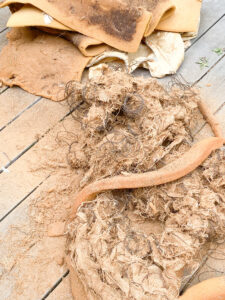
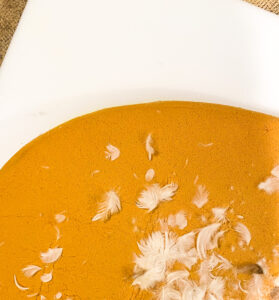
I removed that train wreck and was left with a thin envelope of down.  This was in great condition, and all the feathers were IN the fabric, which is huge.  Chasing feathers is not my favorite.

I used this technique that I described in this post to replace the springs with 3 inch foam and still using the down envelope.  I finished up by wrapping the cushion in  two-three layers of dacron to make a full cushion.  I was very pleased with these cushions and the quality of the felt very comfortable.  Thankfully the back smaller cushions for the back were in great condition and were all down filled.  No springs.  I did wrap these with dacron to make them full also.

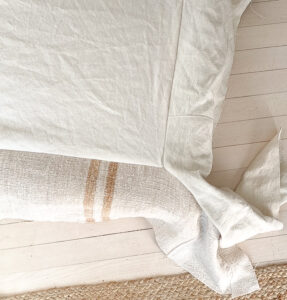
Now the cushions needed new covers.  I made them using this technique in this post.  Although I did not need to make a pattern for the cushions, I just measure the fabric from the original cushion and since they were rectangles I followed those measurements.  I did not measure the original cushions because they were not full and not in good condition.  But the fabric was and gave me accurate measurements.   I made six cushion covers.  It took awhile.  But it was worth it.

All that was left was reupholstering the seat base.  At this point I realized I unscrew the base and remove it to reupholster it.  I wished I had realized this when I had painted it.  I need to do a little painting to cover the missed spots.

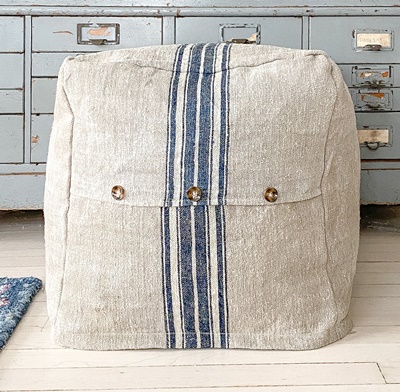
Anyway, having it removed I was able to wrap the base almost like a present.  But first in ordered to get a piece of fabric that size, I used some natural duck canvas pieced together with the hemp linen.  The canvas is not seen because the cushions will cover it, and if someone does get a peek of it then its somewhat similar color to the hemp linen, and it is durable fabric.  I whipped stitched the under side of the seams of the new fabric to the old fabric (the old fabric was in good condition, so no need to remove since I would be covering it entirely). You can see how I did this during this makeover post.  Then I wrapped the fabric around the corners like you would wrap a present and stapled the fabric in place in the underside.

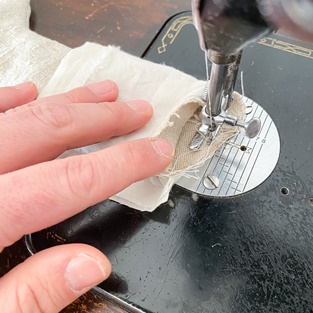
I replaced this bottom and screwed it into place.  I did notice about an 1/8 inch gap under this bottom and the wood.  I corrected it by adding  a 1/4 inch piece of cording wrapped in hemp linen and sewn in place using a zipper foot.  Taking this cording I glued in place with a hot glue gun with the seam in the back.

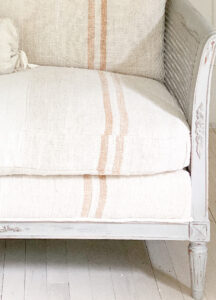
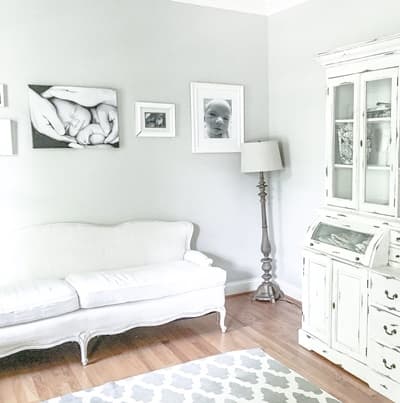
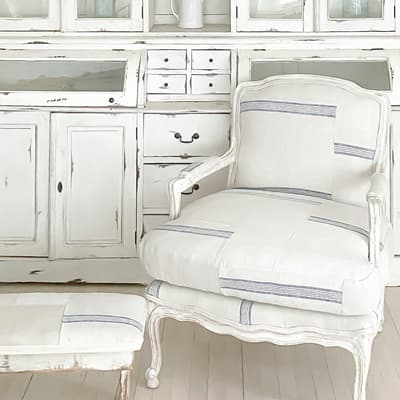
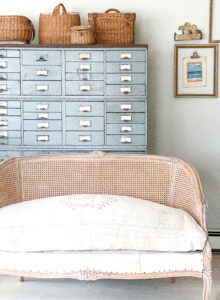
I love how this sofa turned out. I love how comfortable and sturdy it is.

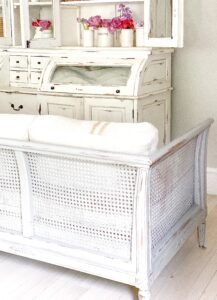
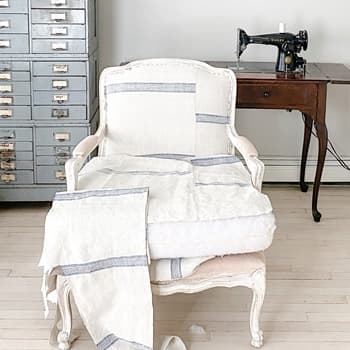
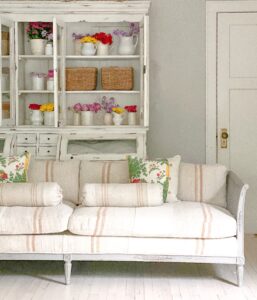
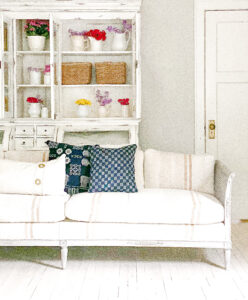
I love that it is 94 inches looong. I love that it is unique but somewhat versatile in its style.  I went through my stash of fabrics and tried out a variety of different styles of pillows and I think that they all work.


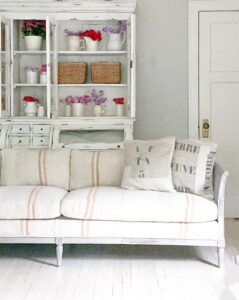
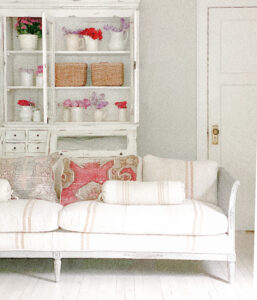
This sofa is currently for sale the charming shop, Anthology Home, in Waukesha. It is such a sweet reward to see the end result in this beautiful space after a couple of weeks of working on it.


The Makeover of Two Settees Part Four: The Decking

We have arrived at the final part of this series of DIY reupholstering these two settees, which is replacing the decking or the bottom part of the settee fabric.  I recommend reading all the directions before beginning.

REPLACING DECKING/BOTTOM FABRIC

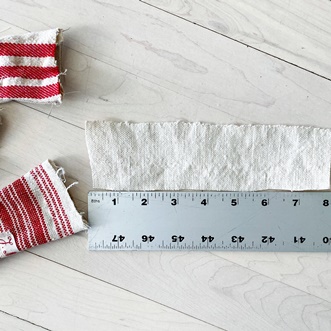
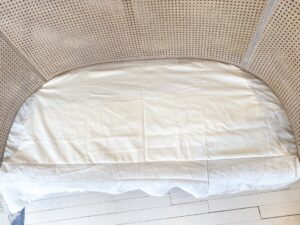
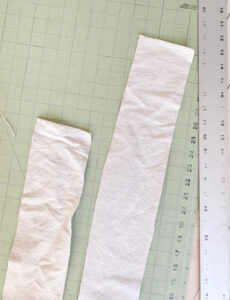
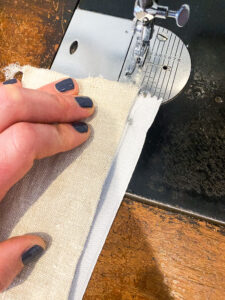
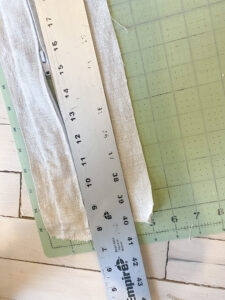
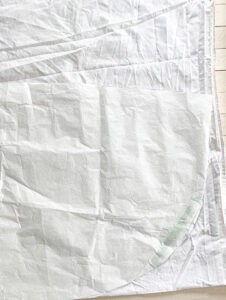
1.I began this project by cutting out a piece of natural colored duck canvas that covered all but approximately 3 inches on the outside of the seat, as pictured:

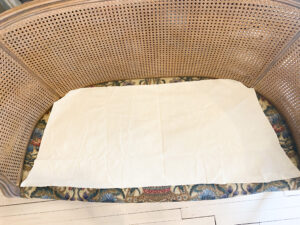
I found no need to remove the previous fabric on the bottom because it was in good condition and I could cover it up.

By using the duck canvas, I was able to use less of the vintage hemp linen.  If you notice most upholstered pieced with removable cushions have plain fabric on the bottom pieced together with the fabric that is showing on the outside (and likely the more costly fabric).

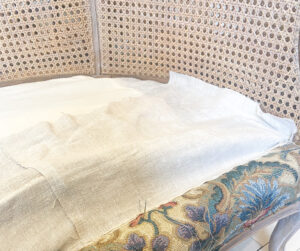
2. I then added at least 8 inches of the hemp linen fabric to all the sides, it needed to be enough fabric to cover a couple inches on the seat and to pull through onto to the sides and nail in place with a fold.

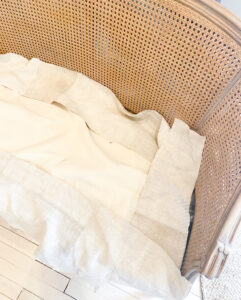
I did a lot of estimating and piecing fabric together for this process.  Because of the look I was going for, I was able to piece fabrics together, which made the process much less exact.

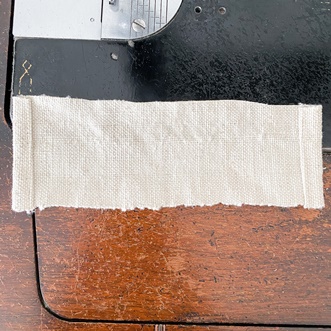
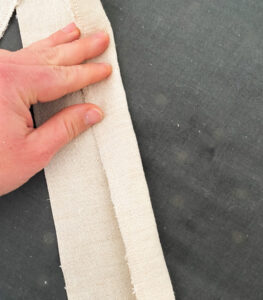
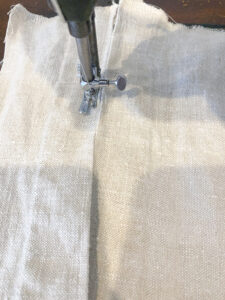
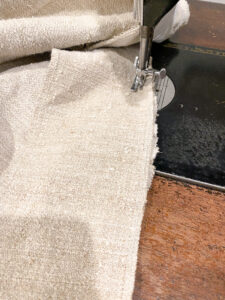
3. I sewed the strips of hemp to the canvas with a double seam and created this fabric piece to cover the entire bottom of the seat:

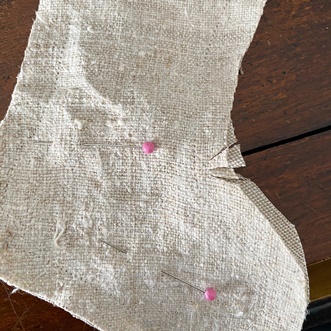
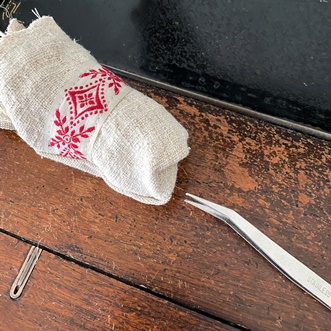
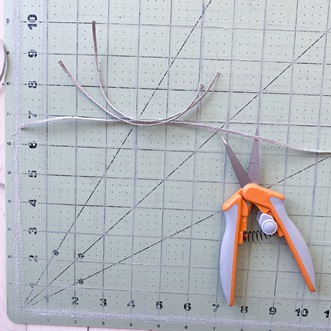
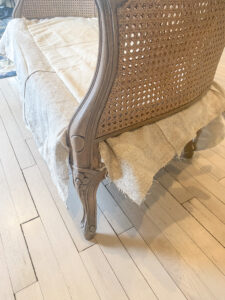
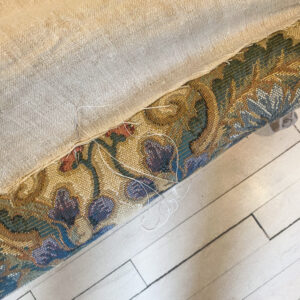
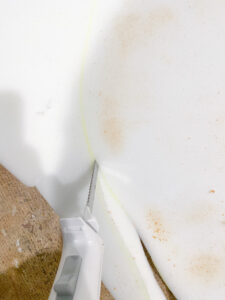
4. Next up is tucking the fabric around the legs and arms of the settee.  This is the trickiest part in my opinion.  Proceed carefully.  I love using these scissors for the process of slowly cutting into the fabric so that the fabric lies flat, but not too much that any cuts in the fabric are visible.  I always try to over estimate on the fabric needed and then make more cuts where in order to get the placement right.

5. Once I am pleased with the way the fabric is placed and tucked under, I flip up the front strip, and do a quick whip stitch at the seam on the bottom to the fabric on the seat.  I use a curved needle and upholstery thread to do this.

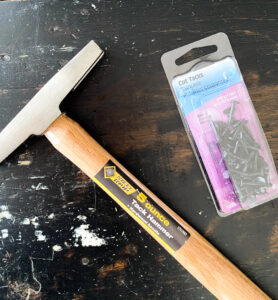
6. Now that is secure, it is time to tack the outside bottom to the frame.  I like using carpet tacks for this and I also like my lightweight upholstery hammer to minimize damage to the wood frame.  I fold the fabric under so no raw edges are exposed and hammer into place.

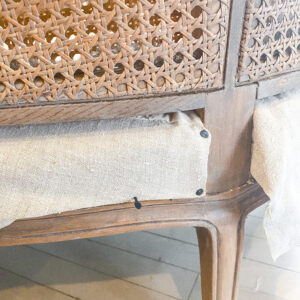
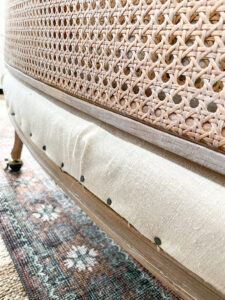
This is another case where I did not mind everything not being quite exact due to the slightly rustic look I was going for.  There were times I need to add a fold to the fabric to get it to lie flat and I was just fine with that.

AND WE ARE DONE

Remember where we started from?

Thank you for checking out this post.  Feel free to contact me with any questions at pennyandivydecor@gmail.com.


Makeover of Two Settees Part Three: Cushion Cover

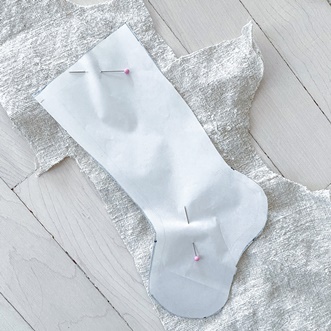
To make a cushion cover(s), I started with my pattern that I created for the seat of the settee.  I mentioned this process in the last post, but it would be helpful to have it here too:

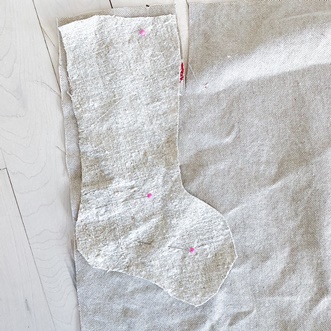
CREATING A PATTERN FOR A CUSHION

  1. I took a large piece of paper similar to wrapping paper and placed it on the seat of the settee:

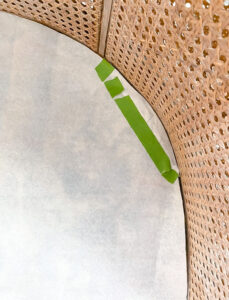
2. I traced around the seat to and cut out the paper:

I cut the paper a bit too short in the corner here so, I corrected with with a bit more paper and tape.

CUTTING OUT FABRIC PIECES FOR THE CUSHION

  1. I first cut out a top and bottom of cushion using a the pattern I created and ADDING 1/2 INCH around the pattern for seam allowance.
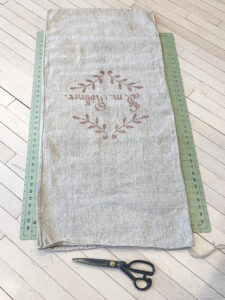
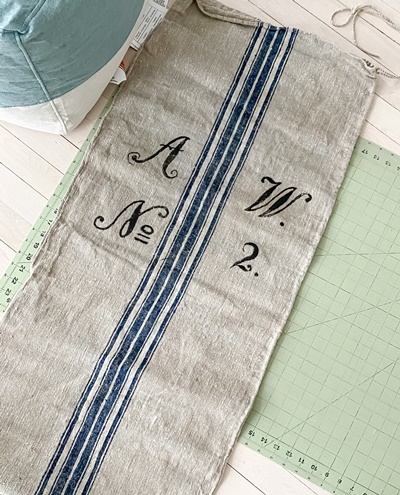
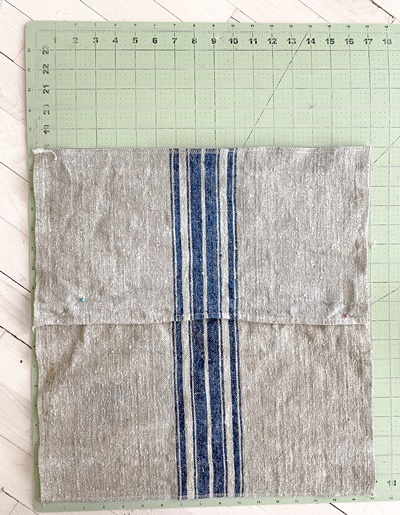
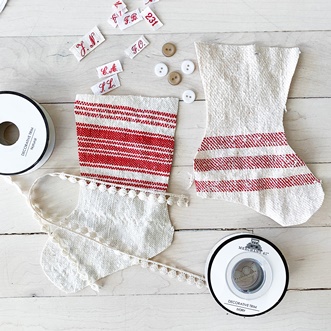
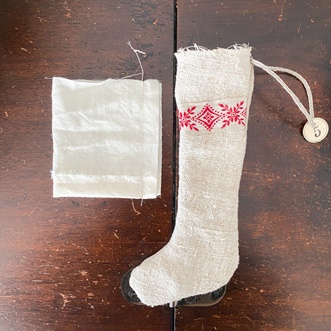
    Since I was using a grain sack in which one side was not wide enough to cover the top, I made cuts on the bottom side, so I could create a piece large enough for the top of the cushion.  If you are here, you are likely to know that vintage hemp linen is my thing.  The quality and history of the fabric is very special to work with.  Here is a list of some of my favorite shops to buy this kind of fabric: Brocante und AntikesObjekts1Grain SackLinens by Sabine, Antique MonkeysThe Textile Trunk

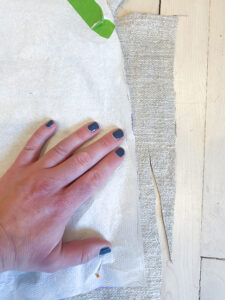
DO NOT FORGET TO ADD 1/2 INCH ON ALL SIDES FOR SEAM ALLOWANCE

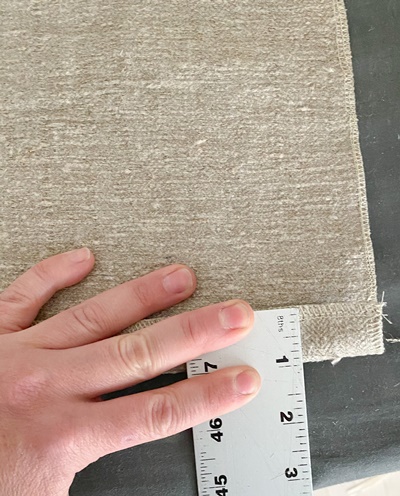
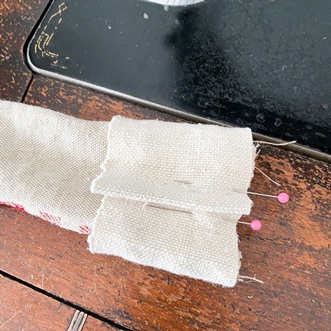
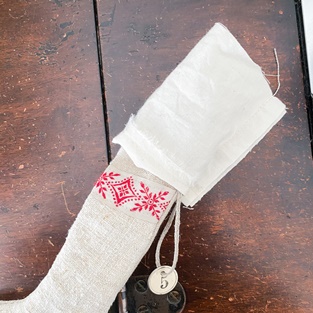
     2. Next up is cutting out the sides of the cushion.  My cushion was 3 inches tall so I cut one strip that was 4 inches that was long enough to wrap around both sides and front.

3. Then I cut two 4 inch wide strips long enough to cover the back.  These are used for the zipper that will go in the back of the cushion.

FINISHING EDGES OF FABRIC

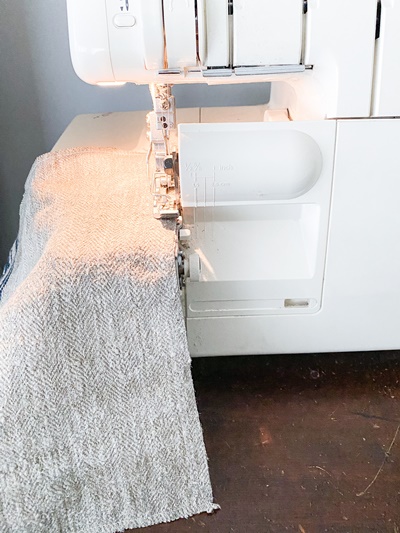
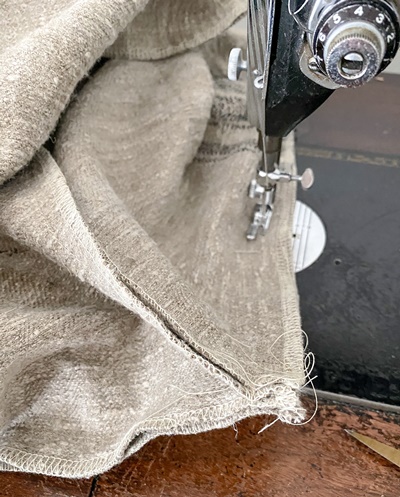
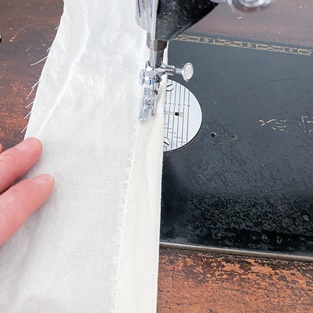
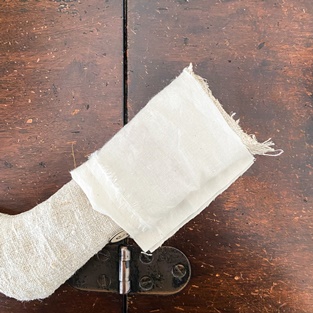
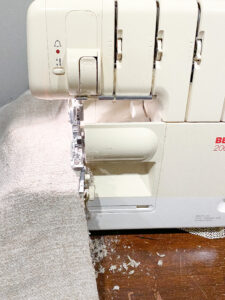
With all the pieces I used my serger to finish off all the edges.  If you don’t have a serger you can do a zigzag stitch around all the sides with a sewing machine.  This is important if this is a cushion that will be washed in the future.  If the edges are not finished there will be a lot of fraying.  I did wait to serge one long edge of the strips of fabric used for the zipper because I will likely need to cut it down after the zipper is sewn in.


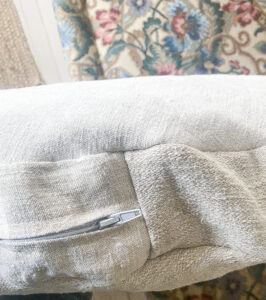
SEWING IN THE ZIPPER


  1. Using the two strips of fabric I cut for the back zipper,  I begin by making an inch fold across the long side of the strips and ironing it into place.

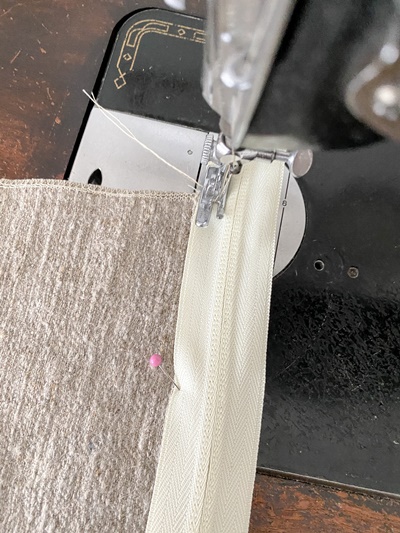
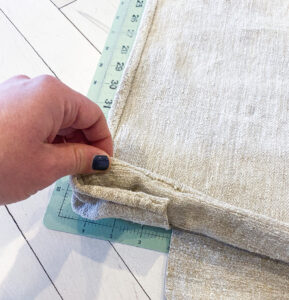
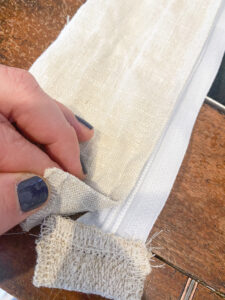
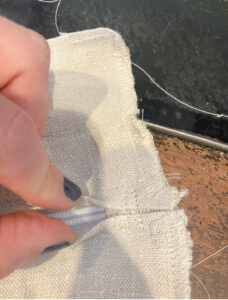
You can see on one side of the piece of the fabric the serged edge.

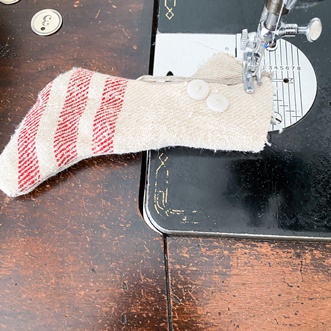
      2. Then I sew a small piece of fabric in place on both ends of the zipper to stop the pull from sliding off, unless there is a metal stopper on the zipper already.

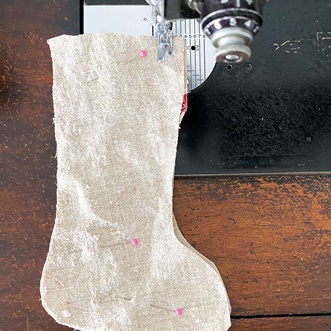
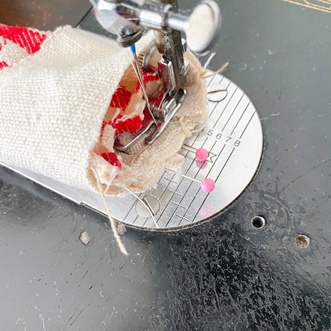
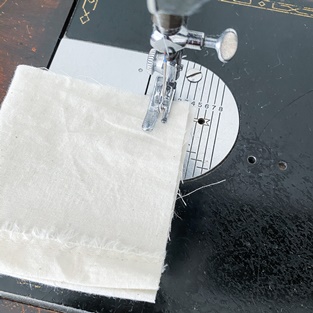
3. Then I pinned the zipper in place on one strip of fabric, allowing at least an inch of overlap before and after zipper handle lengthwise and enough fabric to cover one half of the zipper keeping it hidden. Using a zipper foot on my sewing machine I sew it in place.


4. Repeat with the second strip of fabric.

6. Before and after the zipper I place a couple stitches to sew the fabric together:

7. I cut my strips too wide on purpose, just to leave room for error.  So now with the zipper in place I cut this finished product down to 4 inches so it is the same size as the front strip.

8. After trimming to the correct size, I serged the raw edges.


SEWING CUSHION PIECES TOGETHER

  1. I begin by sewing one end of the zipper piece with one end of the plain strip for the front and sides. With right sides of the fabric together.  I use a 1/2 seam allowance.
  2. Then using this strip that has one open end, I pin the zipper in place to the top of the cushion piece exactly where I want it.  Again with the right sides of the fabric together.  Then I continue to pin the plain side piece until it meets the other end of the zipper.  Next I connect the other ends of the zipper and plain strip and sew them together.  I like to do this at this time because I always seem to get measurements wrong.
  3. With one side of the zipper/side piece pinned in place with the top of the cushion I sew them together with a 1/2 inch seam allowance.
  4. Then I pin the bottom of the cushion to the opposite side of the side/zipper piece. With right sides of the fabric facing each other.  You must be very careful to line up the corners of the top and bottom at this time.  I also make sure a couple inches the zipper is open so that after sewing I can completely unzip it to turn it right side out.
  5. Sew the bottom in place with 1/2 seam allowance. And turn the cushion right side out.
  6. Then  you should have a finished cushion cover.  Try it on.  Sometimes I find corners can be tricky so I add a bit of batting in them to add a some fluff. I also will cut a couple small slits in the corner pieces of the fabric just short of the seam to avoid some pulling at the corners.
  7. If the cushion fits then I take the time to add another stitch all around the sides.  For upholstery pieces I like to have double seams.  If it doesn’t look quite right, that is what a seam ripper is for, I often have to correct sections of my cushion.  I typically don’t completely start from the beginning, but I with remove a section of stitching that I am not pleased with and try again with that part. Be patient with the process, these are tricky and take some time, but its definitely worth it in my opinion.

GOOD LUCK!!!

Please email me with any questions, pennyandivydecor@gmail.com


The Makeover of Two Settees Part Two: Reconstructing the Down Seat Cushion

So as luck would have it, a couple months after I purchased the first settee for our home I was checking IG and I saw a picture of my settee for sale at Goodland Antiques.  What? TWO of them exist??? I knew I wanted the second to reupholster for resale.  I sent a note to Ann, the shop owner and placed my claim on it.

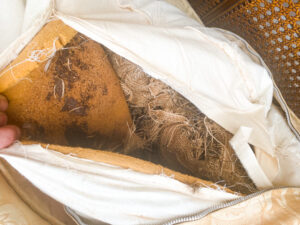
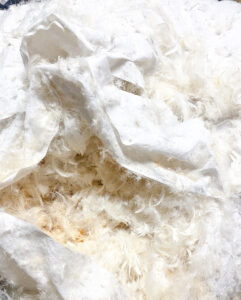
The biggest surprise with these pieces was the state of the cushions.  The interior fabric was almost completely disintegrated.  So I need to remove the feathers and reconstruct the interior cushions.  I suppose if the exterior fabric did not have piping or a zipper you could just leave the exterior fabric on and make a new cover for it.  But my cushions had both.   In my experience, every single vintage furniture piece has a surprise or two that you find once you get to work changing things up.  There really is no way that the Antique shop I purchased them from would have known that if I wanted to redo them, I would have to reconstruct the cushions.  They were in perfect working order if I kept the fabric that they had on them on them.  That is all you can expect when buying a piece of vintage furniture.

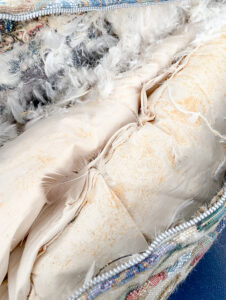
see the feathers are about to take flight

For the purpose of this being a tutorial, for this section I am going to go through the process that I used on the second settee to reconstruct the seat cushion.  Because I did in fact learn more the second time around.  Although I am pleased with the results of the first settee, the second is better.
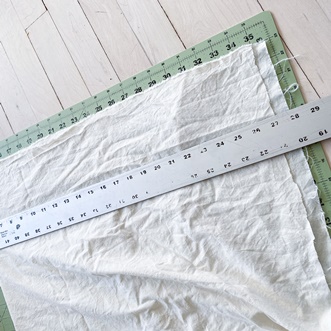
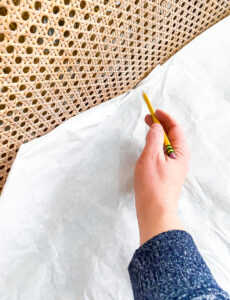
Step 1:

I made a pattern of the seat with some paper.  I did this by placing a large piece of paper. You can do this with wrapping paper.  Then I carefully traced around the seat and cut it out.  I double checked my work by replacing the paper on the seat and saw that there were some spots that I cut too short.  I taped more paper on those edges and cut true to size.


Step 2:

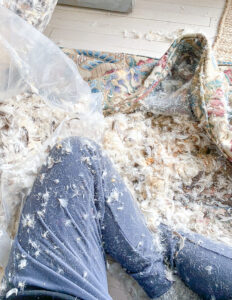
Into the down feathers I went.  I did my best to carefully remove the previous cushion.  I tried to work on this in a clean, contained space because feathers will get everywhere and I wanted to chase down as many as could.  I found the second settee’s cushion to be in slightly more intact condition, not working condition, but it at least provided more clues as how to reconstruct.  The cushion was a down envelope around a piece of two inch high foam.

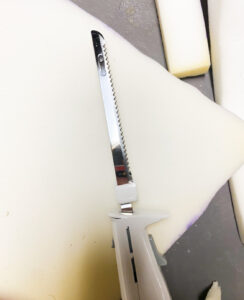
The cushion was a down envelope around a piece of two inch high foam.  I carefully removed the foam and tried to keep the feathers contained in the original cushion cover.  The foam was not in great condition, but I was able to use it as a pattern for new piece of foam.  I traced the old foam piece onto a new foam piece and used an electric carving knife to cut it out.

Step 3:

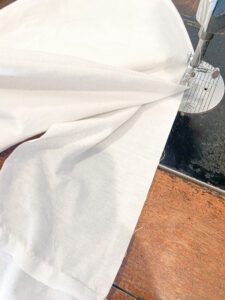
I set the foam piece to the side, while I worked on redoing the envelope part for the cushion.  I found that the original cushion had two thin, top and bottom feather cushions that were held together by strip of 4 inch fabric edges.  The back of the cushion allowed space for foam to slide in in-between the two feather cushions.  So in order to recreate this I needed 4 pieces of liner fabric (I actually just used an old clean sheet) cut to size, I cut the fabric one each 2 inches larger around the entire pattern.  If I were sewing a cushion cover I would cut the pieces 1/2 inch greater than the pattern to allow for 1/2 seam allowance, and then I end up with a snug fit.  But since this would be used for stuffing a plump cushion I wanted to add bit more fabric make it easier to stuff and allow room for the feathers.  I also cut a strip of 4 inch fabric to go around the edges of the cushion.  My cushion was 3 inches high, so 4 inches was right with a 1/2 inch seam allowance.  I did not worry about adding extra fabric to this strip like I did for the top and bottom pieces.


Step 4:

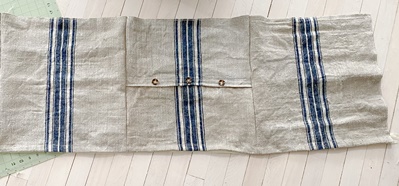
These steps are a bit tricky for me to explain, and I am visual so I attempted a diagram.  Hopefully it helps, not confuses you more:

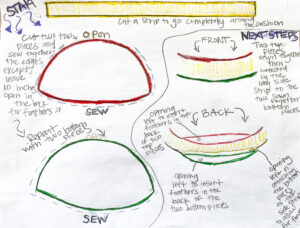
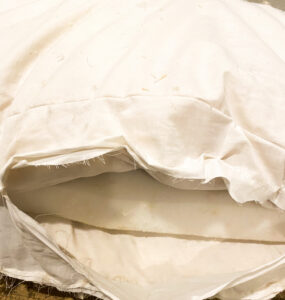
With a 1/2 inch seam allowance, I sewed two of the four of the large pieces together leaving approximately a 10 inch opening in the back to allow for stuffing feathers.  Then I repeated this with two the last two pieces.  I turned these right side out, which I don’t really think is entirely necessry. This will be completely covered and if you left it wrong side out it would be fine.  Then I took the strip of 4 inch fabric and sewed it all the way around the edges of one of the finished larger pieces with a 1/2 seam allowance, careful  not to sew the opening for feathers closed.  Then I did the same for the second pieces, sewing it onto the other side of the strip.  But this time I did not sew it completely around, I left approximately 24 inches open in the back in addition to the opening for the feathers.  This allows an opening for the foam.  In doing this it left unfinished edges on the 4 inch strip.


Step 5:

I did my best to stuff the down feathers evenly between the top and bottom cushions.  I stitched up the openings for the feathers to keep them contained, careful to still allow for the opening of the foam.


Step 6:

I stuffed the foam in place in the envelope of feathers.  I actually found that my foam felt a little too substantial for the cushion, if made more of a flat look versus a pillow like cushion.  I believe this is because the foam was just in so much better condition and possible quality versus the old one.  So I  played with the size by trimming the sides to get it the right feel.


Step 7:

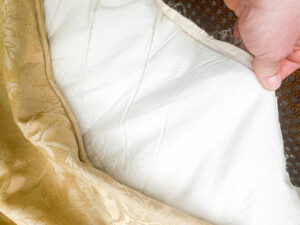
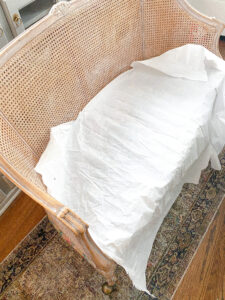
I am going to let you decide if this was necessary.  Originally I thought that the cushion could just be stuffed into another liner and be good to go, not a complete reconstruction.  Since I had it on hand, I thought I would use it.  I had already cut fabric to create this:

– I did this using duck canvas, leaving an extra 2 inches on all sides of the pattern and cutting a 4 inch strip for the sides.

-I sewed the 4 inch strip completely around the top.

– I connected the ends of the 4 inch fabric and sewed those together.

-Next is sewing the bottom part to the other side of the 4 inch strip.  leaving about 20 inches open to allow for stuffing the cushion in.

-Turn the piece right side out.  And stuff the cushion in place.  Finally stitch up the back opening.
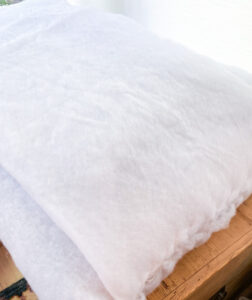
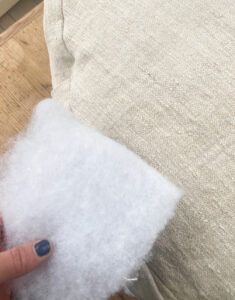
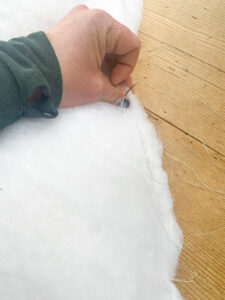
 

Step 8:

To add a little extra padding and making the cushion have a full look, I added a layer of Dacron.  I wrapped the cushion carefully in Dacron as not to change the shape of the cushion.  If you prefer more precision you could use the pattern of the seat and cut two pieces allowing an extra 1/2-1 inches on each side for stitching and 4 inch strip for the sides.  When the Dacron is in place, I secured it with a loose hand whip stitch.  This completed the reconstruction of the cushion, and in the end I had a very high quality cushion that used all the precious down that was still in excellent working condition after decades of use.

Nice and comfy, this one was probably the cushion for my settee, I do my best to keep my dogs away from items I try to sell.  But sometimes they do sneak in there.


Next up is making the cushion cover…


The Makeover of Two Settees Part One: Removing Upholstery Tacks and Adding White Wax to the Wood

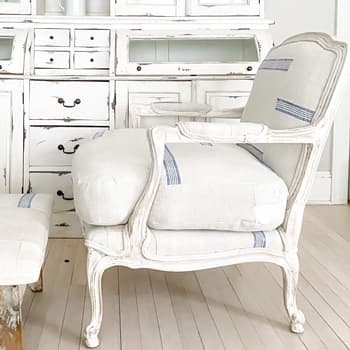
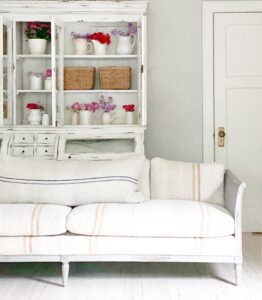
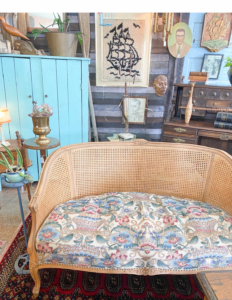
Last summer I stopped by one of my favorite local antique shops, Goodland Antiques in Bayview.  As I entered from across the room, I spotted THIS beauty.  I couldn’t rip the price tag off fast enough in order to stake my claim.  I have done many settee makeovers in my day, but the shape of this, the tone of the wood and the perfect caning made me realize this was a special piece.

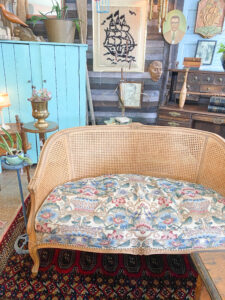
I brought it home with a happy pickers glow on my face. I was going to try really hard to find a spot for it.  The thing about my home is it is on the smaller side,  there really is not any space to add pieces that aren’t actually utilitarian.  I have come to realize that even if pieces are extra special, if I try to squeeze them into my house just to own them, I find the clutter isn’t worth it. It doesn’t bring me joy.  Settees can most definitely be useful, but they can also just be a fancy space filler if you have space.

When I got home I realized that it might be a good option to use at my dining room table.  I did need two more seats at the table.  It unfortunately was a bit too short.  So I had the idea of adding casters.

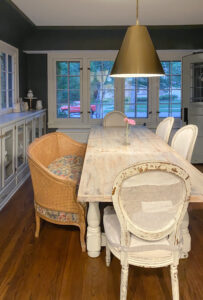
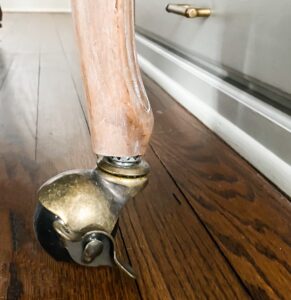
This was a bit of hope and prayer situation, but I was ready for the challenge since I was desperate to make it work in my home.  The legs are solid wood, but they are on the thinner side, and time would only tell if they were strong enough to manage casters.  I ordered these casters off of amazon and carefully drilled holes in the bottom of the feet to to insert them.  If you try this, take your time drilling, with solid wood I found it easy to get the angle wrong.  I did get the angle wrong on one  leg, but I was able to correct it by adding wood glue and small wood dowel, then starting over again after the glue dried.   They seemed to hold fine.  But these wheels only rolled front to back, it was not user friendly for as much as this thing was going to get rolled.  Then I changed them out for this set. The set I purchased had brakes, but this manufacture seems to not be offering those right now.  We actually never use the brakes, so I don’t believe it makes much difference. They totally work!!! We are in nearly 9 months of using this at our only eating table with a family of 6.  I am so happy.  My kids love sitting in it and eating.


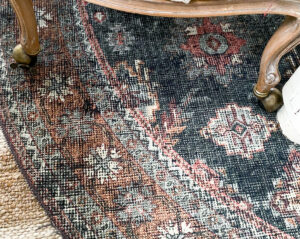
We have since added layered rugs to our dining room and the casters still work great

The height is ideal for a spot at the table.  In a perfect world the settee would slide right under my table.  It doesn’t.  But my world is surely not perfect, and it doesn’t bother me.

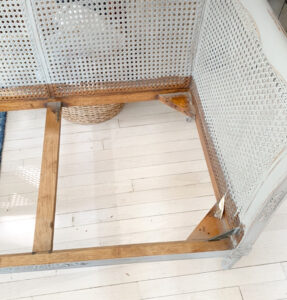
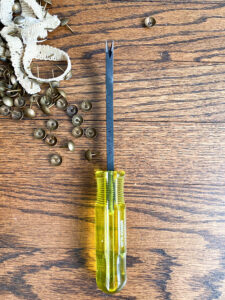
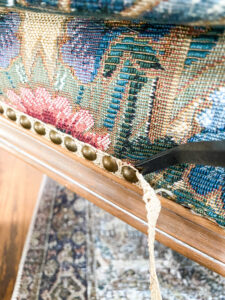
I had plans to give this a fabric overhaul.  The first step in doing that is removing the tacks and trim on the bottom.  I have a confession…I have been doing upholstery for at least 7 years and I have always removed tacks and staples with a flat head screwdriver and pliers.  It works, you have to be careful not to damage wood though.  Anyway, I thought I would try this little tool that I found for around $25 on amazon.  HOLY MOLY!! This was so much easier!! I know that starting out DIY projects its a pain to invest in all the tools not knowing if you would ever need them for another project.  But this was worth it for me, even if I just used it for this project, it likely saved me a couple hours of work.  And those couple of hours of removing tacks from furniture is not the most pleasant couple of hours.  That is definitely not the fun part of reupholstering a piece.

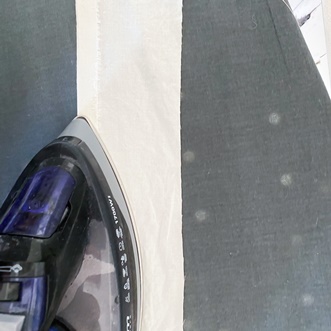
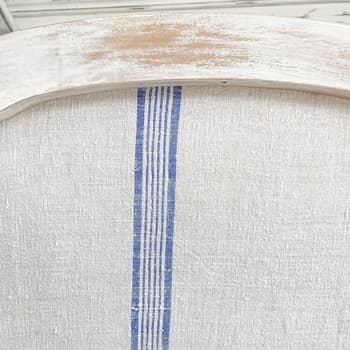
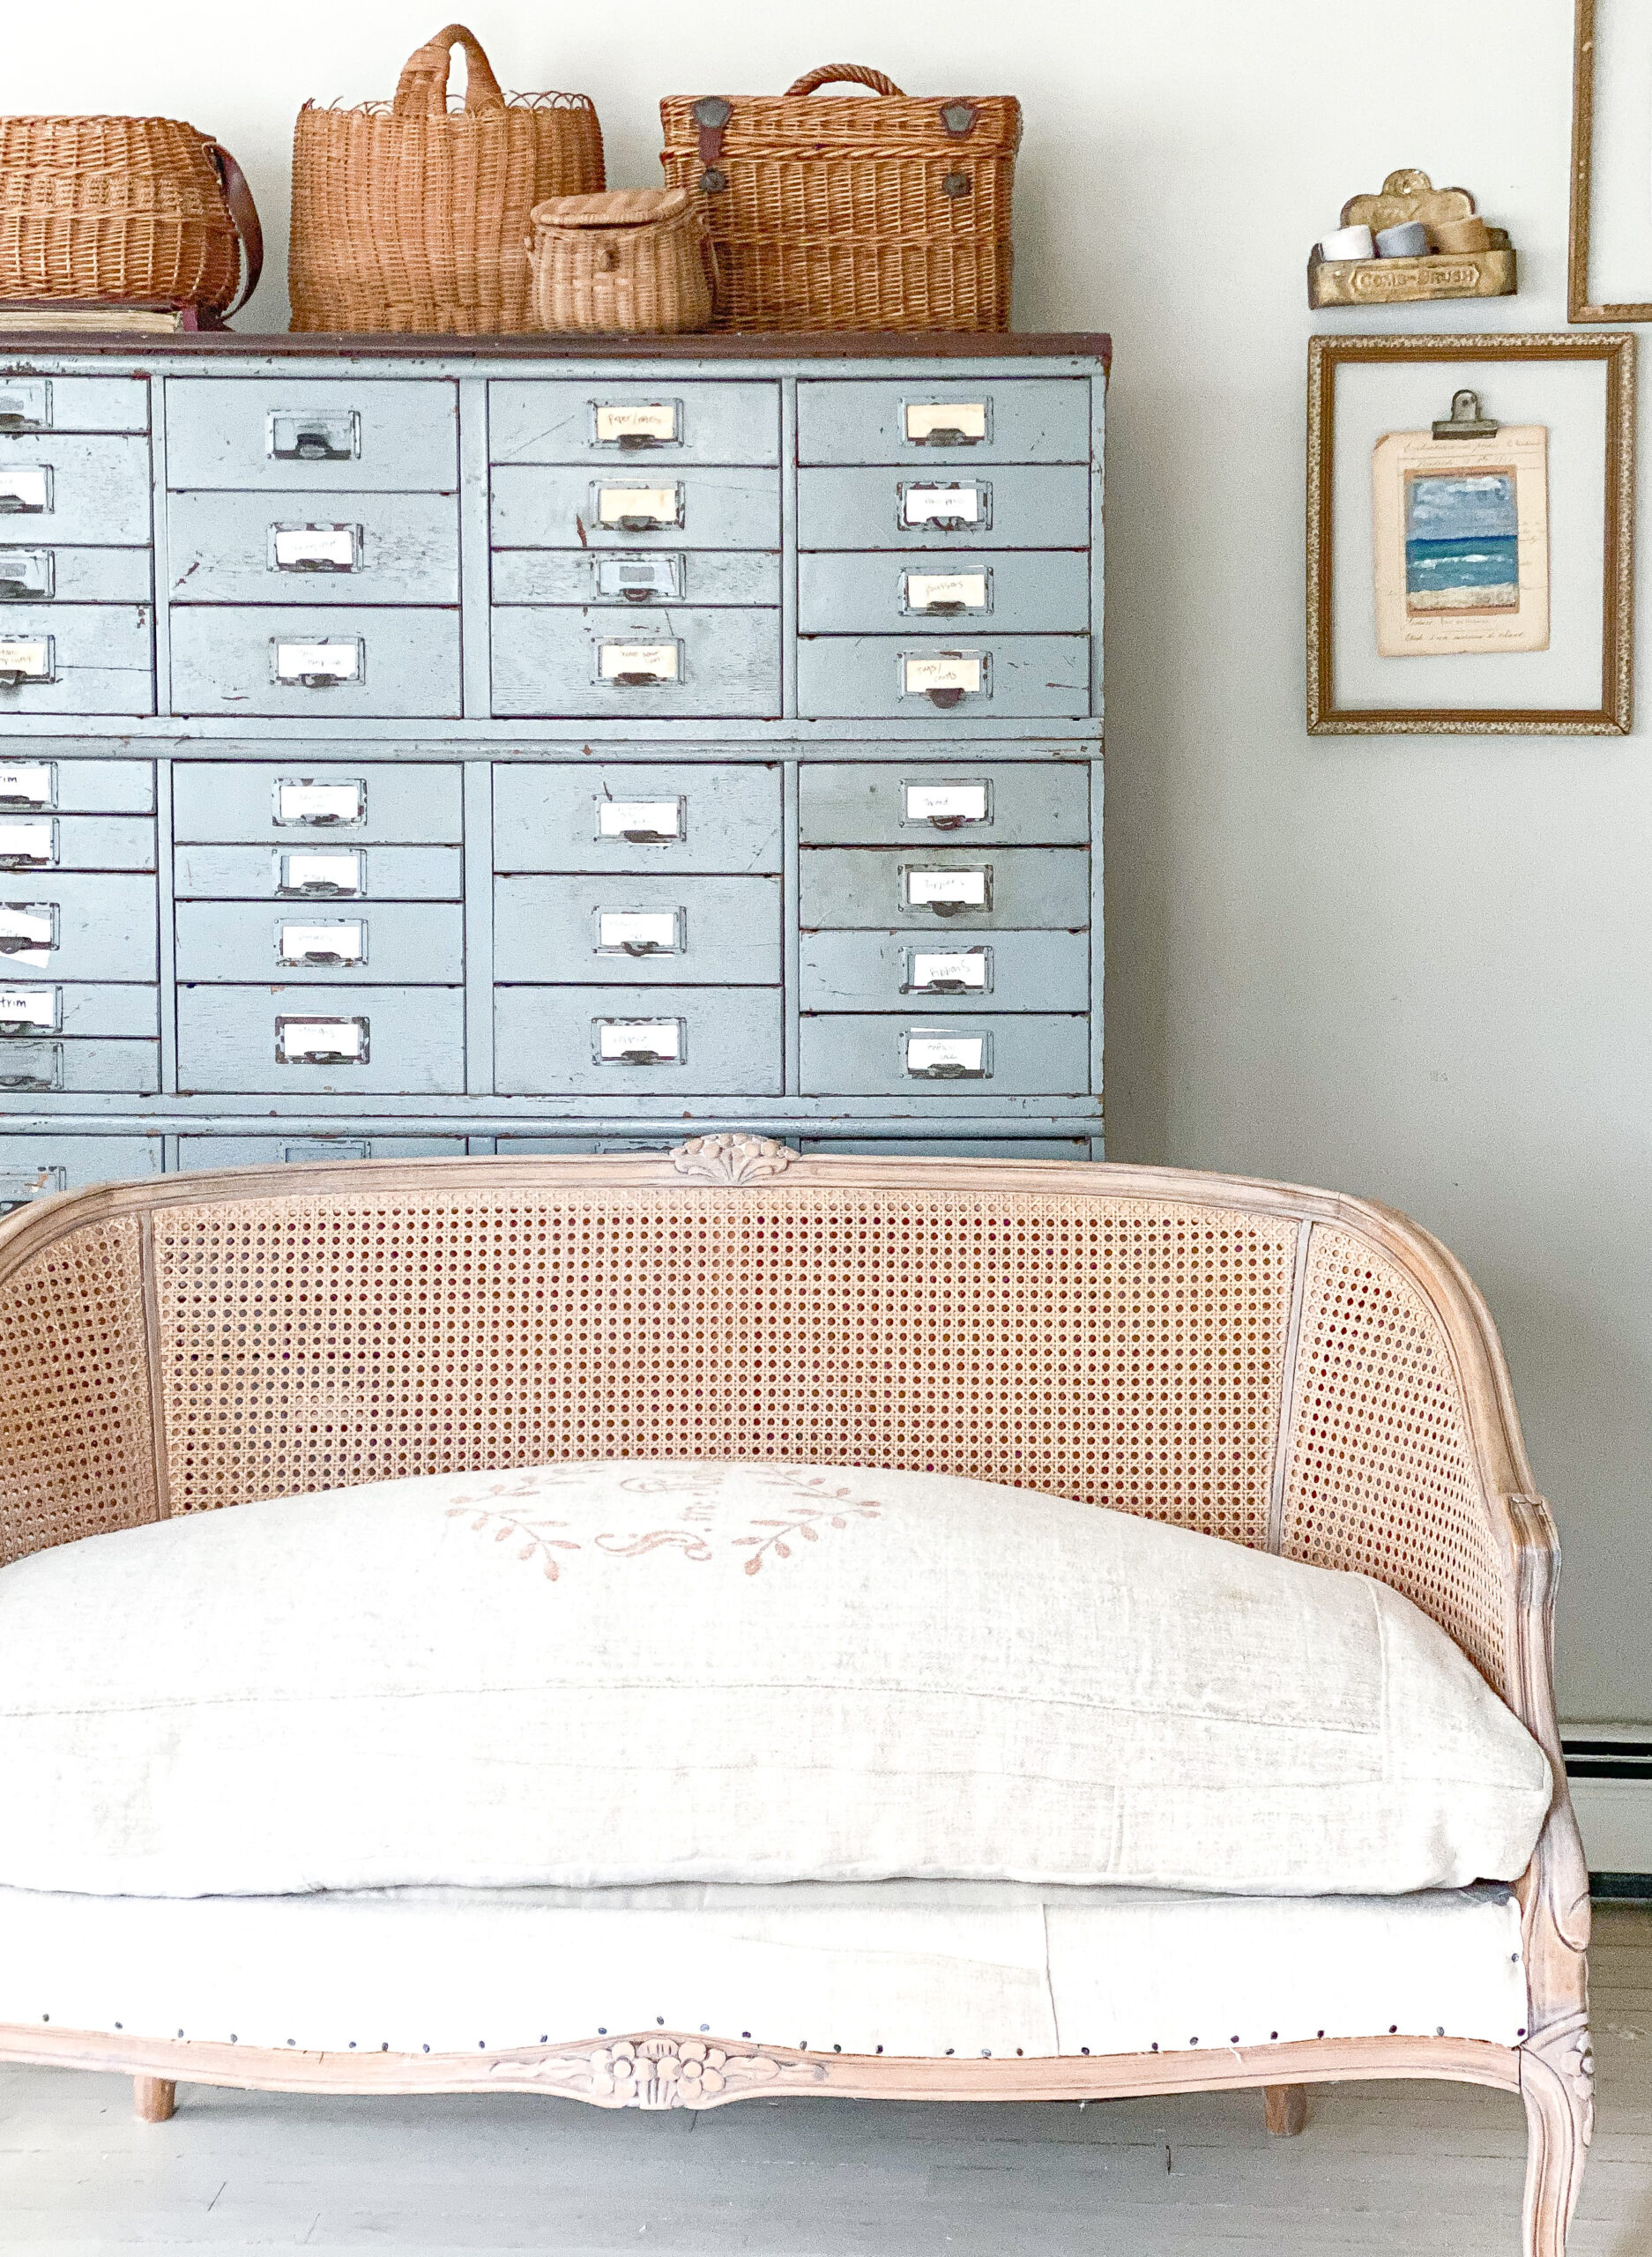
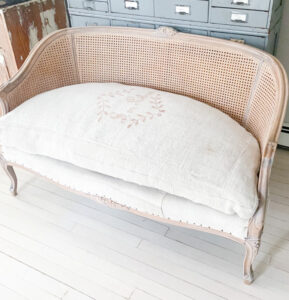
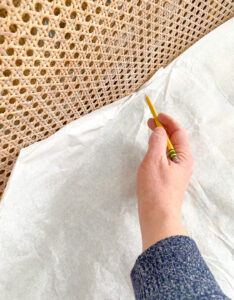
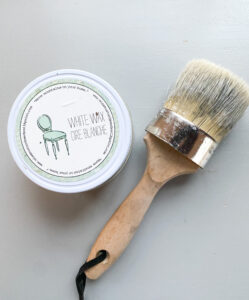
The other change I made, was that even though I loved the tone of the natural wood I wanted to soften it up a bit.  This wood did not have a high gloss finish on it so I knew it would take to a layer of white wax really well.  I used Miss Mustard Seed White wax to cover all the wood.  I used a wax brush to make sure that all the caning got a somewhat even coverage.  A trick that I have learned is that if you apply the wax, let it dry, and you happen to find areas where there are clumps you can apply some clear wax over those areas to work out the white wax to more even coverage.  The change was very subtle, but it meant a lot to me.

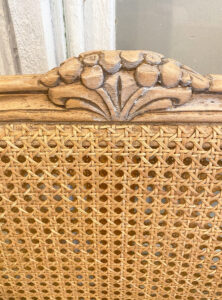
If you look closely you can see on the left its bare and the right has the white wax applied

This is the complete white wax look

During the next part of this project (which actually turned into PROJECTS).  I will go over the process of making the cushion.  It got really messing, but 1000 % worth it.


French linen Shopping

One of my favorite parts to my business is shopping/hunting/scouring the world for antique French linens.  Here is a little back story on how it all began…In 2015 I tackled my first upholstery project, it was chair that I purchased off of craiglist for $5.  Being inspired by pictures of chairs with grain sack material, this is what I wanted to attempt.  And that was the beginning.  I had very little kids at the time and did very little shopping, most especially at antique shops.  I intially thought that I could just run to my local antique mall and grab some grain sacks. Nope.  It is not out of the question that your local antique mall carries a couple, but I quickly found out mine did not, and finding the right vintage fabric was a process.  A process I really enjoy, but there is some work involved.  I was lucky enough to find a lovely grain sack from a seller on ebay, and the outcome was good.  I wanted another project. So next I found a vintage French style sofa on craiglist. It had beautiful lines.  I had committed to buying it, when the seller got a higher offer and threw me to curb.  I was sad, I had grown attached already.  But it finally ended up being mine when the other buyer never showed to pick it up.  It had a lot of potential, but needed a complete overhaul.  My vision was to upholster it using antique hemp linen sheets.  So now I had to get my hands on some…That brought me to here:

P A R I S

Around this time my husband had a business trip in France, he asked me to meet him in Paris for a weekend.  Eveything aligned, that mostly meaning my sister was able to watch my kids, with childcare in place all the other details are easy.  It was a pretty special weekend, I think back on it with fondness.  We wandered, ate crepes, stayed in a nice hotel, and even the book I read on the plane made me happy.  But what was really quite a big deal for me was I needed some antique European hemp sheets for my sofa, and Paris was a promising a place as any to find those.  I did as much research as I could online figuring out where precisely I needed to go to shop for the sheets.  I flew in one morning and my husband couldn’t meet me until the evening. My research steered me to the Marais area, so I set out on my own in this direction with a mission.

 There was a courtyard like area tucked in to a block that had several quaint antique shops, I didn’t find what I was looking for, but I really enjoyed myself. I wish that I had taken more pictures.  One of the shops I visited was this one, its a treat to just look at their website and dream about picking through the lovely collection of textiles and ribbons:

-photo credit Au Petit Bonheur la Chance-

-photo credit Au Petit Bonheur la Chance-

I was not disappointed that I didn’t find my linens on the first day, because I was feeling really hopeful and excited about my luck at a Paris flea market.  There are several flea markets in Paris, there is Les Puces de Saint-Ouen, which according to the internet is the most famous flea market in the world. But I found information warning me that the prices were very high, and it wouldn’t necessarily be the best for linens.  From what I could gather from my research was that Marche aux Puces de la Porte de Vanves was a bit more causual with better prices and plenty of linens.  So Saturday morning I set out early on the metro by myself to buy linens.  Antique shopping is not my husbands thing, and I really prefer to not have to drag an unentertained person through stall after stall. In addition I kind of like shopping alone, so it worked out.  We bonded over French pastries later.  

See THAT is an example of an assortment that served us well.  Back to shopping, although, a proper shopping trip should always include snacks and nourishment.  In my experience sugar is best to keep up the longetivity of a shopping trip, its science :).  French pastries do their job well to keep a sucessful shopping trip going. 

Okay, now back to shopping, I arrived early due to an internet recommendation.  A bit too early in fact. Some stalls weren’t welcoming shoppers yet, and even if they were I am not convinced it was necessary.  The atmosphere was not of a hustle to score the best pieces.  It was more like a social event.  Everyone seemed to be leisurely enjoying themselves.  It was lovely.

I speak very limited French. I took French in high school, which equals me being able to introduce myself and order a crepe.  But I did read up on how to ask for a price so I was prepared.  My pronunciation was often not understandable and it was one of those experiences out of my comfort zone, but I tried.  I always had warm feedback because I made an attempt.  The vendors would either start speaking English to me or if they didn’t speak English they would write down the price for me.  Even though I could sort of ask what the price was, it didn’t mean I could always (almost never) understand the response.  But it worked out. The mutual goal of a sale and the fact that I tried to speak French in France we worked through any communication barriers.  

 I loved the flea market.  There were some curated stalls, like this whismical one filled with ribbons, textiles, and sweet vintage childrens toys.  Looking at these pictures makes me wish I had bought so much more.

There were also tables set up that were disorganized and random.  But there were always good stuff to be found.  The dishes!!! There were so many pretty ones!!  And the prices were very good in my opinion.  But there was only so much room in my suitcase.

It took the morning but I eventually found enough linen for my sofa.  I was thrilled.  It was a lot of linen, it didn’t make the metro ride back to the hotel easy, but I was beaming inside holding on tightly to my treasure.  Even the plane ride home I was very careful not to check my pile of linen, I carried it on and made sure it was never too far away.  

The quality of the linen made it possible to recover my sofa successfully.  I remember one moment working on an arm, and the fabric stapled beautifully in place without very much effort, it felt wild because I was fairly inexperienced with upholstery and most DIY projects I had done before did not cooperate so easily. Between the magic of a special weekend in a foreign land with my husband and learning that I had a developed a new skill and love and a true love for it, makes this a time that I hold close to my heart.

This is the finished product of my vintage linens from Paris and my craigslist sofa in our old house

These days traveling to France is not an option, and it wasn’t very easy pre covid anyway.  I have found shopping on Etsy gives me a little taste of the Paris Flea market experience.  It has turned into one of my favorite pastimes.  The hunt is for the perfect item is really, REALLY fun. Then there is nothing like receiving a package from France to make your day.  Sometimes I am just buying a fabric remnant, or some ribbon so shipping remains reasonable.  The items that arrive always make my project very special.  Here are some of the Etsy shops that I have had the most success with:

-First off is my friend, Cybele’s shop Au Pres de Mont Toi.  I purchased many French Postal Bags from her initially, but since I have bought some other beautiful treasures from her shop.  A bonus is that I have gotten to know her through communicating over the internet through google translate.  She is sweet, funny, and a mother like me. Last year I received a thoughtful note from her wondering how we were doing with the pandemic in my part of the world.  I hope that to meet her one day in person. From her shop I purchased the postal bags that made these projects possible.

Newfoundland Postal Bag Pillows

Another shop that I love is Sissidavril, this little shop has beautiful fabrics, ribbons, and French laundry tags.  Using the tiny  French laundry tags that I bought from this shop added a lot of charm to my little stockings I made at Christmas time.

Sissidavril also offered this extra special fabric remnant.  I love all the characters in it. I was able to make a couple of pillows and some Valentine’s decor with it.  It was a treat to work with it.

I just discovered MarieDecor1888, when I was searching for vintage ticking stripe fabric.  Browsing the shop is really fun, and I reached out to the owner in hopes that she possibly had some fabric similar to what she had listed.  She was very easy to work with and had just what I was looking to buy. I hope to use these pretty pieces to make some stockings when the holidays roll around.

 I have a package making its way over the Atlantic from FrenchVintageRetro right now.  I have yet to actually receive a package directly from them, but a friend who bought the fabric from this shop had me sew a pillow for her. She actually ended up with some extra French linen and I gladly took it off her hands. This particular fabric is pristine vintage French linen, it is c’est magnifique!! Also a virtual wander through this store is highly recommended, their treasures are not isolated to pretty linen, and their photography and presentation is beautiful.

Happy shopping or browsing or sewing or just dreaming about travel.  If you would like to see if I have any completed projects for sale using my French finds check my shop.  Also if you are looking for a project idea check out my stocking tutorial or bed upholstery tutorial.

Quickish Gallery Wall

A couple of weeks ago I was tidying my house because I had a couple of close friends coming to lunch.  In the off chance that they wanted a complete house tour, my goal was to get every room presentable.  My house has really missed having company and getting a good full, top to bottom clean.  But inevitably my expectations for a magazine appearing house outweigh my ability and there is total panic in the last minutes leading up to their arrival. Anyway…this is how my gallery wall came to be.  Not in the last moments of panic but during the clean up process.

In a corner of what we call our sunroom is my sewing/studio space.  This sunroom was an addition to our 1920s bungalow probably in the 1980s.  It is very large room and there is enough space for a family room and studio space.  It has a wall of windows, so its our sunroom.  ANYWAY…above my sewing machine I had just hung a mirror and tacked up a grain sack to experiment.  It was not looking good.  I loved both pieces but not displayed like that. Surely I wanted it cuter for company.  I started to wonder about adding more frames, some art that I loved, and framing the grain sack.  Good vintage gold frames are an item when I am out thrifting that is hard for me to pass up.  I love them.  And this proves its true you never know when you might use them. I was able to pick out enough frames from my stash to start a gallery wall.  If you don’t have much luck at your local thrift store, Etsy has a selection. Here are a couple examples of a to some nice vintage frames:  link, link,  and linkity link.  If those have sold or don’t work, my search for vintage gold frames produced a good selection on the site.

This special grain sack was purchased from the Etsy shop, Objekts1.  The owner, Atta offers the most unique grain sacks.  This one was very special to me because my maiden name is Schaefer, meaning shepard in German.  I love the hand drawn sheep and my genelogy represented.

When I had the frames in hand I started to wonder about how I could use them to frame the paintings.  Then I remembered the vintage clips that I had bought for something else but didn’t use, I bought these from my friend’s shop, Anthology Home. But again you could buy them…guess where?? ETSY.  Here are some links: here and here.  I really, really love the look.  And I love the practically of the clips.  I was thrilled when the clips worked.  I could finish the project quickly and I have the potential to change the art out any time that I would like. 

I find that I often don’t complete many DIY projects that include stopping and starting.  Framing falls into that catergory.  Finding the right size frame, plus the right size matting often ends up being a lot of steps, totally reasonably doable, but for my brain I find if I can just complete something in one feld swoop it happens.  When several steps are involved sometimes frames just sit waiting empty next to the wall they are intended to hang on. 

This sweet painting was done by the ultra talented Shaunna Parker.  Even though it is very simple with the use of colors, the way she used texture in this landscape adds such an artisitic element that it fosters imagination.

I was happy to find a display for this handwritten antique French list.  I am not sure where in my shopping travels I got this, but I found this shop had many similar items. 

I 100% support planning out a gallery wall carefully with cut outs of wrapping paper in the shape of frames taped to the wall as a guide.  This sets it up for success.  But I didn’t do that. I winged it.  I will likely have to fill some nail holes, and I am okay with that.  Also for the exception of the mirror, because I removed the glass the frames were very light, it just took a nail or two to hold them up on the wall.  The clips were also very light just requiring one nail.  I didn’t need to find any special hanging equipment.

To have a couple pieces of original paintings done by Marian Parson of Miss Mustard Seed is very special to me.  She has long been a source of inspiration to me through her projects, design, and business.  

I am so pleased with the end result.  I really love my sewing corner, there is something about it that makes me feel good, and fosters creativity.  I am very much a visual person, so it means a lot to me to have a visually appealing wall that makes this space even better to create in.  

In addition to this gallery wall success with thrifted frames, I have had results that I have been happy with in using them to have pieces professionally framed in them.  I know I am contradicting my above statement on avoiding multiple steps in decorating, in the case of the gallery wall I needed something quick.  I have purchased large prints that I thought the best option was to have them professionally framed.  It is an investment, but worth it in this scenario.  I provided an vintage frame in both cases, and that saved a bundle.  The local compant that I used said that if they had created a frame similiar to these vintage ones it would have cost nearly $1000, I could be over quoting that, but it was shockingly A LOT.  I was very much patting myself on my back for spending $30 to purchase these frames at the thrift. I believe the first one was a mirror and the second an empty frame.

This is a giclee print of the artisit Brian Kershisnik‘s Nativity.  I really appreciate the way he depicted the feelings, rejoicing, and love that happened on that monumental night.  I am pleased to have it displayed in my home.

This is another print done by Brian Kershisnik.  I was drawn to it because one of my most vivid memories as a kid was star gazing with my dad.  Also visually it is stunning.

Finally there is this frame.  I love it very much.  It purchased it an antique store for around $60.   It has had many uses.  I have used it as display in my booths when I did decor shows, and also I used it to frame a gallery wall in my old house.  My favorite use for it now is having this backdrop pinned in place and hanging in our house.  

This backdrop is a reproduction that I purchased from the artist Jennifer Lanne.  She offers a variety of these and it is an affordable option to a sizeable piece of art.  And they can be hung without a frame and are just as beautiful.

Never understimate the value of a good frame or not.  There are lots of ways to hang art. I support the idea of no rules when decorating. Don’t be afraid to experiment!

*Disclosure: This post contains affiliate links at no additional cost to you.*

Reupholstering thrift store chair

I thought I would offer a bit of a behind the scenes look at reupholstering this thrift store chair.  I had not done a big project like this in some time, it reminded me that I really enjoy reupholstering pieces and that it takes quite a bit of time.

Here is a picture of how I found the chair although it did come with a seat cushion. I am not entirely sure why I didn’t include it in the photograph, I took it several months ago and that is too long ago for my memory to recall such details :). Although I do remember shopping at the thrift store when this was brought out onto the floor by one of the workers and staking my claim on it as quick as possible.  There is nothing like thrift shopping to bring out my most assertive self. I was drawn to its shape and upon inspection I found it to be very sturdy. I am often tempted in second hand projects that aren’t particularly sturdy, but they can be more trouble than they are worth.  There are lots and lots of potential projects out there, you can find a sturdy one, it will be worth the wait.

This chair sat in my basement for a while, like nearly 2 years.  So in my head it went through a variety of plans.  I actually sanded down the finish a couple months ago and sealed with wax. It was a nice finish, but when I finally decided upon using this vintage hemp mattress cover that I purchased from the shop, Parna, I thought it needed to be painted white.  I painted the wood two coats of  Miss Mustard Seed Milk Paint Linen after a light sanding, I sealed it with a layer of tough coat.

To avoid reinventing the DIY wheel I am going to direct you to Miss Mustard Seed’s blog that inspired and taught me how to reupholster a French Style chair, . She offers a great detailed tutorial if this is a project you would like to tackle.  AND YOU CAN TACKLE IT!!! 

For this project I was so glad that the fabric that I stripped from the chair remained intact so I could use it as a pattern.  It is generally good practice to always do this,  but in this case it especillay helped me line up the stripes and stitching just so. On a side note something very special about this kind of vintage fabric is the hand stitching.  In my work I like to celebrate time and person who carefully did these quality stitches that have lasted decades.  It adds so much meaning to these beautiful textiles, I often wonder who this seamstress they might be? And in what setting did work? I wanted these stitches found running down the front of the chair and lining it up worked out great with a pattern.

Next I like to tack up my pieces of fabric to get a visual on placement before I reach the staple gun level of commitment.

Here I am happily working on the back of the chair:

*note all the visitors I have wondering about dinner.  I had hoped they might forget, but they never do.*

After the back of the chair was done I took on the cushion cover.  Cushion covers have given me the most headaches in reupholstery.  It has taken me a lot of practice to get somewhat efficient and confident in sewing them.  I have even hired a sewing instructor TWICE to work along side me to give me pointers.  However I totally think I beginner can sew one. Absolutely. There just could possibly be a bit more moments of frustration, at least that was my experience. But if you are mentally prepared for frustration, hiccups often don’t turn into frustration.  So by all means beginners go for it!  My first cushions turned out fine in the end, but it took A LOT of patience. I am not trying to be a downer or discourage anyone, quite the opposite.  I just don’t want to romanticize the process so that if someone tries this out and it doesn’t turn out the first time they know they are not alone. This is a really good tutorial done by Peg Baker and she is very precise, maybe I would have had more luck when starting out if I had followed a her tutorial. In her tutorial she uses piping, for the deisgn of this cushion I liked it without piping. Also she teaches how to put a zipper closure, I like buttons and use those instead.  The buttons take a bit more time, and more fabric is needed for the overlap but it is worth it for me.  Also I have found an important step in making a cushion with this hemp linen is adding a bit of padding.  I really like a full looking cushion and the woven fabric has a lot of stretch to it, I always end up adding a layer or two of dacron.  This cushion was already very full, but it needed a little more padding.  I cut a piece that was just about half the size of the top of the cushion and then I cut a piece to the exact size of the entire top of the cushion.   I put both pieces in place on top of the cushion with the smallest one under the larger one.  I like the bit of cozy fullness it added to the seat. 

When I put the cushion back on is when I had my ahhhhhh moment, the chair was starting to come together.  It takes a while to get to this point with upholstery, but it is so sweet and worth the wait to feel like your vision is coming to life.  Also you may notice on the bottom left there is a stripe that I patched in.  I felt like it needed one more stripe and that is the beauty of this pieced togther look of the fabric is that it gives freedom to add patches.

Next up was the bottom of the seat.  I used modern canvas for the part of the seat that would be covered by the cushion, this is fairly typical, but also I needed to because I was running out of the vintage hemp fabric.  To be honest here, this part took me the better part of a day.  It is tricky because you have to make cuts to fit around the legs and arms of the chair so that the fabric is smoothed down in place, but you can’t cut too much then you are left with too little fabric. In someplaces the trim can help cover some small spaces in the fabric, eventhough it is just a half an inch it can make all the difference.  I am glad that I took my time with this seat, in the end it turned out well.

The last parts to the chair left were the fabric for the arms and the trim.  Picking the right trim can stress me out. It can a make or break part of the entire piece.  I feel like sometimes its hard to find a trim that looks like it belongs with the fabric and doesn’t overpower or detract from it.  For this chair I wanted it to blend, and in order to get the color just right I need to make my own with the same fabric.  I made my own double welting.  And here is yet another tutorial that I did not write, thank you Miss Mustard Seed. Then I secured the trim with a glue gun.  I used a small piece of fabric to glue into place where the ends met, I tried to place these parts in inconspicious areas. On the arms where it was visiable I added a button, because why not?

And she DONE and avaliable for purchase with local Milwaukee pick up. All the details are on the shop page

For quick reference here is a list of the tools I use:

Surebonder Staple Gun

Rigid 6 Gallon Air Compressor

T50 Staples I like to have a couple different sizes handy, I often start with the smaller ones so I can remove them if needed and adjust things. Then when I am ready to commit, I bring out the larger ones.  Be sure you get the right kind of staple for your staple gun. 

Upholstery Webbing

Upholstery Webbing Tool

Detail Scissors

Please let me know if you have any questions or success stories, my email is pennyandivydecor@gmail.com.

*Disclosure: This post contains affiliate links at no additional cost to you.*

Sewing a Pouf

If sewing isn’t your thing or you don’t have the time but would still like to own a grain sack pouf…this pouf along with a couple others will be for sale.  They will be avaliable at the grand reopening of Trend+Relic in St. Charles, Illinois on May 1, 2021.

Supplies

Pouf insert, for this project I used a 16 inch cube insert.  I generally just find an affordable pouf that advertises that it has a removable cover, so I can remove and use the insert.

-3 pieces of choice washed fabric measuring 17 inches wide by 18 inches long for the sides (measurements depend on your pouf size, add one inch for seam allowance for the width and two inches for the length for fabric to cover the zipper)

-2 pieces of choice washed fabric measuring 17 inches wide by 17 inches long for side and top (measurements depend on your pouf size, add one inch to length and width for seam allowance)

***I typically use one grain sack to sew a pouf this size, I might need a little bit of complimenting fabric to patch it together if I am short on fabric.  Some good online shops that sell grain sack fabric include grainsackObjekts1, and Parna UK.*** Grain sack fabric is great for poufs because it is very durable.

-1 piece of neutral washed canvas fabric for the bottom measuring 17 wide and 17 inches long(measurements depend on your pouf size, add one inch to length and width for seam allowance).  You will want sturdy fabric for the bottom.  

 –Upholstery zipper measuring at least 50 inches (again this depends on the size of your pouf, but have a long enough zipper to go the full width of 3 side pieces sewn together).

-Sewing machine

-thread

-scissors, rotary cutter,  cutting mat, and metal ruler

-Optional Dacron if you like a full look, and upholstery thread to secure

-Optional buttons

Steps

1) Cut the fabric to size:

           -3 pieces of 17 inches wide by 18 inches long for the sides

           -2 pieces of 17 inches wide by 17 inches long a side and top

          -1 piece of plain canvas for the bottom measuring 17 inches by 17 inches

Amateur mock up of the 6 sides that need to be cut

 ~I have found grain sacks offer enough (sometimes ALMOST enough) fabric for the sides and top of a pouf this size.  I have always had to piece together two smaller ends to make one complete side, I like the look of adding buttons.  Pssst these buttons don’t work, they are just there for appearance, like a fake drawer. Sometimes I am just short some fabric here and I add complementary piece and it looks just fine.

2) Finish the edges of the fabric pieces with a zigzag stich on a sewing machine or if you have a serger finish the edges.  This makes it possible to wash the pouf cover without the ends fraying. ***Make sure all your fabric is washed and dried before starting the project, otherwise it might shrink if washed later*** If you don’t plan on ever machine washing the pouf cover you could skip this step.

3) Place two of the fabric pieces that measure 17 by 18 right sides together, sew with a 1/2 inch seam allowance the length of 18 inches on one side. At the top I start sewing the stitch about a 1/2 inch from the top, this makes it easier when its time to add the top.  I like stitch each line twice just to add stability for wear and tear. Then repeat this with the third piece of the same measurement.  You will have a strip of three pieces of fabric sewn together like this:

4) Take the long strip of the three pieces of fabric sewn together and at the bottom iron a inch fold in prepartion for the zipper.

5) Pin the zipper in place, I align the bottom of the zipper with the bottom of the folded fabric, and the right side of the zipper is facing the inside of the fold. The zipper should go the length of the three pieces sewn together.  Then I stitch it in place using a zipper foot.  I sew the top of the zipper to this piece of fabric.  I also am sure to add a small piece of fabric to the ends of the zipper to make sure that handle doesn’t go sliding off.  When I first attempted making a pouf, I tried to squeeze an insert into one length of a side where I added functioning buttons.  That was impossible.  You really need to have 3 sides of the cube open to fit the pouf inside.

6) Once the zipper is in place. This fabric should be about 17 inches tall and line up pretty close to the fourth side that is 17 inches by 17 inches.  Then sew this fourth piece into place with right sides facing each other on the end of the other three sides, then connect the final two ends to start to shape your cube.  

7) Then I add the bottom. I line up the corners of the bottom fabric with the corners of side fabric.   I pin the bottom with right side with the right side of the zipper. I don’t add the 1 inch fold this time, I just line up the edges of the bottom fabric and zipper.  I carefully sew the other side of the zipper to bottom piece. Then I continue on to sew it together to the side without the zipper, using right sides together, with 1/2 inch seam allowance.  I open the zipper a couple of inches now because it gets kind of tricky to do it after the top is sewn in place.

8) I line up the corners of the top piece with the top corners of the side, with right sides together I pin in place.  Then I finish off with 1/2 inch seam allowance. 

9) Open up the zipper as much as you can and turn the pouf cover right side out. 

10) You can stuff your insert in place, zip it up, and enjoy your pouf.

 10)If you prefer a fuller look you can add dacron to the insert. 

DIY Tiny Stocking Tutorial

DIY Tiny Stocking Tutorial

I kind of love these tiny stockings. They have been a bright little spot during this weird time.  They are a relatively quick project, which means the mental reward for putting pieces together to create something cute comes faster. That is definitely welcome right now.  I have really enjoyed mixing and matching fabrics, sizes, and embellishments to make tiny stocking sets. I am grateful that they have been a very popular item on my website, often selling out.  If you prefer to purchase rather than create, please click here to check my shop. If there aren’t any available, contact me for custom set at pennyandivydecor@gmail.com

The included pattern is designed to offer 3 options of shapes and sizes of stockings that are approximately 2 ½ inches wide and 5-8 inches long, not including the hanging loop. Click here to download the pattern.

Supply list:

  • Fabric. Your choice, approximately 10-inch square needed for one tiny stocking. If you are using thick fabric, I recommend just using that for the front and using a thin fabric for the back. It is kind of tricky to turn it right side out if both sides are thick fabric.
  • Muslin  6.5 by 4 inches needed per stocking. Click here to go to my muslin choice.
  • Your choice of décor: trim, ribbon, buttons, complimentary fabric, tags etc.
  • 6-8 inches trim/ribbon for the loop
  • thread 
  • sewing machine
  • scissors
  • pins
  • iron 
  • ruler
  • click here for pattern *if you have trouble downloading this PDF email me at pennyandivydecor@gmail.com and I will email it to you*
  • A rotary cutter. I think its handy but not essential.


Step by Step

Pick a pattern and cut out two sides. My favorite is always grain sack fabric and this is really thick, so I back it with modern day, thin linen.  These are a couple online shops I recommend for grain sack fabric: Linen by SabineTextile Trunk, and Grain Sack.  As I mentioned above, if you have two sides of thick fabric it is really hard to turn the stocking right side out.  It also helps to make my precious vintage grain sack fabric go farther.  In addition to the grain sack fabric I also like to add some unique fabrics, I have found some very special ones on Etsy.  This post highlights my favorite shops that I purchase these fabric from on Etsy.  I also appreciate this project because not much fabrics is needed and its a great opportunity to use unique fabric remnants.

Take the cut-out piece of the front of the stocking and add whatever detail you would like.  This is one of the best parts.  The possibilities are endless and you don’t need a lot of anything to make an impact on tiny stocking.  I love buttons.   Any craft store should have a great assortment of trim, I usually pick mine up at Hobby Lobby. This year I discovered this shop on Etsy that sells French laundry tags. They are the sweetest. 

Once your front is decorated to your liking, take it and pin it together with the back piece wrong sides out.

Sew it them together leaving the top open. This pattern was designed for a ½ inch seam allowance. It helps to trim some slits in the spots with curves.

Flip the stocking right side out. Sometimes I need tweezers for the tight spots.  Make sure your tweezer’s ends are blunt, so they don’t rip your fabric.

This is an optional step if you want a cuff on your stocking:   

  • Cut an 8-inch strip of fabric at desired length.  I cut mine 2 inches high along the finished edge of fabric so I did not have to hem it.  But keep in mind you may need to hem your cuff fabric or not, I like frayed edge too.  The design choice is up you.  
  • Hem the ends of the fabric strip, I did mine with a 2/8 seam allowance folded over twice.
  • Pin the cuff off the stocking at the top with the end beginning in the back, wrapping around the front, overlapping the other end and ending in the back.

Do a stitch around the top of the stocking to hold the cuff in place.

This is another optional step if you want number tags on your stockings. I get them all stamped up and ready now. 

I used some vintage tags I purchased off of Etsy, but there are many options to get a similar look.  Here are couple:

I like to use a stamp pad that is mixed media, it is handy if I want to stamp on fabric:


This is the number stamp set that I use and love:

Let the tags dry while you do the next couple steps.

Cut 6 ½ by 4 inch strips of muslin, one for each stocking.  Fold about ¾ inches of the fabric down on the 6 ½ side, iron, then sew in place.

Take this muslin strip and fold in half, wrong side out.   Sew together the ends leaving the hemmed bottom and unfinished top open.   Set this aside for the next couple of steps.

Cut 6-8 inch pieces of ribbon, trim or string for your stocking loops.  Add the number tag to the loop now if you want them.

Then, with the loop folded in half, stitch the ends at the top corner of your stocking. The loop should be looping downward, opposite of how it will end up. You can also just pin it in place, but sometimes my pins shift and I have to do it all over. I think it is easier to quickly stitch in place.

Take your muslin tube (wrong side out, and hemmed side down) and pull it down over the top of your stocking (right side out) until the unfinished tops meet.

Pin in place. Then stitch in place.

Then take the muslin, flip it right side out, tuck it in the stocking.

Voila!  You have a tiny stocking!

I’d love to see pictures of your finish products! You can share them with by tagging me in your Instagram stories @pennyandivy.

Please subscribe to Penny & Ivy's email list to receive updates on future sales and a bonus 10% off welcome coupon code